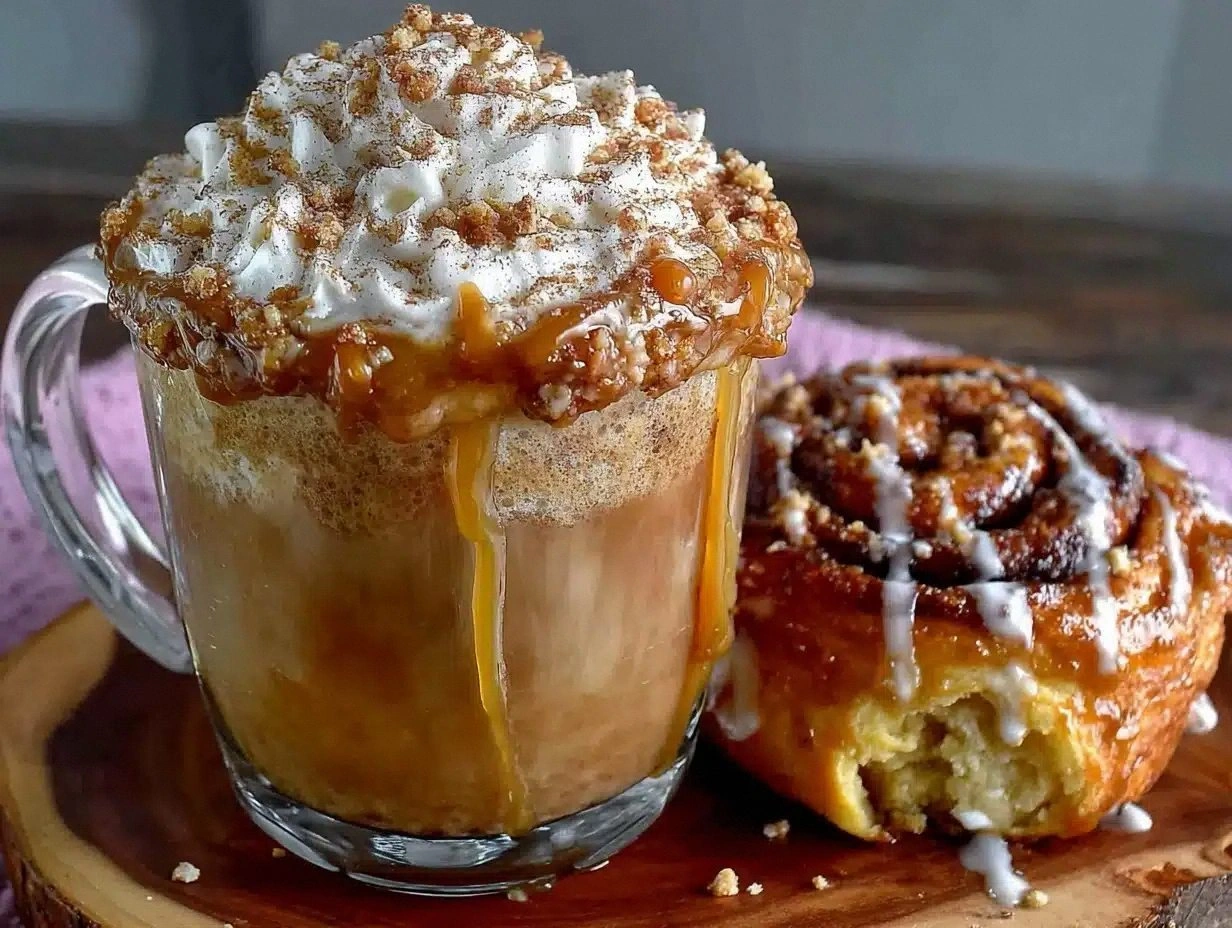
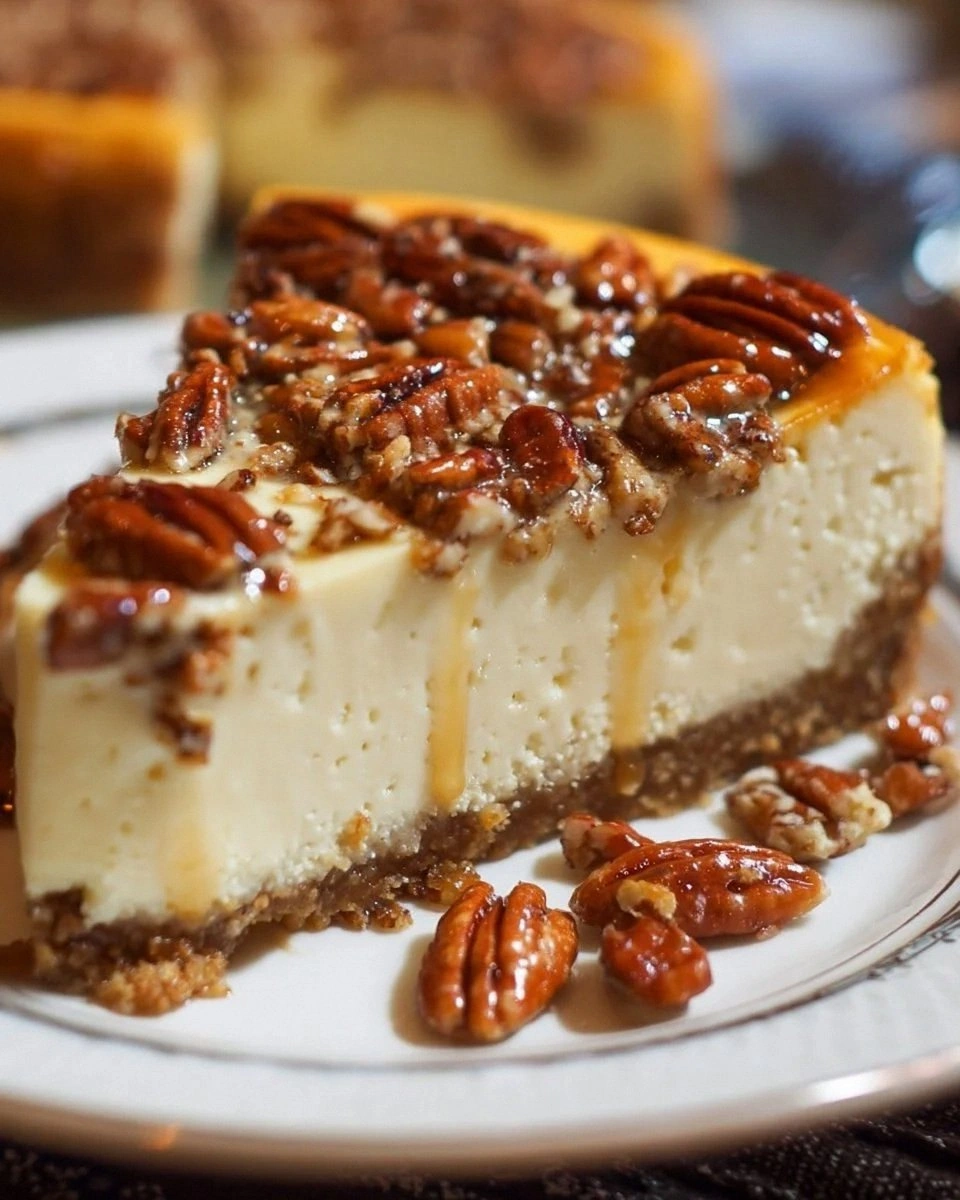
I was standing in my kitchen, mid‑Monday, with a half‑eaten box of store‑bought cheesecake that tasted like a sad, soggy sponge. The blandness was a personal affront, and I swore on my favorite spatula that I would create a version so decadent it would make that boxed disaster weep in shame. I grabbed a bag of pecans, a stick of butter, and a tub of cream cheese, and the rest is a story of buttery bliss and nutty fireworks. This isn’t just a dessert; it’s a love‑letter to every sweet tooth that has ever begged for something richer, crunchier, and more unforgettable.
Picture this: the oven humming like a low‑key jazz club, the buttery crust sizzling as it meets the heat, and the sweet aroma of toasted pecans swirling through the air, wrapping the kitchen in a warm, caramel‑kissed hug. You hear the faint crackle of the crust as it sets, feel the buttery dough yielding under your fingertips, and taste the first spoonful of silky, tangy cheesecake that melts like silk on your tongue. The texture? Imagine a cloud that’s been lightly dusted with toasted sugar crystals—soft, buttery, and just a hint of crunch that sings in perfect harmony.
Why does this version stand out? Most recipes either over‑sweeten the crust or under‑season the filling, leaving you with a flat, forgettable bite. I’ve cracked the code by balancing the sweet and salty, the creamy and crunchy, and adding a secret butter‑pecan swirl that most bakers overlook. The result is a cheesecake that feels like a buttery pecan dream wrapped in a velvety cheese blanket—hands down the best version you’ll ever make at home.
And here’s the kicker: I’m about to reveal a technique that takes the topping from “good” to “legendary”—a quick butter‑brown‑sugar glaze that caramelizes in the oven, creating a glossy finish that looks straight out of a bakery window. I dare you to taste this and not go back for seconds. Let me walk you through every single step — by the end, you’ll wonder how you ever made it any other way.
What Makes This Version Stand Out
- Butter‑Infused Crust: The crust gets a double dose of butter, making it crisp on the edges and melt‑in‑your‑mouth soft in the center, unlike the dry, crumbly bases you see elsewhere.
- Toasted Pecans: Toasted pecans add a smoky depth that contrasts beautifully with the sweet cheese, turning each bite into a symphony of flavors.
- Brown Sugar Glaze: A thin layer of melted butter and brown sugar caramelizes during baking, giving the top a glossy, caramel‑kissed finish.
- Perfect Moisture Balance: The ratio of cream cheese to eggs ensures a custardy interior without the dreaded cracks that plague many cheesecakes.
- Simple Yet Elegant: No fancy equipment required—just a springform pan, a whisk, and a sense of adventure.
- Make‑Ahead Magic: This cheesecake holds up wonderfully in the fridge, making it a perfect make‑ahead dessert for gatherings.
Inside the Ingredient List
The Flavor Base
The graham cracker crumbs are the unsung hero of any cheesecake, providing a sweet, slightly spicy backbone. Pairing them with melted butter creates a rich, cohesive crust that binds together without feeling greasy. If you’re out of graham crackers, you can substitute with vanilla wafers or digestive biscuits, but the flavor profile will shift slightly.
The Texture Crew
Cream cheese is the heart of the cheesecake, delivering that luxurious, velvety mouthfeel. Using a full 16‑ounce block that’s been softened to room temperature ensures a smooth batter without lumps. The eggs act as a gentle binder; three large eggs give the filling structure while keeping it tender. Skipping an egg or using too many will either cause cracks or a rubbery texture.
The Unexpected Star
Pecans bring a buttery crunch that contrasts the silky filling. Toast them lightly in a dry pan for 5‑7 minutes until they’re fragrant—this step is crucial for unlocking their nutty essence. If you’re allergic to nuts, toasted pumpkin seeds make a surprisingly good substitute.
The Final Flourish
The brown sugar butter glaze is the secret weapon that transforms a good cheesecake into a show‑stopper. Half a cup of unsalted butter combined with half a cup of brown sugar melts into a caramel that spreads over the top, creating a glossy, caramelized finish. For a deeper flavor, you can add a pinch of sea salt to the glaze.
Everything's prepped? Good. Let's get into the real action...
The Method — Step by Step
Preheat your oven to 325°F (163°C). While the oven warms, line the bottom of a 9‑inch springform pan with parchment paper—this tiny step prevents the crust from sticking and makes removal a breeze. I’ll be honest — I ate half the batch before anyone else got to try it, but you’ll want that perfect release for a clean slice.
Combine the graham cracker crumbs, melted butter, and sugar in a medium bowl. Mix until the crumbs are evenly coated and the mixture looks like wet sand. Power transition: Press this mixture firmly into the bottom of the pan, using the back of a measuring cup to create an even layer.
Kitchen Hack: Chill the crust for 10 minutes before adding the filling; this prevents it from becoming soggy.In a large mixing bowl, beat the softened cream cheese on medium speed until smooth—no lumps, no grainy bits. Add the cup of sugar and vanilla extract, beating until the mixture is light and airy. This step is the moment of truth; the mixture should look glossy and slightly thick.
Add the eggs one at a time, beating on low speed after each addition. Scrape the sides of the bowl to ensure everything is incorporated. Over‑mixing at this stage can introduce too much air, leading to cracks later.
Fold in half of the chopped pecans, reserving the rest for the topping. The nuts should be evenly distributed, creating little pockets of crunch throughout the batter.
Kitchen Hack: If you want extra toasted flavor, toss the pecans in a teaspoon of melted butter before folding them in.Pour the batter over the chilled crust, smoothing the top with a spatula. Sprinkle the remaining pecans evenly across the surface. Watch Out: Avoid shaking the pan; any sudden movement can cause the batter to settle unevenly, creating a lopsided cheesecake.
Watch Out: Opening the oven door too early can cause the cheesecake to sink in the center.In a small saucepan, melt the remaining half‑cup of butter over low heat. Stir in the brown sugar until fully dissolved and the mixture turns a deep amber. Drizzle this glaze over the top of the cheesecake, allowing it to cascade into the cracks and create a glossy finish.
Place the springform pan in a larger roasting pan and fill the outer pan with hot water until it reaches halfway up the sides of the springform. This water bath (bain‑marie) ensures gentle, even cooking and prevents the dreaded cracks. Bake for 30‑35 minutes, or until the edges are set and the center still has a slight wobble.
Turn off the oven, crack the door open slightly, and let the cheesecake sit for 1 hour. This gradual cooling helps prevent cracks. After the hour, remove the cheesecake from the water bath, run a thin knife around the edge, and chill in the refrigerator for at least 4 hours—or overnight for the best texture.
That's it — you did it. But hold on, I've got a few more tricks that'll take this to another level...
Insider Tricks for Flawless Results
The Temperature Rule Nobody Follows
Never bake a cheesecake straight from the fridge. Let the batter sit at room temperature for 20 minutes before it hits the oven. This tiny pause lets the proteins relax, resulting in a smoother, crack‑free surface. A friend once tried to skip this step and ended up with a cheesecake that looked like a cracked desert—lesson learned.
Why Your Nose Knows Best
When the crust is ready, you’ll hear a faint sizzle and smell a buttery, toasted aroma. That’s your cue that the crust has formed a perfect golden base. Trust your senses over the timer; ovens can vary by up to 15 degrees.
The 5‑Minute Rest That Changes Everything
After the water bath, let the cheesecake rest in the turned‑off oven with the door ajar for exactly 5 minutes before moving it to the fridge. This short rest lets the residual heat finish setting the center without shocking the batter.
The Secret Butter‑Brown‑Sugar Glaze
For a glossy finish, whisk the butter and brown sugar together until the mixture is smooth, then pour it over the cheesecake while it’s still warm. The heat melts the butter, allowing the sugar to caramelize and create that restaurant‑quality sheen.
Cooling the Right Way
Never place a hot cheesecake directly in the fridge; the rapid temperature drop can cause condensation and soggy crust. Instead, let it cool on a wire rack for an hour, then cover loosely with foil before refrigerating.
Creative Twists and Variations
This recipe is a playground. Here are some of my favorite ways to switch things up:
Maple‑Pecan Dream
Swap half the brown sugar in the glaze for pure maple syrup. The result is a subtly sweet, amber‑colored topping that pairs beautifully with the toasted pecans.
Chocolate Swirl
Melt ½ cup of dark chocolate and swirl it into the cheesecake batter before baking. The chocolate ribbons add a bittersweet contrast to the buttery base.
Citrus Burst
Add the zest of one orange and a splash of orange liqueur to the filling. The citrus brightens the richness, making it perfect for spring gatherings.
Salted Caramel Drizzle
Top the cooled cheesecake with a homemade salted caramel sauce and a sprinkle of flaky sea salt. It’s the ultimate sweet‑and‑salty indulgence.
Vegan Adaptation
Replace the cream cheese with a vegan cream cheese alternative, use coconut oil instead of butter for the crust, and swap the eggs for a chia‑egg mixture. The texture stays creamy, and the flavor remains true to the original.
Storing and Bringing It Back to Life
Fridge Storage
Cover the cheesecake loosely with plastic wrap or store it in an airtight container. It will stay fresh for up to 5 days, and the flavors actually deepen after a day or two.
Freezer Friendly
Slice the cheesecake into wedges, wrap each piece individually in parchment and then foil. Freeze for up to 2 months. When you’re ready to serve, let it thaw in the fridge overnight.
Best Reheating Method
To revive a slice, place it on a microwave‑safe plate, add a tiny splash of water (about a teaspoon), and microwave for 15‑20 seconds. The steam gently restores the creamy texture without drying it out.