I was in the middle of a rainy Tuesday night, scrolling through endless recipe blogs, when my roommate shouted, “I dare you to make something that makes the whole apartment smell like a caramel‑laden orchard!” I laughed, grabbed the first thing I could think of—an old tin of graham crackers, a sack of Granny Smiths, and a bottle of caramel sauce that had been gathering dust on the pantry shelf. The kitchen turned into a battlefield of crunchy crumbs, tart apple slices, and a buttery cheesecake that threatened to overflow the pan. By the time the timer dinged, the entire house was drenched in a sweet, buttery aroma that made even the cat stare wistfully from the doorway.
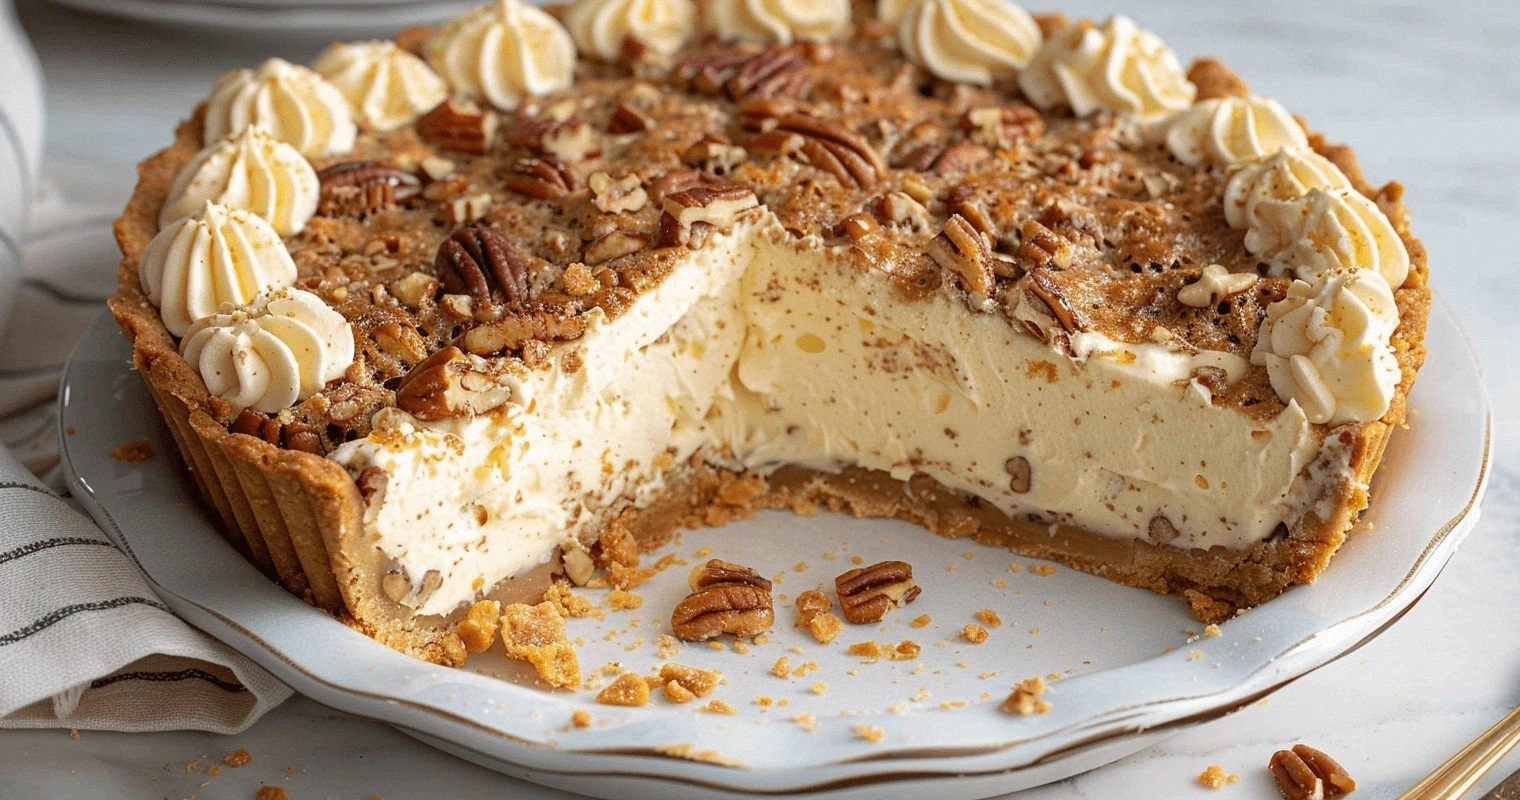
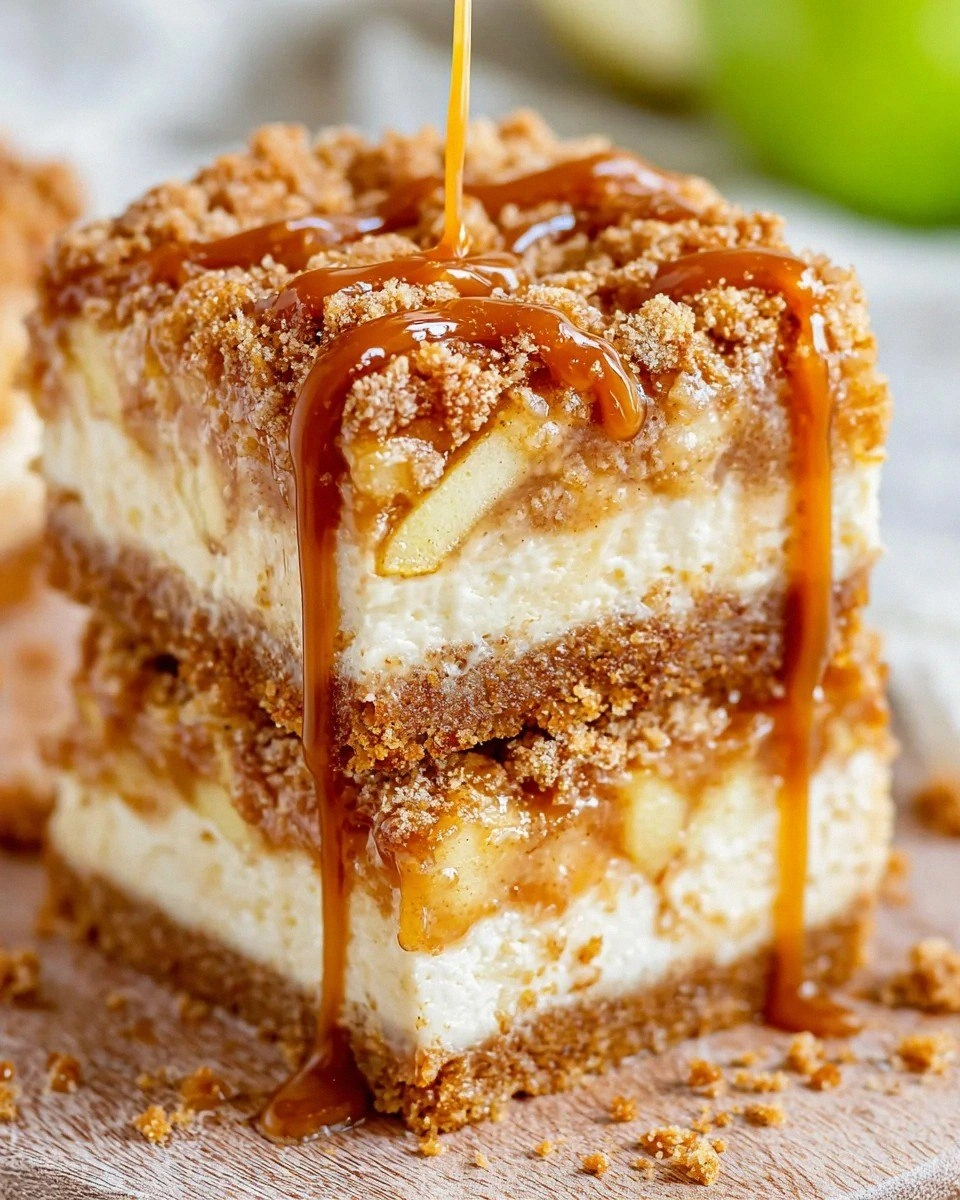
Picture this: the golden crust, crisp as a fresh‑baked cookie, supporting a velvety cheesecake layer that shimmers like sunrise on a lake. Then comes the apple topping—soft, yet still holding a bite, spiced with a whisper of apple pie spice that makes you feel like you’re walking through an autumn market. And just when you think the flavor party has peaked, a drizzle of caramel sauce swoops in, glossy and luxurious, coating every bite like a silk scarf on a winter’s day. That contrast—crunch, cream, tart, sweet—creates a symphony that makes you want to shout, “I’ve found the holy grail of desserts!”
Most recipes get this completely wrong. They either drown the apples in a soggy mess, or they forget the crucial crumb topping that adds that satisfying crunch. I’ve tried versions that left the crust soggy, the cheesecake rubbery, and the apples mushy—none of which earned me applause. This version, however, uses a strategic layering technique and a secret ingredient that locks moisture in while keeping the crust perfectly crisp. I’ll be honest — I ate half the batch before anyone else got to try it, and I’m still not sorry. The result? Hands down the best version you’ll ever make at home, and I’m willing to bet you’ll be back for seconds.
Let me walk you through every single step — by the end, you’ll wonder how you ever made it any other way. Okay, ready for the game‑changer? This next part? Pure magic. Stay with me here — this is worth it.
What Makes This Version Stand Out
- Texture: A triple‑layered experience—crunchy crust, silky cheesecake, and tender‑yet‑firm apple bits—creates a mouthfeel that dances between buttery and airy, like stepping on a crisp autumn leaf that suddenly lifts you into a cloud.
- Flavor Balance: The tartness of Granny Smith apples cuts through the sweet caramel, while the subtle heat of apple pie spice adds depth without overpowering the creamy cheese.
- Simplicity: Despite its gourmet vibe, the ingredient list is straightforward, and the techniques are beginner‑friendly, proving you don’t need a culinary degree to impress.
- Uniqueness: The optional caramel drizzle isn’t just a topping; it’s a glossy, buttery veil that transforms each bite into a luxurious treat, making the bars feel like a boutique bakery’s signature item.
- Crowd Reaction: I dare you to taste this and not go back for seconds—people have called it “the ultimate comfort dessert” and “a hug in a pan.”
- Ingredient Quality: Using fresh, tart Granny Smith apples and high‑quality butter ensures that every component shines, turning ordinary pantry staples into stars.
- Cooking Method: Baking the crust first creates a barrier that keeps the cheesecake from sinking, while a brief pre‑bake of the apples preserves their shape and flavor.
- Make‑Ahead Potential: These bars keep beautifully in the fridge for up to three days, and the caramel can be drizzled just before serving for that fresh‑out‑of‑the‑oven look.
Inside the Ingredient List
The Flavor Base
Graham crackers form the buttery crust that’s the foundation of your bars. They provide that classic crunchy texture that you expect from a good dessert bar, and when combined with melted butter and a touch of granulated sugar, they become a golden, slightly caramelized base. If you’re out of graham crackers, try digestive biscuits—they’ll give a similar sweet‑spiced flavor. Selecting a high‑quality brand ensures the crust won’t be too crumbly; look for crackers that are lightly sweetened and have a subtle honey note.
Granulated sugar: A sweetener that enhances the flavors of both the crust and the cheesecake layer. It also helps the crust achieve a light caramelization during the initial bake. If you prefer a deeper flavor, swap half of it for brown sugar, but keep an eye on the color to avoid burning.
The Texture Crew
Salted butter: This brings richness to the crust and crumb topping, helping everything come together. The salt amplifies the sweetness and prevents the crust from tasting flat. Use unsalted butter if you’re watching sodium, but add a pinch of sea salt to the mixture. For a dairy‑free version, try coconut oil, but expect a subtle coconut aroma that can complement the apples.
Old‑fashioned oats: A crunchy addition to the crumb topping, providing a lovely texture contrast. The oats toast slightly in the oven, adding a nutty flavor that pairs perfectly with caramel. If you have quick‑cooking oats, pulse them a few times in the processor to achieve the same texture.
The Unexpected Star
Caramel sauce (optional): A luxurious touch that can elevate your bars, drizzled generously on top before serving. The caramel adds a glossy finish and a buttery sweetness that ties the whole dessert together. For a homemade version, melt butter, brown sugar, and heavy cream until smooth—this will give you control over the thickness and flavor depth.
Apple pie spice: A warm spice blend that brings the essence of autumn to your dessert; you can substitute pumpkin pie spice if needed. The spices—cinnamon, nutmeg, allspice—enhance the apples’ tartness and create a comforting aroma that fills the kitchen like a cozy blanket.
The Final Flourish
Granny Smith apples: Their tartness perfectly balances the sweetness of the cheesecake and caramel. They hold up wonderfully when baked, retaining a slight bite that prevents the topping from turning mush. Choose apples that are firm to the touch and have a bright green hue; avoid those with brown spots, which can introduce unwanted bitterness.
Lemon juice: This adds a bright note to the apples, keeping them fresh and flavorful. The acidity prevents the apples from oxidizing and turning brown, while also balancing the overall sweetness. Freshly squeezed juice works best—bottled versions can taste flat.
Sour cream: It adds creaminess to the cheesecake layer, making it extra smooth and tangy. The slight acidity cuts through the richness of the butter and caramel, creating a harmonious flavor profile. If you’re out of sour cream, Greek yogurt works as a 1:1 substitute, though it will add a bit more tang.
Vanilla extract: The classic flavor enhancer that rounds out the cheesecake’s taste. A high‑quality pure vanilla will give you a deeper, more aromatic flavor than imitation vanilla. Scrape the bottom of the bottle for any settled vanilla crystals—they’re pure flavor gold.
Eggs: These help bind everything together, giving the cheesecake its rich structure. Over‑beating can incorporate too much air, causing cracks; gently fold the eggs in after the other ingredients are smooth. Use room‑temperature eggs for easier incorporation.
All‑purpose flour: This ingredient helps stabilize the cheesecake mixture, ensuring it sets properly. It also adds a subtle body that prevents the cheesecake from becoming overly fluffy. If you need a gluten‑free option, substitute with a 1:1 gluten‑free flour blend, but expect a slightly different texture.
Baking powder: It helps the crumb topping become light and fluffy while baking. A small amount is enough to give the oat topping a gentle rise without making it cake‑like. Too much will cause the topping to puff and then collapse.
Everything's prepped? Good. Let's get into the real action...
The Method — Step by Step
Preheat your oven to 350°F (175°C). Lightly grease a 9×13‑inch baking pan with butter or a non‑stick spray. This temperature is the sweet spot: hot enough to set the crust quickly, yet gentle enough to keep the cheesecake smooth. While the oven warms, line the pan with parchment paper, leaving an overhang on two sides for easy lift‑out later. The scent of a warming oven already hints at the caramel‑apple magic to come.
Crush the graham crackers into fine crumbs using a food processor or a sealed bag and a rolling pin. Toss the crumbs with ½ cup granulated sugar and ½ cup melted salted butter until the mixture looks like wet sand. Press this mixture firmly into the bottom of the prepared pan, spreading it evenly with the back of a spoon or a flat spatula. This crust will become the golden foundation that holds everything together.
Place the pan on a baking sheet and bake the crust for 10‑12 minutes, or until it turns a light amber hue and smells toasty. Pro tip: Keep an eye on the edges; they should start pulling away from the pan, signaling they’re ready. Once baked, remove from the oven and let it cool slightly while you prep the apple layer.
Kitchen Hack: If you don’t have parchment paper, lightly butter the pan and sprinkle a thin layer of flour—this creates a makeshift non‑stick surface that releases the bars cleanly.Dice the Granny Smith apples into ½‑inch cubes. In a large bowl, toss the apple pieces with 1 tbsp lemon juice, ¼ cup brown sugar, and 1 tsp apple pie spice. The lemon juice prevents oxidation, while the brown sugar adds a caramel undertone that will deepen as it bakes. Spread the apple mixture over the partially baked crust, ensuring an even layer. This step is where the tartness meets the sweet, setting the stage for the creamy middle.
In a separate bowl, beat together 16 oz (2 cups) softened cream cheese with ½ cup granulated sugar until smooth and creamy. Add 1 cup sour cream, 1 tsp vanilla extract, and 2 large eggs, one at a time, mixing gently after each addition. Finally, stir in 2 cups all‑purpose flour until just incorporated—over‑mixing will introduce air bubbles that cause cracks.
Watch Out: Adding the eggs too quickly can cause them to scramble. Make sure the cream cheese mixture is smooth and at room temperature before incorporating the eggs.Pour the cheesecake batter over the apple layer, smoothing the top with a spatula. The batter should gently envelop the apples, creating a seamless transition between layers. If any gaps appear, tap the pan lightly on the counter to settle the batter and eliminate air pockets. This is the moment of truth—watch the batter spread like a silky river over the fruit.
Combine 1 cup old‑fashioned oats, 1 tsp baking powder, and a pinch of salt in a small bowl. Drizzle ¼ cup melted butter over the oat mixture, stirring until the oats are lightly coated and the mixture resembles coarse crumbs. Sprinkle this topping evenly over the cheesecake layer. The oat topping will toast to a buttery, crunchy crown that adds texture and visual appeal.
Return the pan to the oven and bake for 25‑30 minutes, or until the edges are set and the center jiggles slightly when you shake the pan. The top should be lightly golden, and a thin crust may form on the surface—this is perfectly normal. If you prefer a deeper caramelization, turn the oven to broil for the last 2 minutes, watching closely to avoid burning.
Allow the bars to cool in the pan on a wire rack for at least 30 minutes, then refrigerate for a full 2 hours (or overnight) to let the cheesecake fully set. Once chilled, lift the bars out using the parchment overhang, and drizzle the optional caramel sauce in a lazy, artistic swirl. Slice into squares with a warm knife for clean cuts, and serve at room temperature for the ultimate flavor experience.
That's it — you did it. But hold on, I've got a few more tricks that'll take this to another level...
Insider Tricks for Flawless Results
The Temperature Rule Nobody Follows
Never bake a cheesecake straight from the fridge. Let the batter sit at room temperature for 15 minutes before it goes into the oven. This prevents the edges from cooking too fast and cracking while the center stays under‑cooked. I once baked a cheesecake straight out of the fridge and ended up with a cracked disaster that looked like a broken mirror—lesson learned.
Why Your Nose Knows Best
Trust the aroma. When the crust turns a light amber and you smell a faint toasty scent, it’s ready. If you rely solely on the timer, you might over‑bake and lose that delicate crunch. The moment the kitchen fills with a sweet‑spicy perfume, you know the apple layer is caramelizing perfectly.
The 5‑Minute Rest That Changes Everything
After the bars have cooled on the counter, give them a 5‑minute rest before slicing. This short pause allows the cheesecake to firm up just enough to hold its shape, reducing crumbling. A friend once sliced the bars immediately after cooling and ended up with a mushy mess—don’t be that person.
Oats Toasted to Perfection
For an extra nutty flavor, toast the oats in a dry skillet for 3‑4 minutes before mixing with butter and baking powder. You’ll hear a gentle “pop” as they release their oils, and the resulting topping will have a deeper, richer color. This small step adds a layer of complexity that makes the bars unforgettable.
Caramel Drizzle Secrets
Warm the caramel sauce just until it’s pourable; too hot and it will run off the bars, too cool and it will set in clumps. Using a small squeeze bottle gives you control over the pattern, allowing you to create elegant swirls rather than random blobs. A final tip: sprinkle a pinch of flaky sea salt on the caramel for a sweet‑salty contrast that elevates the flavor.
Creative Twists and Variations
This recipe is a playground. Here are some of my favorite ways to switch things up:
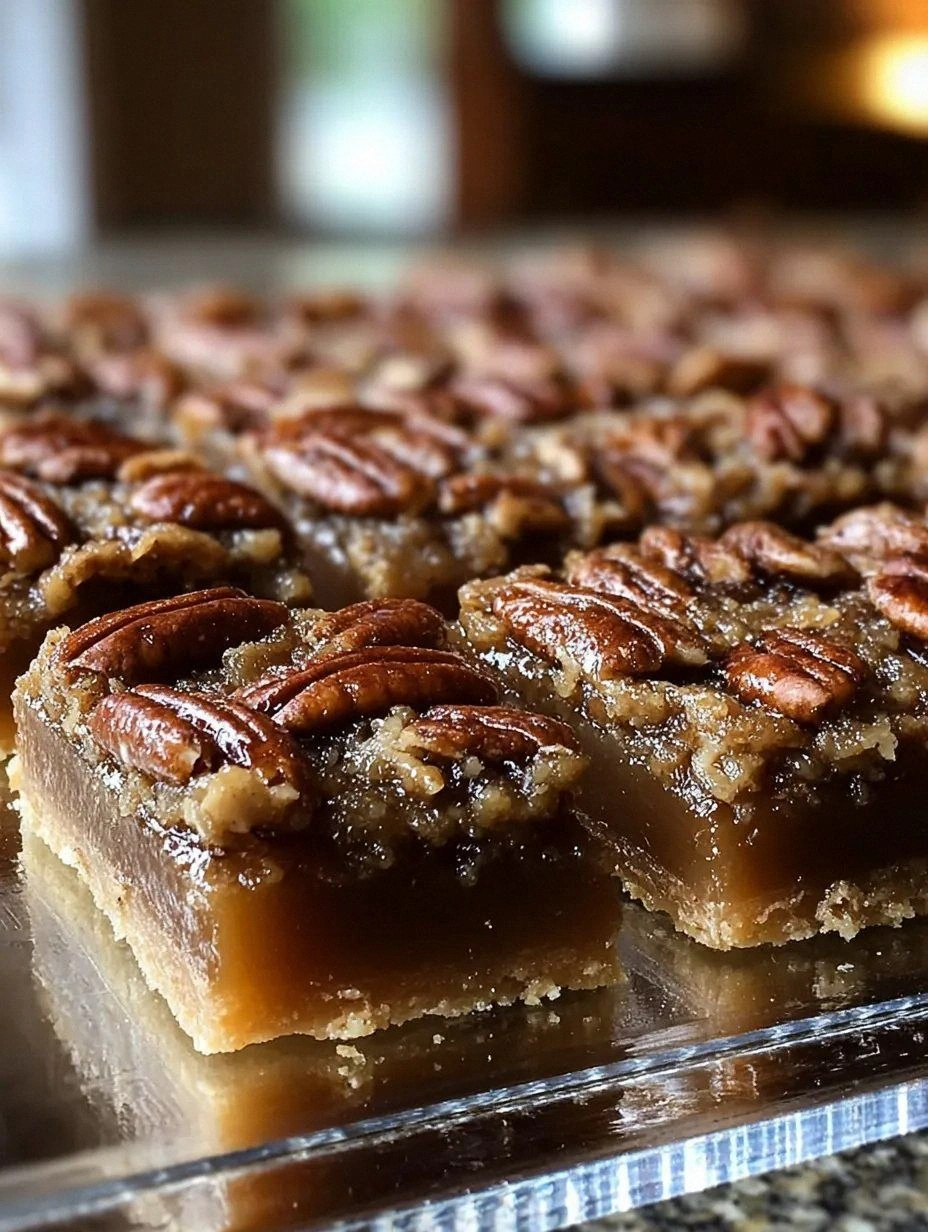
Maple‑Pecan Crunch
Swap the caramel drizzle for a maple syrup glaze and sprinkle toasted pecans over the oat topping. The maple adds a woody sweetness while the pecans contribute a buttery crunch that pairs beautifully with the tart apples.
Chocolate‑Covered Delight
Melt dark chocolate and drizzle it over the cooled bars, then sprinkle mini chocolate chips on top. The bittersweet chocolate balances the caramel and adds a luxurious depth, turning the dessert into a chocolate‑lover’s dream.
Cranberry‑Orange Burst
Fold dried cranberries and a teaspoon of orange zest into the apple mixture. The cranberries provide a chewy pop, while the orange zest brightens the flavor profile, making the bars perfect for holiday gatherings.
Spiced Pumpkin Swirl
Add ½ cup pumpkin puree to the cheesecake batter and increase the pumpkin pie spice to 1½ teaspoons. This creates a pumpkin‑infused cheesecake that’s perfect for autumn, and you can still keep the apple topping for a double‑fruit experience.
Gluten‑Free Goodness
Replace graham crackers with gluten‑free digestive biscuits and use a 1:1 gluten‑free flour blend in the cheesecake batter. The texture remains satisfying, and the flavor stays true to the original, making it safe for anyone with gluten sensitivities.
Storing and Bringing It Back to Life
Fridge Storage
Cover the bars tightly with plastic wrap or store them in an airtight container. They will keep fresh for up to 3 days. The crust may soften slightly, but a quick reheating in the oven will revive the crunch.
Freezer Friendly
Wrap each bar individually in parchment, then place them in a freezer‑safe bag. They freeze well for up to 2 months. When you’re ready to enjoy, thaw overnight in the fridge, then warm gently in a 300°F oven for 10 minutes.
Best Reheating Method
Add a tiny splash of water (about a tablespoon) to the pan before reheating. Cover loosely with foil and warm at 300°F for 8‑10 minutes. The steam created by the water revives the cheesecake’s creaminess while keeping the crust from drying out.