Okay, picture this: it’s a rainy Saturday, the kind where the clouds are so low you can practically taste the humidity, and you’re stuck inside with nothing but a half‑finished batch of store‑bought brownies that taste like cardboard. I was in that exact situation, staring at a tray that looked more like a sad, flat pancake than the chocolatey masterpiece I craved. That disappointment sparked a dare from my roommate—“Make the best brownies ever, and I’ll bring the wine.” I accepted, but little did I know that the experiment would turn into an obsession. I dove into my pantry, grabbed a jar of Biscoff cookie butter, and set out to create a brownie that would make even the most hardened dessert snob weep with joy.
The kitchen quickly filled with the intoxicating scent of melted chocolate and butter, a fragrance that wrapped around the room like a warm blanket. The sound of the mixer whirring, the gentle crackle as the butter hit the pan, and the faint pop of the Biscoff cookies hitting the countertop all formed a symphony of anticipation. My fingertips tingled as I felt the glossy batter slip through the whisk, thick and glossy, promising a fudgy interior that would melt on the tongue. When the first swirl of cookie butter hit the batter, it was like watching a river of caramel cascade over a dark chocolate waterfall—pure, unadulterated decadence.
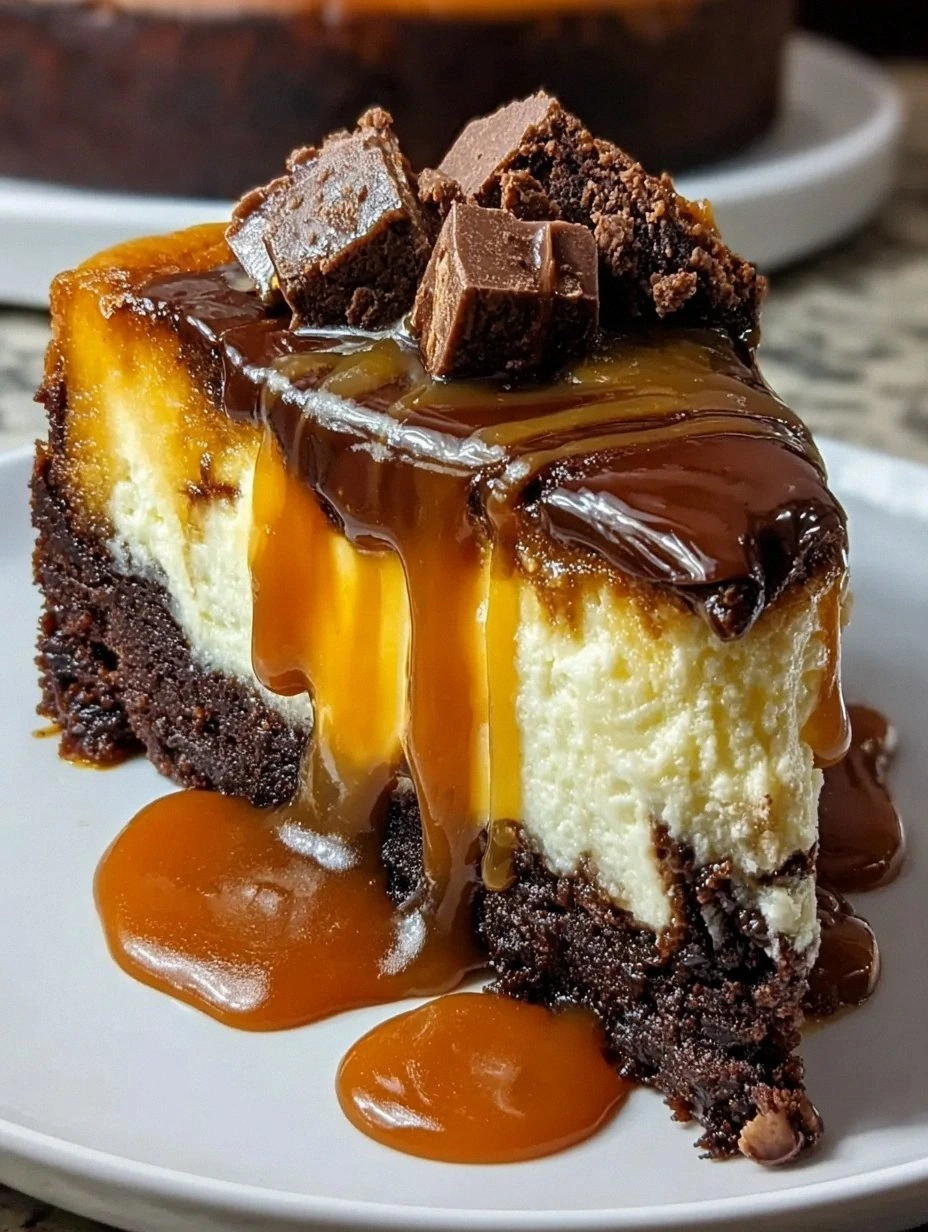
What makes this version stand out is simple: I combined the deep, almost bittersweet notes of dark chocolate with the caramel‑spiced, buttery crunch of Biscoff, then added a swirl of silky cookie butter that runs through the middle like a secret love affair. Most recipes either ignore the texture of the cookie pieces or drown the brownie in too much butter, resulting in a soggy mess. Not here. I’ve balanced the crumb, the chew, and the melt‑in‑your‑mouth gooeyness to perfection. The secret? A precise temperature for the butter and chocolate melt, plus a clever technique for folding in the crushed cookies without over‑mixing.
I’m about to spill the beans on a technique that most bakers overlook: the “double‑melt” method, where you melt the butter and chocolate together, then let them cool just enough before adding the eggs. This prevents the eggs from scrambling and gives the batter a glossy, velvety texture that feels like silk. Trust me, you’ll taste the difference the moment you bite into the fudgy center. I dare you to taste this and not go back for seconds—because once you’ve had one bite, you’ll be counting down the minutes until the next batch.
Let me walk you through every single step — by the end, you’ll wonder how you ever made brownies any other way. Ready? Grab your apron, preheat that oven, and let’s turn this kitchen disaster into a legend.
What Makes This Version Stand Out
- Taste: The marriage of deep cocoa with caramel‑spiced Biscoff creates a flavor profile that feels like a dessert version of a fine wine—complex, layered, and unforgettable.
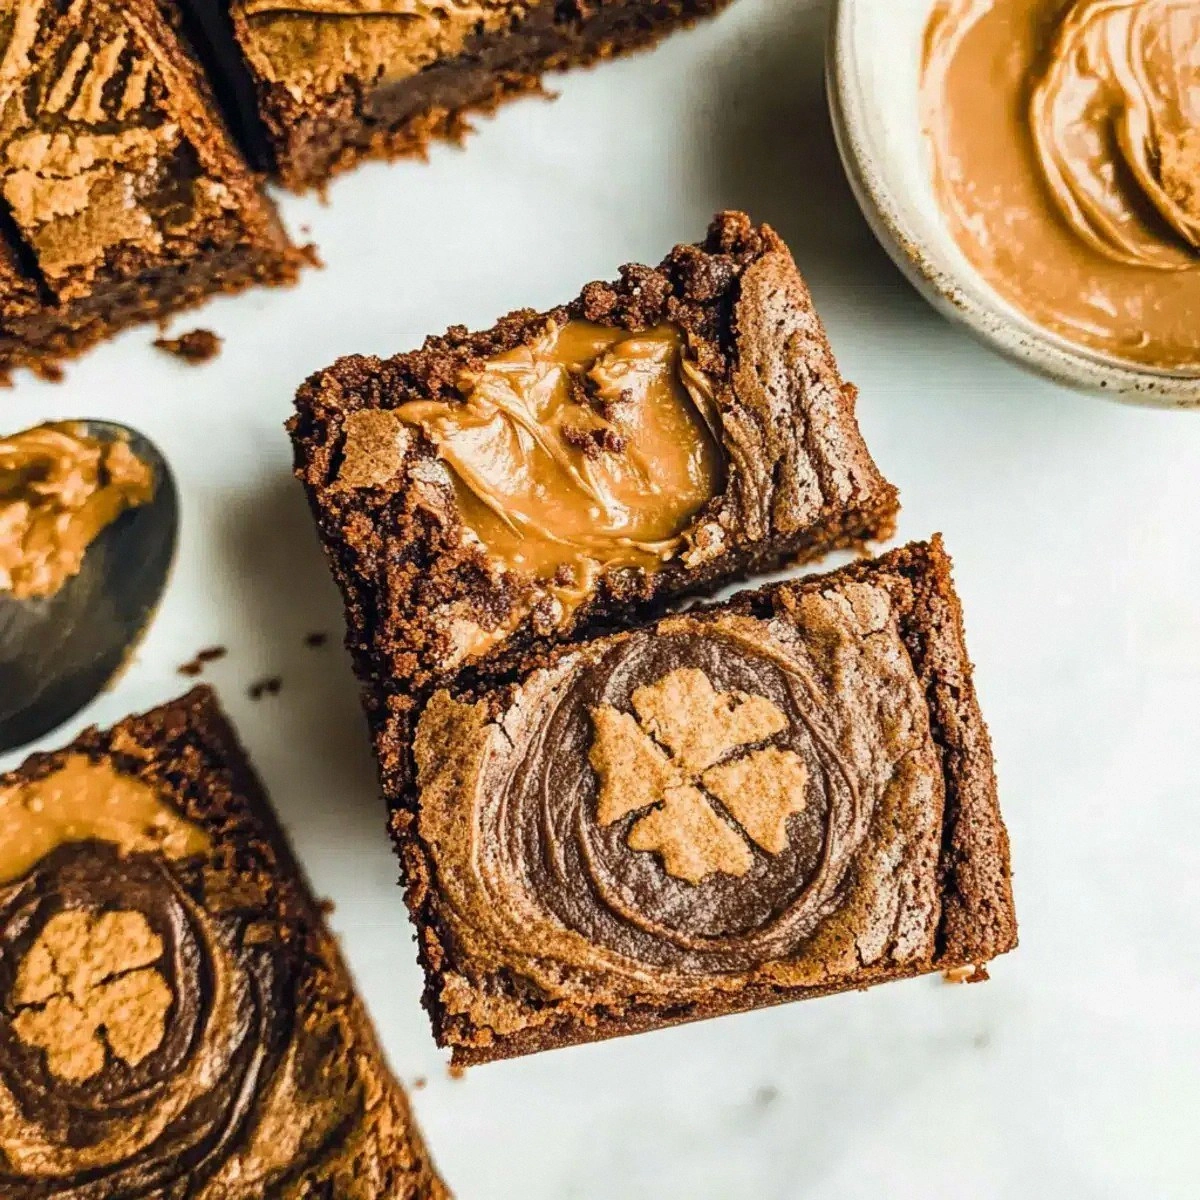
- Texture: A fudgy, slightly chewy interior punctuated by crunchy cookie shards gives you a bite that’s both soft and satisfyingly crisp.
- Simplicity: Despite the gourmet vibe, the ingredient list is short, and the steps are straightforward enough for a beginner to nail.
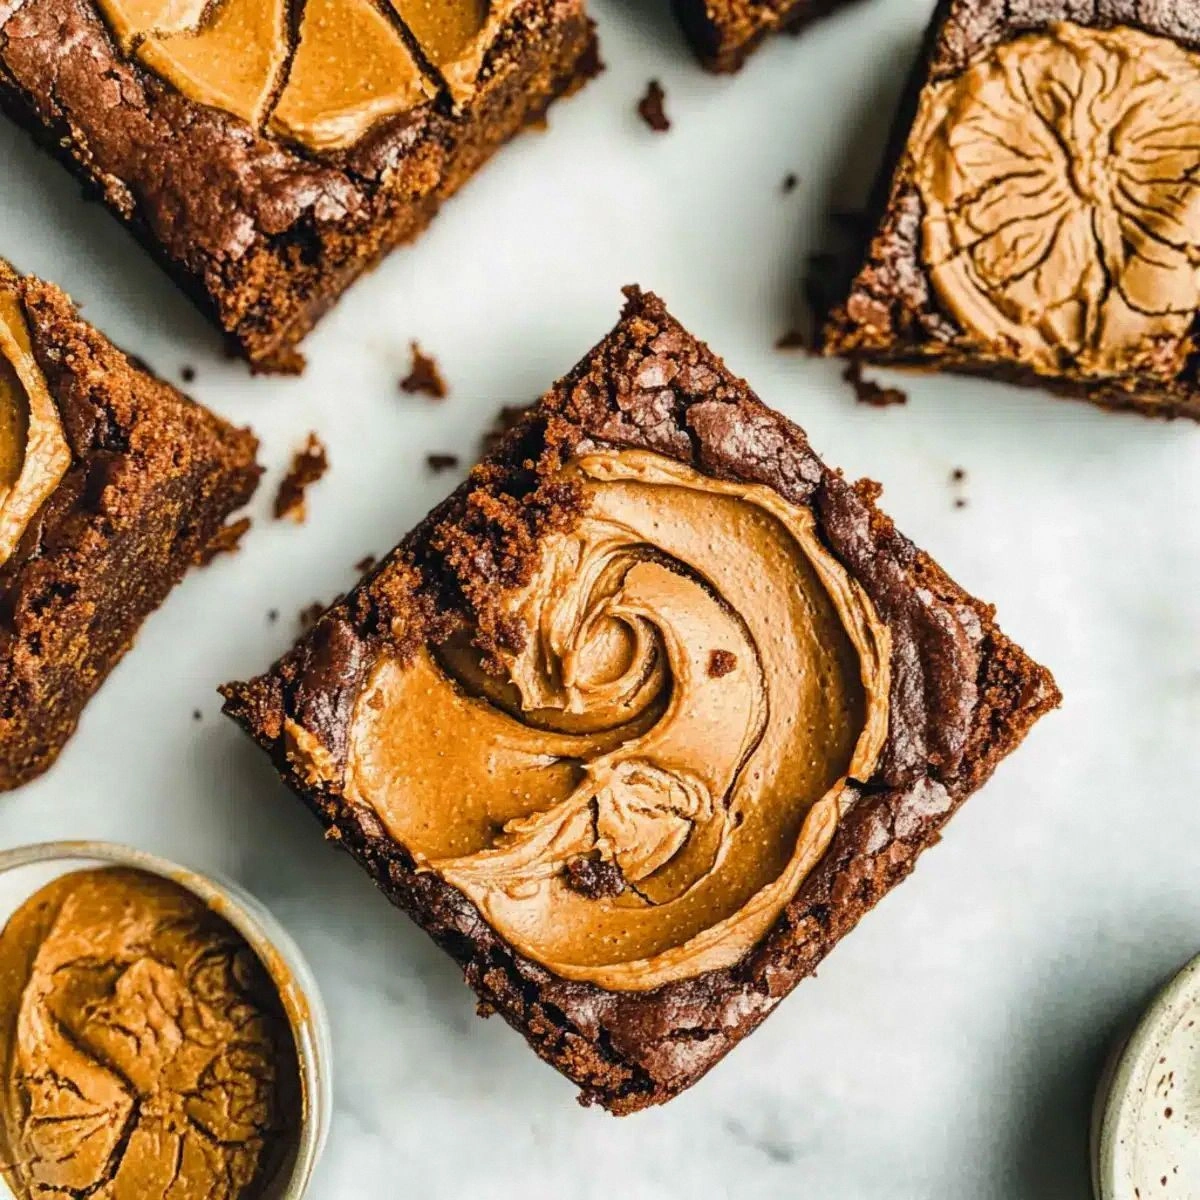
- Uniqueness: The gooey cookie butter swirl is a game‑changer, turning an ordinary brownie into a show‑stopping centerpiece.
- Crowd Reaction: Expect gasps, compliments, and the inevitable “Can I have the recipe?” from anyone within a ten‑foot radius.
- Ingredient Quality: Using real Biscoff cookies and authentic cookie butter (not the generic spread) makes all the difference in flavor depth.
- Cooking Method: The double‑melt technique ensures a glossy batter that bakes into a glossy, crackly top.
- Make‑Ahead Potential: These brownies keep beautifully for up to a week, and they freeze like a dream for future cravings.
Alright, let's break down exactly what goes into this masterpiece...
Inside the Ingredient List
The Flavor Base
Unsalted butter is the backbone of any good brownie, providing richness and helping to create that coveted fudgy crumb. I use a full cup of high‑quality butter because it melts into the chocolate, giving the batter a glossy sheen that looks professional. If you skip the butter or replace it with oil, you’ll lose that buttery mouthfeel and end up with a drier texture. For a dairy‑free version, try a solid coconut oil, but expect a subtle coconut undertone that may compete with the Biscoff’s spice.
Semi‑sweet or dark chocolate (8 oz) is where the deep, almost bitter notes come from, balancing the sweet cookie butter. Choose a chocolate with at least 60 % cacao for that rich, complex flavor. If you opt for a milk chocolate, the brownies will be sweeter but lack the sophisticated depth that makes them unforgettable. Buying a chocolate bar and chopping it yourself yields a smoother melt than pre‑shaved chips.
The Texture Crew
Eggs act as the binder, giving the brownies structure while keeping them moist. Three large eggs are perfect; they add just enough protein to hold the batter together without making it cakey. Over‑beating the eggs can incorporate too much air, leading to a spongy result—so whisk just until combined.
Sugar (1 cup) provides sweetness and also contributes to the chewy texture. I prefer granulated sugar because it dissolves nicely during the melt, creating a glossy surface. If you use brown sugar, you’ll get a deeper molasses flavor that can compete with the Biscoff, which is not ideal for this recipe.
Vanilla extract (4 tsp) amplifies the chocolate and cookie butter flavors, acting like a secret enhancer. Using pure vanilla is worth the extra pennies; imitation can taste flat and diminish the overall aroma.
The Unexpected Star
Crushed Biscoff cookies (1 cup plus an extra ½ cup for topping) provide that crunchy surprise in every bite. The caramel‑spiced cookies break up the brownie’s density, giving you a delightful textural contrast. If you can’t find Biscoff, try speculoos or a spiced ginger cookie, but the flavor won’t be identical.
Cookie butter (½ cup) is the hero of the swirl. Its silky, caramel‑like consistency creates ribbons that melt into the brownie as it bakes, leaving pockets of gooey goodness. Be sure to use the authentic Lotus Biscoff cookie butter; the generic versions often have added stabilizers that affect the melt.
The Final Flourish
All‑purpose flour (1 cup) provides the structure without making the brownies cake‑like. The amount is calibrated to keep the crumb dense yet tender. If you substitute with cake flour, you’ll end up with a softer, more crumbly texture—not what we’re aiming for.
Cocoa powder (⅓ cup) deepens the chocolate flavor and adds a subtle bitterness that balances the sweetness of the cookie butter. Use a high‑quality, unsweetened cocoa for best results. Dutch‑process cocoa can be used, but it will yield a slightly less bitter profile.
Salt (¼ tsp) is the unsung hero, enhancing all the flavors and cutting through the richness. A pinch too much can make the brownies taste salty, so measure carefully.
Everything's prepped? Good. Let's get into the real action...
The Method — Step by Step
Preheat your oven to 350°F (175°C). Line a 9‑inch square baking pan with parchment paper, allowing the edges to overhang for easy removal. This is the moment of truth: a properly preheated oven ensures the brownies rise just enough to create that coveted crackly top. While the oven warms, gather all your ingredients and set them on the counter so nothing surprises you mid‑process.
Kitchen Hack: Use a kitchen scale for the butter and chocolate. Precise weights prevent a batter that's too wet or too dry.Melt the butter and chocolate together using a double‑boiler. Place a heat‑proof bowl over a pot of simmering water, making sure the bowl never touches the water. Stir continuously; the mixture should become a glossy, velvety river of chocolate. Once fully melted, remove from heat and let it cool for about 5 minutes—this cooling period is crucial so the eggs don’t scramble when added.
In a separate bowl, whisk together the eggs, sugar, and vanilla extract until the mixture lightens in color and becomes slightly frothy. This is where you can hear the faint whisper of sugar dissolving, a sound that tells you you’re on the right track. Add the melted chocolate‑butter blend to the egg mixture, gently folding with a spatula until fully incorporated. The batter should look thick, dark, and incredibly inviting.
Sift the flour, cocoa powder, and salt together over the batter. This step eliminates lumps and ensures even distribution of the dry ingredients. Fold gently—over‑mixing will develop gluten and give you a cakey brownie, which we absolutely do not want. The batter will become a bit more fluid, but still retain a thick consistency.
Stir in 1 cup of crushed Biscoff cookies, reserving the extra ½ cup for the topping. The crumbs will disperse throughout the batter, creating pockets of crunchy surprise. At this point, the batter should smell like a bakery—deep chocolate with a hint of caramel spice.
Pour half of the batter into the prepared pan, spreading it evenly with a spatula. Drop spoonfuls of the ½ cup cookie butter over the surface, then use a knife or skewer to swirl it through the batter, creating a marble effect. The swirl should look like rivers of gold cutting through dark chocolate—pure visual magic.
Watch Out: Don’t over‑swirl; too much motion will blend the cookie butter completely, losing the distinct ribbons.Add the remaining batter on top, smoothing the surface. Sprinkle the reserved ½ cup of crushed Biscoff cookies evenly over the top. This final dusting creates a crunchy crown that will toast slightly as the brownies bake, adding a delightful contrast to the soft interior.
Slide the pan into the oven and bake for 30‑35 minutes. The edges should pull away from the sides of the pan, and a toothpick inserted into the center should come out with a few moist crumbs but not wet batter. The top will have a subtle crackle and a glossy sheen—if you see that, you’ve nailed the bake.
Allow the brownies to cool in the pan for at least 20 minutes before lifting them out using the parchment overhang. While they’re cooling, the cookie butter continues to set, creating those ooey‑gooey pockets. Cut into squares—preferably 4‑by‑4 for a perfect serving size. And now the fun part: dig in and watch everyone’s faces light up.
That's it — you did it. But hold on, I've got a few more tricks that'll take this to another level...
Insider Tricks for Flawless Results
The Temperature Rule Nobody Follows
Never melt chocolate over direct heat. Even a brief scorch can cause the cocoa butter to separate, leading to a grainy texture. Use a double‑boiler or melt in short bursts in the microwave, stirring between each burst. I once tried the direct‑heat method and ended up with a burnt, bitter mess—lesson learned. Keep the temperature under 115°F (46°C) for the smoothest batter.
Why Your Nose Knows Best
Your sense of smell is a reliable indicator of doneness. When the brownies are about 5 minutes from finishing, the kitchen will fill with a sweet, caramel‑spiced aroma that’s impossible to ignore. If you can smell the Biscoff notes rising, pull them out; they’ll continue to cook slightly from residual heat. Trusting your nose prevents over‑baking, which can dry out the crumb.
The 5‑Minute Rest That Changes Everything
After removing the brownies from the oven, let them rest, uncovered, for exactly five minutes before covering with foil or a towel. This short rest lets the steam escape, keeping the top from getting soggy while allowing the interior to set. I used to skip this step and end up with a gummy top—now I never forget.
The Crumble‑First Technique
If you love extra crunch, toast the reserved crushed Biscoff cookies on a dry skillet for 2‑3 minutes before sprinkling them on top. The extra toasting adds a caramelized edge that intensifies the spice profile. Just watch closely; they can go from golden to burnt in seconds.
The Double‑Swirl Secret
For an even more dramatic visual, do a second swirl after adding the top layer of batter. This creates a layered marble effect that looks as good as it tastes. I’ve seen people try this and end up with a beautiful “tornado” pattern that’s Instagram‑ready.
Creative Twists and Variations
This recipe is a playground. Here are some of my favorite ways to switch things up:
Nutty Crunch
Fold in ½ cup toasted chopped hazelnuts or almonds with the crushed Biscoff. The nutty oil adds another layer of richness and pairs beautifully with the caramel notes.
Spicy Heat
Add a pinch of cayenne pepper to the dry ingredients for a subtle heat that awakens the chocolate. It’s a secret weapon that makes the brownies feel sophisticated and unexpected.
White Chocolate Dream
Replace half of the dark chocolate with white chocolate chips. The sweet creaminess contrasts with the bitter cocoa, creating a balanced flavor that’s both bright and deep.
Mocha Madness
Dissolve 1 tsp instant espresso powder in the melted butter before mixing with chocolate. The coffee amplifies the chocolate’s intensity and adds a subtle bitterness that cuts through the sweetness.
Fruit Fusion
Stir in ½ cup dried cherries or cranberries after the batter is fully mixed. The tart fruit bursts complement the sweet Biscoff swirl, offering a pleasant contrast.
Vegan Version
Swap butter for coconut oil, use a flax‑egg mixture (1 tbsp ground flaxseed + 3 tbsp water per egg), and choose a dairy‑free dark chocolate. The texture remains fudgy, and the coconut oil adds a faint tropical note that pairs surprisingly well with the spices.
Storing and Bringing It Back to Life
Fridge Storage
Place the cooled brownies in an airtight container and store them in the refrigerator for up to 5 days. The cooler environment keeps the cookie butter from becoming too runny, preserving the swirl’s integrity.
Freezer Friendly
Wrap individual squares tightly in plastic wrap, then place them in a zip‑top freezer bag. They’ll stay fresh for up to 3 months. When you’re ready to indulge, let them thaw at room temperature for 30 minutes, then give them a quick microwave zap (10‑15 seconds) to revive the gooey center.
Best Reheating Method
To reheat a slice, place it on a microwave‑safe plate, sprinkle a tiny splash of water (about a teaspoon) over the top, and microwave on medium for 15‑20 seconds. The added steam revives the brownie’s moisture, making it taste as fresh as the day it was baked.