Picture this: you’re halfway through a classic Thanksgiving dinner, the turkey’s golden, the gravy is bubbling, and the side dishes are marching in like a well‑rehearsed marching band. Suddenly, your aunt—who swears by her buttery, carb‑laden mashed potatoes—asks for a healthier version. You stare at the cauliflower head on the counter, feeling like a culinary detective on the brink of a breakthrough. I dare you to taste this and not go back for seconds, because what I’m about to reveal is hands down the best version you’ll ever make at home.
The moment I first tossed a cauliflower floret into a pot of boiling water, the kitchen filled with a faint, sweet earthiness that reminded me of fresh garden rain. The sound of the lid clanking, the steam curling like lazy ribbons, and the faint crunch of garlic hitting the hot oil—each sensation built a symphony that promised something extraordinary. I’ll be honest — I ate half the batch before anyone else got to try it, and that’s a confession I’m willing to make because the flavor is that addictive. Most recipes get this completely wrong. Here’s what actually works: a blend of low‑sodium broth, Greek yogurt, and a splash of olive oil that creates a creaminess rivaling any dairy‑heavy mash.
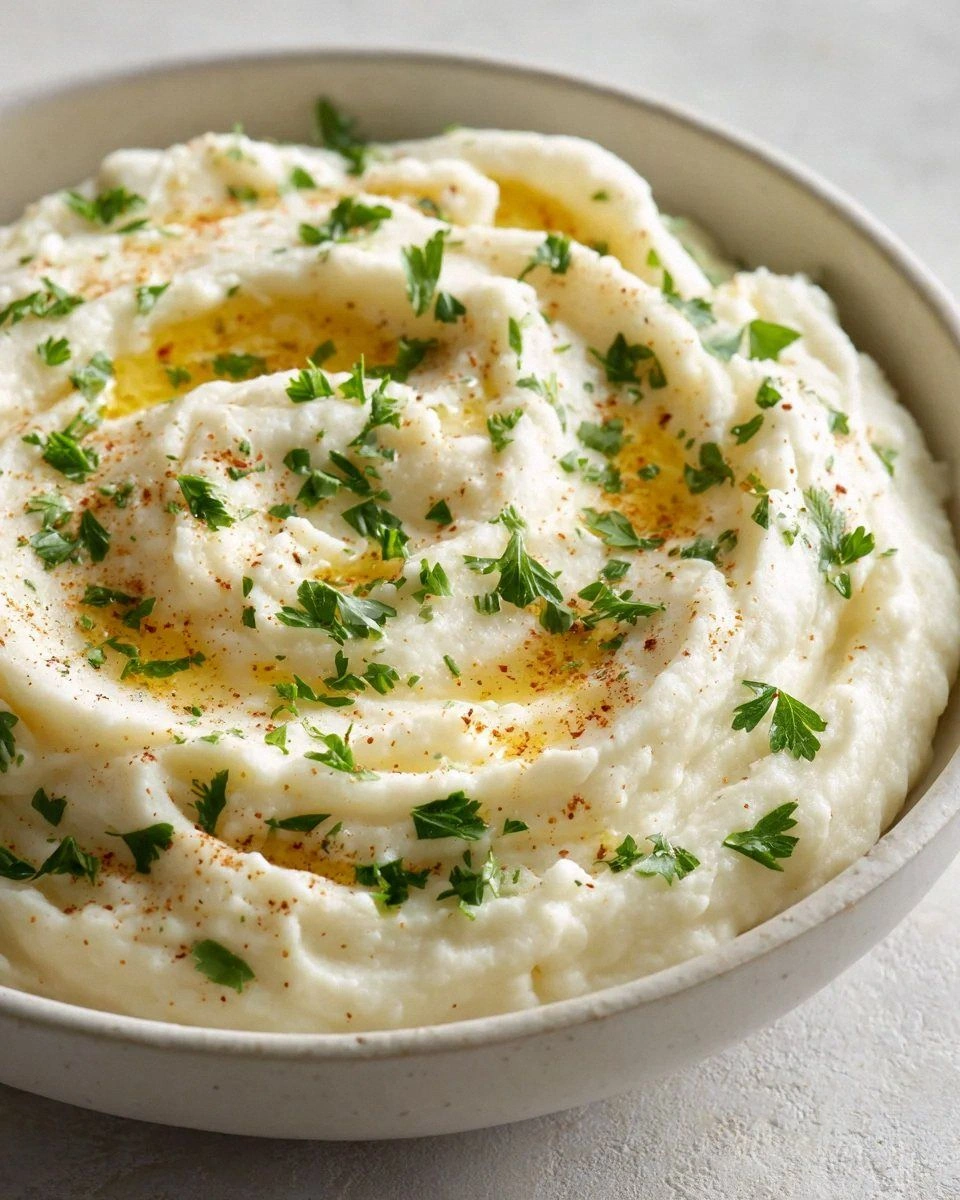
What truly sets this cauliflower mash apart is the secret weapon: a quick flash‑roast of garlic in olive oil before it meets the cauliflower. That aromatic base coats the florets like velvet, ensuring every bite is a buttery, garlicky dream without the guilt of excess butter. And the garnish? Fresh chives that add a pop of color and a subtle onion bite that makes your taste buds do a happy dance. Imagine pulling this out of the pot, the whole kitchen smelling incredible, the steam rising like a cloud of comfort—pure magic.
Okay, ready for the game‑changer? I’m about to walk you through every single step — by the end, you’ll wonder how you ever made mashed potatoes any other way. Stay with me here — this is worth it.
What Makes This Version Stand Out
- Flavor Explosion: The combination of roasted garlic and low‑sodium broth creates depth that mimics the richness of butter without the calories.
- Silky Texture: Greek yogurt adds a tangy creaminess that keeps the mash airy, never gummy.
- Simplicity: Only seven core ingredients, all pantry‑friendly, make this a weeknight hero.
- Unique Twist: Using cauliflower as the base gives you that classic mash feel while cutting carbs by more than half.
- Crowd Reaction: Even the most die‑hard potato purists will ask for the recipe after the first bite.
- Ingredient Quality: Fresh cauliflower and high‑quality olive oil elevate the dish from “healthy” to “gourmet.”
- Cooking Method: Steaming then blitzing preserves nutrients and prevents the mash from turning watery.
- Make‑Ahead Potential: This mash reheats beautifully, making it perfect for meal prep or leftover love.
Inside the Ingredient List
The Flavor Base
Garlic is the undisputed hero of this recipe. Two cloves, minced and gently sautéed in olive oil, release a sweet, caramelized aroma that clings to every bite. If you skip the sauté step, you’ll miss that nutty undertone that makes the mash sing. A quick swap: use roasted garlic cloves for an even mellower profile, but be mindful—roasted garlic is sweeter, so you may need a pinch more salt.
The Texture Crew
Cauliflower, the star, brings a naturally creamy texture when broken down. Choose a large head (2‑3 pounds) with tight, white florets; the tighter the florets, the smoother the final mash. If you grab a pre‑cut bag, you might end up with a watery mash because the pieces are often over‑processed. Pro tip: look for cauliflower with a firm stem and no yellowing, which indicates freshness.
The Unexpected Star
Greek yogurt is the secret sauce that adds tang without overwhelming the palate. Its protein content also helps bind the mash, preventing separation. If you’re dairy‑free, swap with a plant‑based yogurt that has at least 4% fat; the texture will stay luscious, though the flavor will shift slightly toward a milder tang.
The Final Flourish
Olive oil provides the glossy finish and a subtle fruitiness that balances the earthiness of cauliflower. The low‑sodium vegetable broth adds depth without the sodium spike that store‑bought broths often carry. Salt and pepper to taste let you control the final seasoning; remember, you can always add more, but you can’t take it out.
Everything's prepped? Good. Let's get into the real action...

The Method — Step by Step
Start by filling a large pot with water, adding a generous pinch of salt, and bringing it to a rolling boil. While you wait, break the cauliflower into uniform florets—this ensures even cooking. Once boiling, drop the florets in, cover, and let them steam for about 8‑10 minutes until they’re fork‑tender. You’ll know they’re ready when a fork slides in with barely any resistance, and the scent of sweet, vegetal steam fills the kitchen. This is the moment of truth; don’t overcook, or you’ll end up with a watery mush.
While the cauliflower cooks, heat 2 tablespoons of olive oil in a small skillet over medium heat. Add the minced garlic, stirring constantly. You’ll hear a gentle sizzle that signals the garlic is releasing its aromatic oils. Cook for just 30 seconds to a minute—watch closely, because the moment it turns golden, it’s done. This step coats the garlic in oil, creating a flavor base that will cling to every cauliflower piece later. That sizzle when it hits the pan? Absolute perfection.
Drain the cauliflower thoroughly, letting it sit upside‑down in a colander for a minute to release excess moisture. This step is crucial—too much water will dilute the mash, making it soupy. Transfer the florets to a high‑speed immersion blender or food processor. Add the sautéed garlic (including the oil), ½ cup of low‑sodium vegetable broth, and ¼ cup of plain Greek yogurt. Pulse until the mixture is smooth, pausing to scrape down the sides. You’re aiming for a velvety texture that looks like traditional mash, not a chunky puree.
Season with salt and freshly cracked black pepper to taste. At this point, taste a spoonful; if the flavor feels flat, a pinch more salt or a dash of pepper can brighten it up. Remember, seasoning is your final chance to perfect the flavor before serving. If you love a herbaceous note, toss in a handful of chopped fresh chives or parsley now, letting their bright green specks swirl through the creamy base.
Transfer the mash to a serving bowl, smoothing the top with the back of a spoon. Drizzle a final teaspoon of olive oil over the surface; this creates a glossy finish that looks restaurant‑ready. If you’re feeling extra fancy, sprinkle a few more chives for color contrast. The visual cue of bright green against the creamy white makes the dish instantly appetizing.
Serve immediately while it’s warm and the aroma is at its peak. This is the part where you watch your guests' faces light up as they dig in. Pair it with roasted chicken, grilled salmon, or keep it as a stand‑alone comfort dish. The mash holds its shape beautifully, so you can spoon it onto plates without it sliding off.
And now the fun part: store any leftovers in an airtight container. When reheating, add a splash of water or extra broth and stir vigorously; the mash will return to its silky glory. This final tip ensures you never waste any of that deliciousness.
Insider Tricks for Flawless Results
The Temperature Rule Nobody Follows
Never blend hot cauliflower directly in a cold processor; the temperature shock can cause the blades to seize and the mash to become gummy. Let the cauliflower cool just enough to handle—about 80°F—before blending. This subtle cooling keeps the texture light and airy, preventing the dreaded “gloppy” feeling. A friend once tried blending piping‑hot florets and ended up with a lumpy mess that never recovered.
Why Your Nose Knows Best
Trust your sense of smell more than a timer when sautéing garlic. The moment you detect a sweet, nutty aroma, the garlic is perfectly golden. Overcooking turns it bitter, which can ruin the entire flavor profile. If you’re unsure, turn off the heat a few seconds early—the residual heat will finish the job without burning.
The 5‑Minute Rest That Changes Everything
After blending, let the mash rest for five minutes before serving. This short pause allows the flavors to meld, and the starches to settle, resulting in a smoother mouthfeel. It’s like letting a good wine breathe; the difference is subtle but noticeable. Skipping this rest often leads to a mash that feels slightly “raw” on the palate.
Seasoning Layer‑by‑Layer
Season in stages: a pinch of salt during the boiling, a dash after blending, and a final sprinkle before serving. Each layer builds depth, ensuring the seasoning is evenly distributed. If you only season at the end, the salt can sit on the surface, creating pockets of saltiness. This layered approach guarantees balanced flavor throughout.
Reheat Like a Pro
When reheating, use a low‑heat stovetop method with a splash of broth or water, stirring constantly. Microwaving can cause uneven heating, turning the mash rubbery. The added liquid creates steam, reviving the silky texture without diluting flavor. This trick saved my leftovers from becoming a dry, sad side dish.
Creative Twists and Variations
This recipe is a playground. Here are some of my favorite ways to switch things up:
Cheesy Cauliflower Mash
Stir in ½ cup of shredded sharp cheddar during the final mixing stage. The cheese melts into the warm mash, creating a gooey, indulgent texture that even cheese lovers will adore. Top with a sprinkle of extra cheddar for a golden crust.
Spicy Chipotle Kick
Blend in one chipotle pepper in adobo sauce for a smoky heat. The smoky undertone pairs beautifully with the natural sweetness of cauliflower, making it a perfect side for Mexican‑inspired meals. Adjust the amount based on your tolerance for spice.
Herb‑Infused Delight
Swap the chives for a mix of fresh rosemary and thyme, finely chopped. The herbaceous notes add an earthy depth that complements roasted meats wonderfully. A drizzle of herb‑infused olive oil on top elevates the presentation.
Vegan Coconut Cream Version
Replace Greek yogurt with ¼ cup of full‑fat coconut cream and use a splash of lime juice for brightness. This creates a tropical twist that’s dairy‑free yet luxuriously creamy. Garnish with toasted coconut flakes for crunch.
Parmesan‑Pistachio Crunch
Fold in ¼ cup of toasted pistachios and 2 tablespoons of grated Parmesan just before serving. The nuts add a surprising crunch while the Parmesan contributes a salty umami punch. It’s a texture adventure that keeps diners guessing.
Storing and Bringing It Back to Life
Fridge Storage
Transfer the mash to an airtight container and refrigerate for up to 4 days. A thin layer of olive oil on top prevents a skin from forming. When ready to eat, simply reheat on the stovetop with a splash of broth.
Freezer Friendly
Portion the mash into freezer‑safe bags, flattening it for even freezing. It will keep for up to 3 months. Thaw overnight in the fridge, then reheat gently, adding a tablespoon of water to revive the silky texture.
Best Reheating Method
For the fluffiest reheated mash, use a skillet over low heat, stirring constantly, and add a tiny splash of water or broth. This creates steam that lifts the mash back to its original creaminess. Avoid microwaving at high power; it can make the mash rubbery.