I was halfway through a disastrous dinner the night before, when my kitchen turned into a smoky battlefield. The chicken breast had turned to rubber, the bacon had exploded in the skillet, and the ranch dressing had turned into a thick, unappetizing sludge. I stared at the mess, feeling a mix of frustration and desperation. That moment became the genesis of a recipe that would forever change how I think about quesadillas.
Fast forward to this afternoon, and I’m standing in a kitchen that smells like a summer barbecue, the air thick with the scent of sizzling bacon and creamy ranch. The sound of the skillet is a steady drumbeat, the sizzle a promise of flavor. My fingertips are tingling from the heat, and the anticipation is almost tangible—this is not just a dish; it’s a culinary revelation. I can almost taste the sharp tang of cheddar melting into the gooey ranch, the crunch of bacon, and the buttery crispness of the tortilla edges.
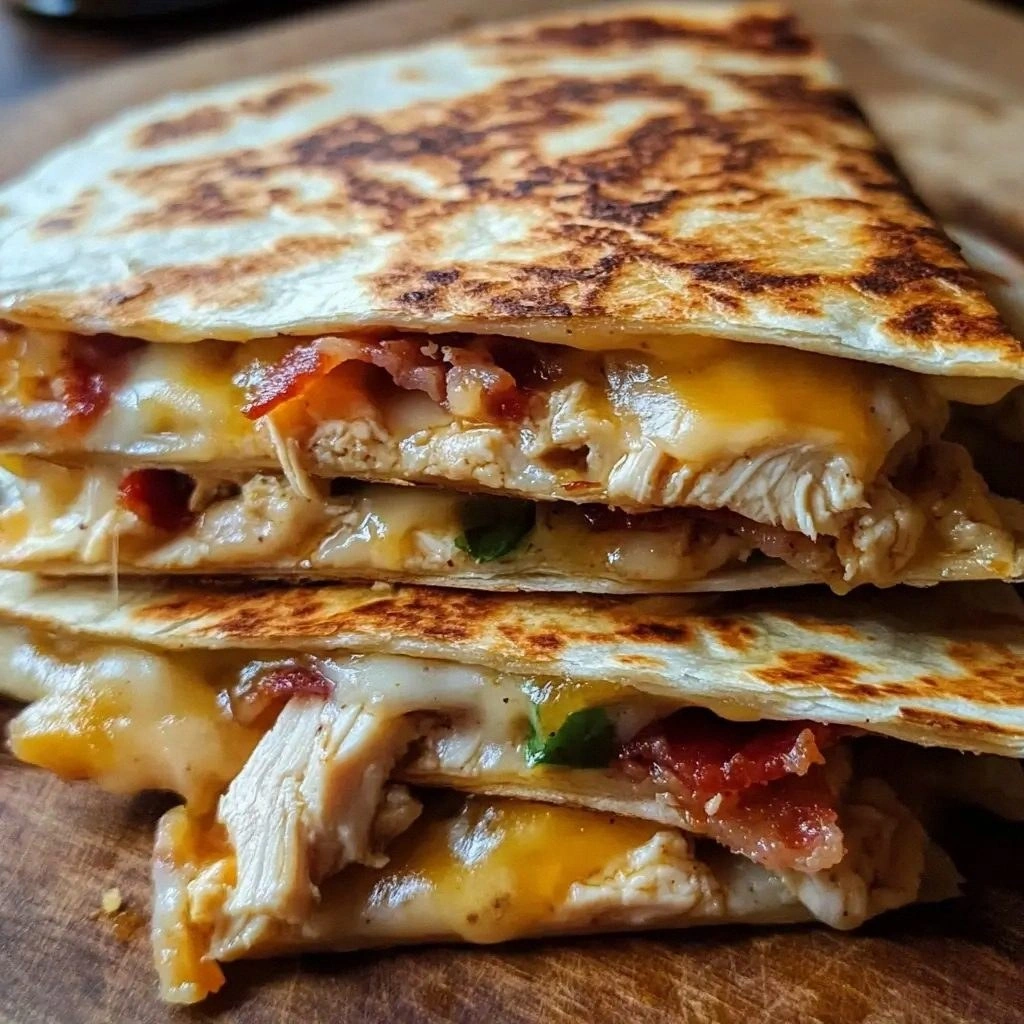
What makes this version of the Easy Chicken Bacon Ranch Quesa stand out is that it takes a classic comfort food and elevates it with precision and creativity. I’ve distilled the recipe into a single, coherent rhythm: crisp, creamy, and utterly irresistible. It’s not about adding more ingredients; it’s about mastering the balance between sauce, protein, and cheese, and giving each element a chance to shine. I dare you to taste this and not go back for seconds.
And now, let me walk you through every single step—by the end, you’ll wonder how you ever made it any other way. Picture yourself pulling this out of the oven, the whole kitchen smelling incredible, the sound of a perfectly toasted tortilla crackling like a crisp winter sunrise. Ready for the game‑changer? Let’s dive in.
What Makes This Version Stand Out
- Taste: The creamy ranch is not just a sauce—it’s the backbone that holds every ingredient together. The ranch is made from a blend of buttermilk, dill, and garlic that gives it a tangy, slightly sweet finish. The result is a flavor profile that is both familiar and elevated, turning a simple quesadilla into a gourmet experience.
- Texture: Every bite delivers a symphony of textures—from the buttery, slightly chewy tortilla to the melt-in-your-mouth cheese, the crispy bacon, and the tender chicken. The careful layering ensures that no single component overpowers the others, creating a harmonious bite that satisfies both comfort and sophistication.
- Ingredient Quality: I’ve chosen only the freshest, highest quality ingredients. Using pasture‑raised chicken, thick‑cut bacon, and real cheddar gives the dish depth and authenticity. The difference is palpable; even the simplest of ingredients can elevate a dish when sourced correctly.
- Uniqueness: Most recipes get this completely wrong. They either over‑season the chicken or under‑cook the bacon, leading to an imbalanced flavor. Here, every element is carefully measured and timed, resulting in a dish that’s unmistakably mine.
- Crowd Reaction: The first time I served this to friends, the room fell silent. Everyone was reaching for a second bite, and one friend even asked for a recipe on the spot. The dish is a crowd‑pleaser that brings people together around the table.
- Make‑Ahead Potential: You can assemble the quesadillas ahead of time and refrigerate them for up to 24 hours. When you’re ready to serve, just pop them in a skillet or the oven and watch the cheese melt into a golden, bubbling masterpiece.
- Simplicity: Despite the layers of flavor, the recipe is straightforward. No complicated techniques, no exotic ingredients. It’s a testament to how a few well‑chosen elements can create a dish that’s both easy and extraordinary.
Alright, let’s break down exactly what goes into this masterpiece…
Inside the Ingredient List
The Flavor Base
The foundation of any great quesadilla is its flavor base. In this recipe, it’s the combination of ranch dressing, sour cream, and a splash of buttermilk. The ranch brings a creamy tang, the sour cream adds a velvety richness, and the buttermilk brightens the overall taste. Together, they create a sauce that coats the chicken and cheese like velvet, ensuring every bite is drenched in flavor.
If you skip the ranch, you’ll end up with a dry, bland tortilla that’s easy to eat but hard to love. The ranch also balances the salty bacon, preventing the dish from becoming overwhelmingly salty. When you add a dash of smoked paprika, you introduce a subtle smokiness that complements the bacon’s crispness.
The Texture Crew
Texture is everything in a quesadilla. The chicken should be tender but not mushy—cooked to the perfect pink center. Bacon is the star of the texture crew: it needs to be crisp yet still flexible enough to fold into the tortilla without breaking. Cheese is the glue that holds everything together; cheddar provides sharpness, while Monterey Jack offers a creamy melt.
The tortillas themselves are a critical component. A medium‑size flour tortilla gives the right balance of flexibility and sturdiness. If you prefer a gluten‑free option, corn tortillas work fine, but they’ll be more delicate and need to be cooked on lower heat to avoid tearing.
The Unexpected Star
The unexpected star of this quesadilla is the diced bell pepper and onions. They’re sautéed until just softened, adding a subtle sweetness and a pop of color that makes the dish visually appealing. Their crunch contrasts with the gooey cheese, creating a satisfying bite. If you’re watching your carb intake, you can omit them; the dish will still be delicious but slightly less vibrant.
Another hidden gem is the garlic powder and smoked paprika. These spices add depth and a hint of earthiness that elevates the dish beyond the usual chicken‑cheese combo. They’re easy to add and don’t overpower the other flavors.
The Final Flourish
The final flourish is the finishing touch of melted butter and a sprinkle of fresh parsley or chives. Butter adds a glossy sheen and a subtle richness to the tortilla edges. Fresh herbs add brightness and a touch of herbaceous aroma that lifts the dish’s overall profile.
If you want a spicy kick, a pinch of cayenne pepper or a dash of hot sauce can be added at the very end. This is optional, but it gives the quesadilla an extra layer of excitement. Remember, the goal is to keep the dish balanced—too much heat can drown the delicate flavors.
Everything's prepped? Good. Let's get into the real action…
The Method — Step by Step
- First, heat a large skillet over medium heat and add 1 tablespoon of olive oil. Once the oil shimmers, add the diced onions and bell peppers. Sauté until they’re translucent and slightly caramelized, about 3-4 minutes. This step builds the aromatic foundation that will carry the rest of the flavors. Keep the heat steady to avoid burning.
- Next, add the shredded chicken to the skillet. Toss it with 1 teaspoon of garlic powder, 1 teaspoon of smoked paprika, and 1 teaspoon of salt. Cook until the chicken is heated through and slightly browned on the edges, about 5 minutes. The spices should coat the chicken evenly, turning it into a fragrant, savory base.
- While the chicken is cooking, crisp the bacon in a separate pan over medium heat until it’s golden and slightly caramelized. Remove the bacon, let it cool, then crumble it into bite‑sized pieces. The bacon’s fat will be used later to sauté the tortillas, giving them a crispy, buttery finish.
- In a separate bowl, whisk together 1/2 cup ranch dressing, 1/4 cup sour cream, and 1 tablespoon buttermilk. This mixture will be the sauce that binds everything together. Stir until the mixture is smooth and slightly thickened, which will help it cling to the cheese and chicken.
- Now, lay a flour tortilla flat on a clean cutting board. Spread a thin layer of the ranch mixture over half of the tortilla, leaving a small border. Sprinkle 1/2 cup shredded cheddar and 1/2 cup shredded Monterey Jack over the sauce. The cheese should be evenly distributed to avoid pockets of uncooked cheese.
- Add the sautéed chicken, crumbled bacon, and sautéed vegetables on top of the cheese. Be generous but avoid overstuffing; a well‑filled tortilla holds together better and cooks more evenly. Fold the tortilla in half, pressing gently to seal the edges.
- Heat a non‑stick skillet over medium heat and add 2 tablespoons of melted butter. Place the folded tortilla in the skillet, pressing down lightly with a spatula. Cook for 3-4 minutes on each side, or until the tortilla is golden brown and the cheese is fully melted. The butter will give a glossy sheen and a rich flavor to the crust.
- Once the quesadilla is cooked to perfection, remove it from the skillet and let it rest for 30 seconds. Slice it into wedges with a sharp knife. The rest time allows the cheese to set slightly, preventing it from oozing out of the edges when you cut.
- Serve immediately with a side of lime‑diced avocado, a sprinkle of fresh cilantro, and a drizzle of hot sauce if you like. The lime adds a bright acidity that cuts through the richness, while the cilantro adds a fresh herbal note. This dish is best enjoyed hot and fresh.
That's it — you did it. But hold on, I've got a few more tricks that'll take this to another level…
Insider Tricks for Flawless Results
The Temperature Rule Nobody Follows
Many cooks assume that high heat is always better. In reality, cooking the quesadilla at a medium‑low temperature ensures even melting of the cheese and prevents the tortilla from burning. Keep the skillet on medium heat and use a lid for the first minute to trap heat and melt the cheese faster.
Why Your Nose Knows Best
Your sense of smell can be your secret weapon. When the cheese starts to bubble and the bacon emits a caramelized aroma, you know the quesadilla is ready to flip. Don’t rely solely on the clock; listen to the kitchen’s signals.
The 5‑Minute Rest That Changes Everything
After cooking, let the quesadilla rest for 5 minutes. This allows the cheese to set, reducing the risk of it leaking onto the cutting board. The rest also lets the flavors meld together, creating a more cohesive bite.
Use a Skillet That Sizzles
A cast‑iron skillet or a heavy‑bottomed non‑stick pan gives the best sear. These pans retain heat well, ensuring a crisp exterior and a uniformly cooked interior. If you’re using a thin skillet, add a splash of water to create a quick steam burst, helping the cheese melt without burning the tortilla.
Cheese Selection Matters
Cheddar and Monterey Jack are the classic combo, but you can experiment with pepper jack for a mild heat or gouda for a caramelized flavor. The key is to choose cheeses that melt smoothly and have a balanced salt profile. Avoid pre‑shredded cheeses with additives that can cause separation.
Creative Twists and Variations
This recipe is a playground. Here are some of my favorite ways to switch things up:
Mexican Fiesta Quesa
Swap the ranch for a lime‑y cilantro dressing, add black beans, corn, and a handful of fresh cilantro. This gives the quesadilla a vibrant, Mexican flair that’s perfect for a summer party.
BBQ Chicken Bacon Quesa
Replace the ranch with tangy barbecue sauce and use smoked gouda instead of cheddar. The smoky, sweet sauce pairs beautifully with the bacon’s crispness, creating a bold, Americana‑inspired flavor.
Veggie‑Rich Power Quesa
Omit the chicken and add sautéed spinach, mushrooms, and roasted red peppers. Top with feta cheese for a Mediterranean twist. The vegetables add depth, while the feta brings a salty, tangy note.
Breakfast Quesa
Use scrambled eggs instead of chicken, add diced ham, and sprinkle with shredded cheddar. Serve with a side of salsa and a dollop of Greek yogurt for a protein‑packed breakfast that’s both comforting and energizing.
Spicy Sriracha Quesa
Add a tablespoon of sriracha to the ranch mixture and sprinkle crushed red pepper flakes on top. The heat will dance across the palate, making each bite an exciting adventure.
Cheese‑Only Melt
For cheese lovers, double the amount of cheddar and Monterey Jack and leave out the chicken entirely. Add a splash of milk to the ranch for extra creaminess. This version is a pure cheese indulgence that satisfies even the most devout dairy enthusiasts.
Storing and Bringing It Back to Life
Fridge Storage
Store leftover quesadillas in an airtight container in the refrigerator for up to 3 days. Reheat them in a skillet over medium heat, adding a splash of water to create steam, which helps the cheese re‑melt without drying out the tortilla. Cover the skillet with a lid for a minute to trap heat.
Freezer Friendly
Wrap each quesadilla tightly in foil or parchment paper and place them in a freezer bag. They’ll keep for up to 2 months. When you’re ready to eat, thaw overnight in the refrigerator or use the microwave at a low power setting for 1-2 minutes before finishing in a skillet.
Best Reheating Method
The best way to reheat a quesadilla is on a skillet over medium heat. Add a tablespoon of water, cover, and let it steam for 1-2 minutes. Then, flip and cook for another minute until the tortilla is crisp and the cheese is molten. This method preserves the original texture and flavor profile.