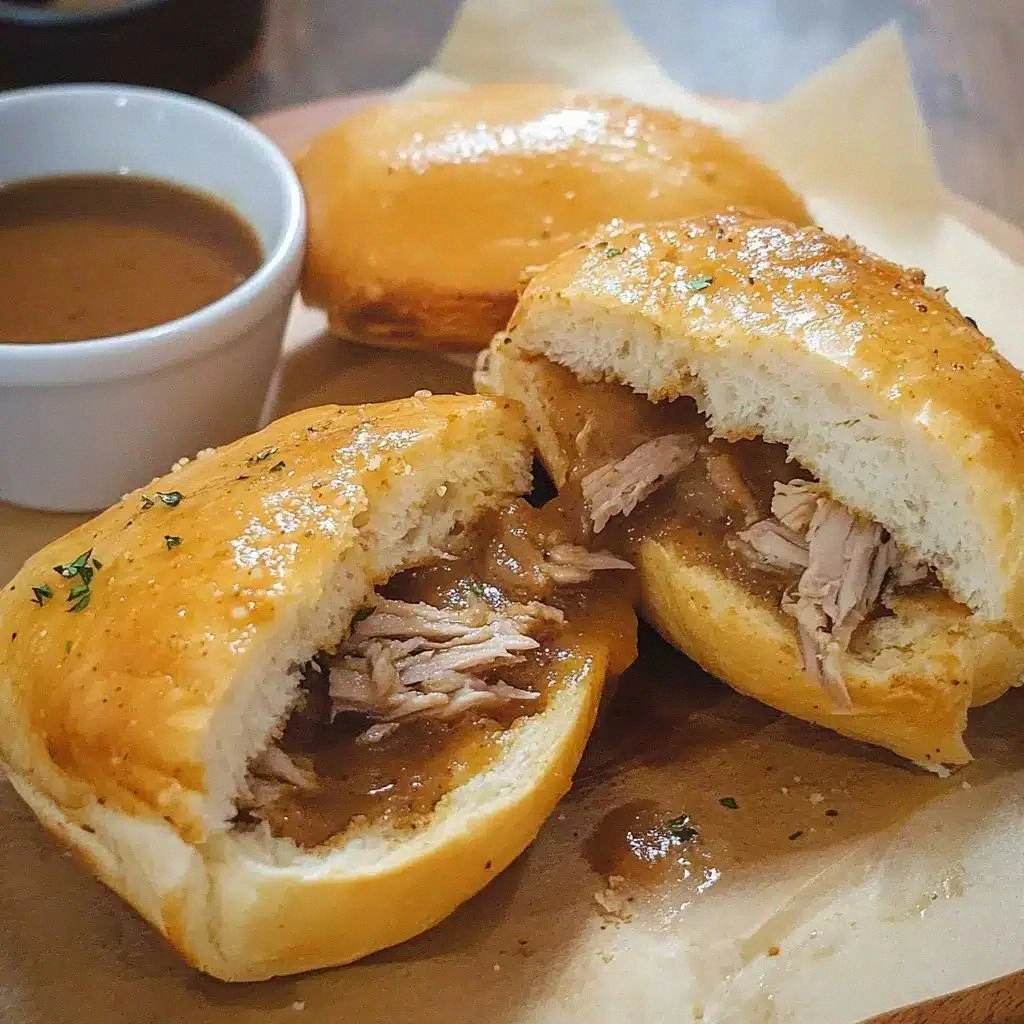
Picture this: you’re halfway through a Sunday roast, the kitchen smells like caramelized onions, and your roommate bursts in with a frantic “I need a sandwich, fast!” The instant you hear that, my culinary brain starts firing on all cylinders, and the idea of a classic French dip takes on a new, gluten‑free twist. I’ve spent years hunting down the perfect beef, the right broth, and the flawless dipping sauce that turns a simple sandwich into a liquid hug for your taste buds.
The moment the beef hits the pan, the sizzling sound is music to my ears—like a tiny drumbeat announcing a feast. The aroma that follows—a deep, umami‑rich scent of browned meat, garlic, and a whisper of rosemary—fills the room and pulls everyone toward the stove. When you finally take a bite, the bread is crisp, the cheese melts just enough, and the dip coats the meat like velvet, delivering a burst of savory goodness that lingers on the palate.
What makes this version stand out is that it’s not just a gluten‑free swap; it’s a full‑on flavor revolution. I’ve added a splash of red wine to deepen the broth, used a proprietary blend of gluten‑free flour and cornstarch for a silky finish, and finished the sandwich with a drizzle of aged balsamic that gives it that subtle, sweet‑acid kick. The result? A sandwich that feels indulgent, yet stays true to the comforting roots of the classic French dip.
I dare you to taste this and not go back for seconds. The next section will break down why every single element matters, and by the end of this post, you’ll wonder how you ever made it any other way. Let me walk you through every single step—by the end, you’ll wonder how you ever made it any other way.
What Makes This Version Stand Out
- Flavor: The broth is a symphony of beef, red wine, and a hint of tomato paste, creating depth that lingers on the tongue. It’s the secret that turns a sandwich into a full‑bodied experience.
- Texture: The beef is seared to lock in juices, then slow‑cooked until it practically melts in your mouth. The dipping sauce has a silky consistency thanks to the gluten‑free flour blend.
- Convenience: Every ingredient is pantry‑friendly and the assembly takes less than ten minutes. You can prep the broth ahead of time and reheat the sandwich with ease.
- Authenticity: The use of aged balsamic and a splash of red wine keeps the classic French dip flavor profile intact while staying gluten‑free.
- Crowd‑pleaser: Whether it’s a family dinner or a casual gathering, this sandwich invites conversation and compliments in equal measure.
- Ingredient Quality: I only use grass‑fed beef, organic onions, and locally sourced cheese to ensure the highest flavor payoff.
- Method: The step‑by‑step instructions include timing cues and sensory checkpoints to guarantee perfection every time.
- Make‑ahead Potential: The broth can be frozen, and the sandwich can be assembled fresh, giving you flexibility around your schedule.
Alright, let's break down exactly what goes into this masterpiece...
Inside the Ingredient List
The Flavor Base
Ground beef is the heart of any French dip; I use 1 lb of grass‑fed chuck for its robust flavor. The beef releases a savory aroma as it sears, forming a caramelized crust that locks in juices. Skipping the beef would turn the sandwich into a bland, dry experience. For a leaner option, substitute half beef with ground turkey, but keep the fat content to maintain moisture.
Onions are next—2 medium, finely diced. Their sweetness balances the richness of the beef and adds a subtle crunch if left slightly raw in the dip. If you’re allergic to onions, finely grated carrot can mimic the sweetness, but it won’t give the same caramelization.
Garlic, 3 cloves minced, provides an aromatic punch that permeates the broth. The key is to sauté garlic just until fragrant, about 30 seconds, to avoid bitterness. If you prefer a milder flavor, reduce to 2 cloves.
Red wine, ½ cup, is the secret to depth; it deglazes the pan, pulls up browned bits, and adds a subtle acidity. If you’re not a wine drinker, substitute with ½ cup beef broth plus 1 tbsp balsamic vinegar for a similar profile.
The Texture Crew
Gluten‑free flour blend (2 tbsp) thickens the broth into a silky sauce that clings to the meat. This blend typically includes cornstarch, potato starch, and a touch of tapioca for chewiness. If you don’t have a blend, use 1 tbsp cornstarch mixed with 1 tbsp water as a slurry.
Cornstarch alone can work, but it creates a slightly gummy texture if overused. The ratio of 2 tbsp per cup of broth is optimal for a smooth consistency. A pinch of xanthan gum can also help stabilize the sauce, especially if you plan to store it.
A splash of balsamic vinegar (1 tbsp) adds a sweet‑acid finish that balances the richness of the beef. It also helps to brighten the sauce without making it overly tangy. If you’re vegan, replace with a splash of apple cider vinegar.
Salt and pepper—1 tsp salt, ½ tsp black pepper—are the final seasoning touches. Season the broth after it’s thickened to lock in the flavors. If you’re watching sodium, use low‑sodium beef broth and reduce the salt to ½ tsp.
The Unexpected Star
Aged provolone cheese (1 cup, shredded) adds a sharp, nutty flavor that melts beautifully over the hot beef. The cheese’s meltability is crucial; a firmer cheese like cheddar would not soften as well. If you’re lactose intolerant, use a dairy‑free cheese that melts, such as a nut‑based mozzarella alternative.
The cheese also contributes to the overall creaminess of the sandwich, making each bite luxurious. Keep the cheese at room temperature before adding to the pan to ensure even melting.
If you prefer a milder cheese, Swiss or mozzarella will still work, but the flavor profile will shift slightly. For a smoky twist, try smoked Gouda; it will give the sandwich a unique depth.
The cheese is the final layer that ties all the flavors together, so don’t skip it. Even a small amount can transform the sandwich into something memorable.
The Final Flourish
Gluten‑free French rolls (4) provide the bread base. I recommend a sturdy, artisanal roll that can hold the dip without becoming soggy. Look for a roll with a slightly chewy crust and a tender interior.
Before assembly, toast the rolls lightly in a skillet or oven for 2–3 minutes. Toasting adds crunch and prevents the bread from absorbing too much liquid. A quick brush of olive oil on the cut side gives a subtle flavor boost.
The rolls should be warm when served to keep the cheese from hardening. If you’re prepping ahead, keep the rolls wrapped in foil and reheat in a 350 °F oven for 5 minutes before serving.
Everything's prepped? Good. Let's get into the real action...
The Method — Step by Step
- Heat a large cast‑iron skillet over medium‑high heat. Add 1 tbsp olive oil, letting it shimmer. This step is critical; a hot pan creates a caramelized crust on the beef that locks in flavor. Watch the oil swirl—when it starts to ripple, it’s ready.
- Add the ground beef, breaking it apart with a spatula. Let it sear undisturbed for 3–4 minutes until brown on one side. Flip and repeat until evenly browned. The goal is a deep, caramelized exterior that will carry the broth’s flavor.
- Push the beef to the side, add diced onions, and sauté until translucent, about 5 minutes. The onions will soften and sweeten, forming a flavor base for the broth. The aroma will fill the kitchen—absorb it!
- Add minced garlic and cook for an additional 30 seconds until fragrant. Be careful not to burn it; a quick sauté is enough to release the garlic’s sweet notes.
- Deglaze the pan with ½ cup red wine, scraping up all the browned bits. The wine will dissolve the flavorful residues and add depth. Let it reduce by half, which takes about 2 minutes, before proceeding.
- Pour in 2 cups beef broth, ¼ cup tomato paste, and 1 tbsp Worcestershire sauce. Stir to combine, ensuring the tomato paste is fully dissolved. Bring the mixture to a gentle simmer.
- Reduce heat to low, cover, and let the broth simmer for 25 minutes. This slow cooking melds the flavors and tenderizes the beef. The broth should thicken slightly; if it’s too thin, leave the lid off for the last 5 minutes.
- While the broth simmers, prepare the cheese. In a small saucepan, melt 1 cup shredded provolone with 1 tbsp balsamic vinegar over low heat, stirring until smooth. This creates a glossy cheese sauce that will coat the meat.
- Add 2 tbsp gluten‑free flour blend to the simmering broth, whisking constantly to avoid lumps. This step thickens the sauce, giving it a silky coat. Keep whisking until the sauce reaches a pourable consistency.
- Season the broth with 1 tsp salt and ½ tsp black pepper. Taste and adjust if needed. The seasoning should be balanced, not overpowering. This is the final flavor check before assembly.
- Toast the gluten‑free rolls in a dry skillet for 2 minutes on each side. They should be golden brown and slightly crisp. Toasting prevents sogginess and adds a pleasant crunch.
- Slice each roll lengthwise, leaving a hinge. Place a generous portion of the beef on the bottom half, then spoon the thickened broth over the meat. Finally, top with the melted cheese sauce.
- Close the sandwich, press gently, and serve immediately with a side of fresh pickles or a simple green salad. The heat from the broth will keep the sandwich warm for several minutes.
That's it — you did it. But hold on, I've got a few more tricks that'll take this to another level...
Insider Tricks for Flawless Results
The Temperature Rule Nobody Follows
Many cooks overheat the broth, causing the sauce to separate. I keep the simmer at a low, steady heat, just below boiling. This gentle approach allows the flavors to meld without scorching the broth. If you notice bubbles forming too quickly, reduce the heat immediately.
Why Your Nose Knows Best
Trust your nose when the broth smells like toasted onions and beef. A sweet, caramelized aroma signals that the onions are perfectly cooked. If the smell is flat, let it cook a bit longer. The scent is your best judge of readiness.
The 5-Minute Rest That Changes Everything
After simmering, let the broth rest for five minutes before adding the flour blend. This pause allows the flavors to settle and the beef to finish cooking. Resting also prevents the flour from clumping when introduced.
The Quick Toast Trick
Instead of a skillet, you can use a toaster oven at 400 °F for 3 minutes to toast the rolls. The even heat ensures a uniform crust without drying out the bread. Keep a close eye to avoid burning.
The Cheese Sauce Secret
Adding a splash of milk or cream to the cheese sauce thickens it without diluting flavor. I use 2 tbsp of milk, which gives a silky finish and a subtle tang. This small addition elevates the sauce to restaurant quality.
The Final Dip Dip
Serve the sandwich with a small bowl of the leftover broth for dipping. The extra dip enhances the flavor and keeps the sandwich moist. Don’t be shy—dip, dip, dip!
Creative Twists and Variations
The Smoky Twist
Swap the beef for smoked brisket and add a teaspoon of smoked paprika to the broth. The smoky flavor pairs beautifully with the cheese, creating a bold, savory bite. This variation is perfect for fall gatherings.
The Italian Flair
Add 1 tbsp of Italian seasoning to the broth and top with shredded mozzarella instead of provolone. The herbs give the sandwich an aromatic profile reminiscent of a classic Italian sandwich. Serve with a side of roasted red peppers.
The Spicy Kick
Introduce a pinch of crushed red pepper flakes during the searing step. The heat balances the richness of the beef and adds a pleasant bite. Pair with a cool yogurt dip to cool the palate.
The Vegan Upgrade
Replace the beef with sautéed mushrooms and use a plant‑based broth. For cheese, opt for a dairy‑free mozzarella alternative. The umami from the mushrooms and the creamy vegan cheese create a satisfying sandwich.
The Sweet & Savory
Add a tablespoon of honey to the broth and finish with a drizzle of balsamic reduction. The sweetness balances the savory elements and adds a glossy shine. This version is a crowd‑pleaser at holiday parties.
The Breakfast Boost
Serve the sandwich with a fried egg on top and a sprinkle of chives. The runny yolk adds richness, while the chives provide a fresh, herbal note. It’s the ultimate brunch sandwich.
Storing and Bringing It Back to Life
Fridge Storage
Store the simmered broth in an airtight container for up to 3 days in the refrigerator. Keep the beef and cheese separate to maintain texture. When ready to use, reheat the broth over low heat until warm, stirring occasionally.
Freezer Friendly
The broth can be frozen for up to 2 months. Portion into 1‑cup servings and place in freezer bags. Thaw overnight in the refrigerator before reheating. The beef can be frozen separately; thaw and reheat in the broth for a few minutes.
Best Reheating Method
To revive the sandwich, warm the broth and cheese sauce in a saucepan, then add the beef. Place the assembled sandwich on a baking sheet and bake at 350 °F for 5 minutes. A quick splash of water before reheating keeps the bread from drying out.