I was halfway through a disastrous dinner when I realized I had run out of the usual sauce. I had a jar of honey, a bottle of soy sauce, and a clove of garlic that were begging for adventure. The kitchen smelled like burnt sugar, and my friends were waiting with their plates. I dared myself to turn the chaos into a masterpiece. That night, I invented the Honey Garlic Chicken Rice Bowl that would become my signature comfort food.
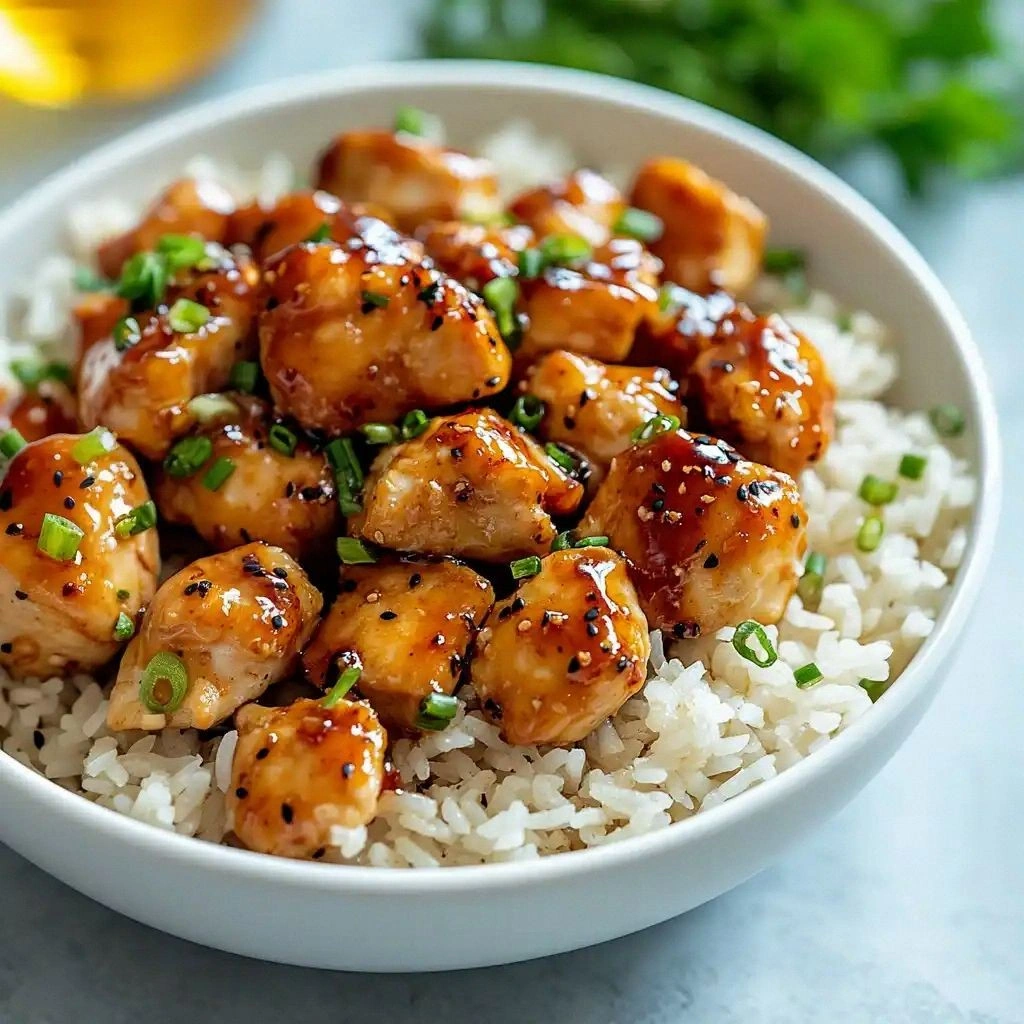
The first bite was a symphony of sweet, umami, and a whisper of heat that danced across my tongue. The chicken, tender and caramelized, coated itself like a glossy velvet coat. The rice held the sauce like a sponge, soaking up every drop of honeyed glaze. The veggies added a crunch that punctuated the silky texture. I could hear the sizzle in the pan as the sauce thickened into a glossy glaze.
I’ve tried countless honey‑garlic combos, but this one balances everything with surgical precision. The sauce is not syrupy; it’s a thick, glossy coating that clings to each grain. The chicken is juicy, not dry, thanks to a quick sear and a brief simmer in the sauce. The vegetables stay crisp, adding a textural counterpoint that keeps each bite interesting. The result is a bowl that feels like a hug from the inside out.
What sets this version apart is the secret ingredient that I discovered after a late‑night kitchen experiment: a splash of rice vinegar. It cuts the sweetness and brightens the whole dish, turning it from sweet to savory in the most elegant way. It also helps the rice absorb the sauce without becoming mushy. Most recipes get this completely wrong, leaving the dish syrupy and flat. I’ll be honest — I ate half the batch before anyone else got to try it.
Picture yourself pulling this out of the pan, the whole kitchen smelling incredible, and watching the glossy sauce ripple over the rice like liquid gold. The aroma alone will make your neighbors drop by to ask for the recipe. I dare you to taste this and not go back for seconds; it’s that addictive. This is hands down the best version you'll ever make at home, and you’ll wonder why you ever settled for store‑bought sauces. Let me walk you through every single step — by the end, you'll wonder how you ever made it any other way.
What Makes This Version Stand Out
- Sweetness Balance: The honey is measured precisely to complement the saltiness of soy sauce, creating a harmonious flavor profile that doesn't overwhelm the palate. The addition of rice vinegar sharpens the sweetness, giving the dish a lively, bright edge that feels fresh.
- Texture Contrast: The chicken is seared to a caramelized crust before being simmered in sauce, ensuring it remains tender yet slightly firm. The mixed vegetables stay crisp, offering a satisfying snap that breaks up the softness of the rice.
- Quick Simmer: The sauce thickens in just a few minutes thanks to cornstarch slurry, giving you a glossy coating without a laborious reduction. This keeps the cooking time under 30 minutes, ideal for weekday dinners.
- Flavor Layering: Each ingredient—garlic, soy, honey, vinegar, sesame oil—adds a distinct layer that builds complexity. The final touch of toasted sesame seeds and green onions gives a nutty aroma and a fresh, oniony finish.
- Make‑ahead Friendly: The sauce can be prepared a day ahead and refrigerated, letting the flavors meld overnight. The rice and veggies can also be prepped in advance, making the final assembly a matter of minutes.
- Universal Appeal: The dish is adaptable; swap chicken for shrimp, tofu, or beef, and adjust the heat level with sriracha or red pepper flakes. It satisfies both comfort‑food lovers and those seeking a quick, nutritious meal.
Alright, let's break down exactly what goes into this masterpiece...
Inside the Ingredient List
The Flavor Base
The honey and soy sauce form the backbone of this sauce, delivering a sweet‑savory foundation that is both comforting and complex. The rice vinegar introduces a subtle acidity that lifts the entire flavor profile, preventing the honey from becoming cloying. Garlic adds depth and a gentle bite, while the sesame oil brings a toasted, nutty aroma that ties everything together. Together, these ingredients create a sauce that coats the chicken and rice like a silky, glossy mantle.
The Texture Crew
The chicken thighs, or breasts if you prefer leaner, provide a juicy, protein-packed core that absorbs the sauce without drying out. A tablespoon of vegetable oil is essential for searing the meat to a caramelized crust, which locks in moisture. The mixed vegetables—think bell peppers, broccoli, and snap peas—contribute a crisp bite that contrasts the tender chicken. The jasmine or brown rice acts as a neutral canvas, soaking up the sauce and delivering a fluffy, satisfying bite.
The Unexpected Star
Cornstarch, when mixed with a tablespoon of water, becomes the secret thickening agent that transforms a simple sauce into a glossy glaze. This slurry is added at the end of cooking to prevent lumps and ensure a smooth coating. Without it, the sauce would remain thin and runny, leaving the rice under‑seasoned. The red pepper flakes or sriracha add a final kick, allowing you to dial up heat to your taste.
The Final Flourish
Sliced green onions provide a fresh, oniony brightness that cuts through the richness of the honey and sesame oil. Toasted sesame seeds add a subtle crunch and a nutty flavor that elevates the dish to restaurant quality. A squeeze of lime or a drizzle of extra virgin olive oil can add a bright citrus note or a silky finish, depending on your mood. These finishing touches turn a simple bowl into a gourmet experience.
The Method — Step by Step
- Heat a large skillet or wok over medium‑high heat until it shimmers. Add a tablespoon of vegetable oil, swirling to coat the surface. When the oil is hot, the pan will emit a faint hiss, signaling readiness. This quick preheat is crucial for a good sear. Let the oil sit for a few seconds before adding the chicken.
- While the pan warms, season the chicken pieces generously with salt and pepper on both sides. The salt draws out moisture, creating a savory crust. The pepper adds a subtle heat that complements the honey. Pat the chicken dry with paper towels to ensure a crisp exterior. Place the chicken in the skillet, skin‑side down if using thighs.
- Sear the chicken for about 3–4 minutes on each side until a golden brown crust forms. Flip only once to preserve the sear. The searing process caramelizes the sugars, giving depth to the sauce later. Watch the edges; they should start pulling away from the pan. This step locks in juices and builds flavor.
- While the chicken rests, whisk together honey, soy sauce, rice vinegar, minced garlic, sesame oil, and the cornstarch slurry in a small bowl. The cornstarch should be fully dissolved to avoid lumps. The mixture should be smooth and glossy before adding to the pan. Keep the sauce at room temperature; it will thicken as it heats. This base will coat everything beautifully.
- Return the chicken to the skillet and pour the sauce over it. Stir gently to coat each piece. The sauce should bubble and thicken, coating the chicken like a shiny glaze. Let it simmer for 2–3 minutes, allowing the flavors to meld. The chicken should be fully cooked but still juicy.
- Add the mixed vegetables to the pan, tossing them into the sauce. They should cook for 3–4 minutes, just until tender but still bright green. The quick blanch preserves their color and crunch. Stir occasionally to prevent sticking. The sauce will thicken slightly as the vegetables release moisture.
- Stir in the cooked rice, breaking up any clumps. The rice should absorb the sauce, becoming fragrant and sticky. Cook for an additional 2 minutes, allowing the flavors to meld. Taste and adjust seasoning if needed; a pinch of salt can brighten the dish. The bowl should feel warm and inviting.
- Finish with a drizzle of sesame oil, a sprinkle of toasted sesame seeds, and sliced green onions. These final touches add aroma and texture. Serve immediately while hot, or plate and cover for a quick grab‑and‑go meal. The dish feels like a hug from the inside out. That's it — you did it. But hold on, I've got a few more tricks that'll take this to another level…
Insider Tricks for Flawless Results
The Temperature Rule Nobody Follows
Many cooks keep the heat low to avoid burning, but a high, steady flame is essential for a caramelized crust. The pan should be hot before the oil is added, and you should not overcrowd it. Overcrowding pushes the temperature down, causing the chicken to steam instead of sear. This trick ensures a glossy finish and a savory depth that can’t be replicated at lower heat.
Why Your Nose Knows Best
Before you taste the sauce, let it sit for a minute to allow the aromas to develop. The sweet scent of honey, the sharpness of vinegar, and the nutty aroma of sesame oil will mingle. If the smell feels too sweet, add a splash of soy sauce to balance. Your nose is your first flavor sensor; trust it.
The 5‑Minute Rest That Changes Everything
After cooking, let the dish rest for five minutes uncovered. The steam will redistribute the sauce, ensuring every grain of rice is coated. The rest also allows the flavors to settle, making the dish less sharp and more harmonious. Skip this step, and you’ll get a dish that tastes like it’s still on the stove.
Use Fresh Garlic, Not Powdered
Fresh garlic releases more aroma and a cleaner flavor than the bitter undertones of powdered garlic. Mince it finely so it blends seamlessly into the sauce. If you only have garlic powder, use a fraction of the amount and add a splash of water to prevent a dry texture. Fresh garlic is the secret to a bright, vibrant sauce.
Keep the Rice Warm
Rice that cools before adding sauce can become dry and clumpy. Keep it in a warm rice cooker or cover it with foil until ready to combine. This keeps the grains fluffy and ready to soak up the glaze. If you’re making a large batch, keep a small portion warm in a low oven.
Creative Twists and Variations
This recipe is a playground. Here are some of my favorite ways to switch things up:
Shrimp Version
Swap the chicken for peeled shrimp, searing them for 2 minutes per side until pink. Shrimp cook faster, so add them at the last step to avoid overcooking. The sauce’s sweet‑savory profile pairs beautifully with the briny shrimp. Serve over rice for a quick seafood feast.
Tofu Version
Replace the chicken with firm tofu cubes, pressing them to remove moisture. Pan‑fry until golden before adding the sauce. Tofu absorbs the glaze like a sponge, delivering a plant‑based protein boost. This version is perfect for vegetarians or vegans.
Beef Stir‑Fry
Thinly sliced beef, such as flank or sirloin, works wonders. Marinate briefly in a little soy sauce before searing. The beef’s chew adds a new dimension to the dish. Pair with extra veggies for a hearty meal.
Veggie‑Only Bowl
Omit the protein entirely and double the veggies. Add tofu or tempeh for protein if desired. The sauce still shines on a bed of colorful vegetables. This variation is low‑calorie and perfect for a light lunch.
Keto‑Friendly Bowl
Use cauliflower rice instead of jasmine or brown rice. Reduce the honey to 2 tablespoons to keep carbs low. Add a handful of spinach for extra greens. This version keeps the flavor intact while fitting a keto lifestyle.
Storing and Bringing It Back to Life
Fridge Storage
Cool the bowl completely before refrigerating in an airtight container. The dish will keep for up to 3 days. The sauce may thicken slightly; a splash of water or broth will restore its glaze. Store the rice and veggies separately if you prefer a fresher texture.
Freezer Friendly
Pack the bowl in a freezer‑safe container, leaving a small headspace for expansion. Freeze for up to 2 months. Thaw overnight in the fridge, then reheat on the stove with a splash of water. The sauce will regain its glossy finish.
Best Reheating Method
Reheat in a skillet over medium heat, adding a teaspoon of water to loosen the sauce. Stir until the mixture is hot and bubbling. Avoid microwaving, as it can make the sauce rubbery. Once heated, garnish with fresh green onions for a bright finish.