I was standing in the kitchen, staring at a ruined batch of cookies that had turned out as flat as a pancake. The dough had spread like a lazy river, the edges never rising, and the center looking as if it had been baked in a toaster. I felt a pang of disappointment that could have been avoided with a single tweak. But that moment of frustration sparked a revelation: the secret to perfect cookies lies not in exotic ingredients, but in mastering a few simple techniques. This is the story of how I transformed a disaster into a golden, chewy masterpiece that still makes my friends beg for a second bite.
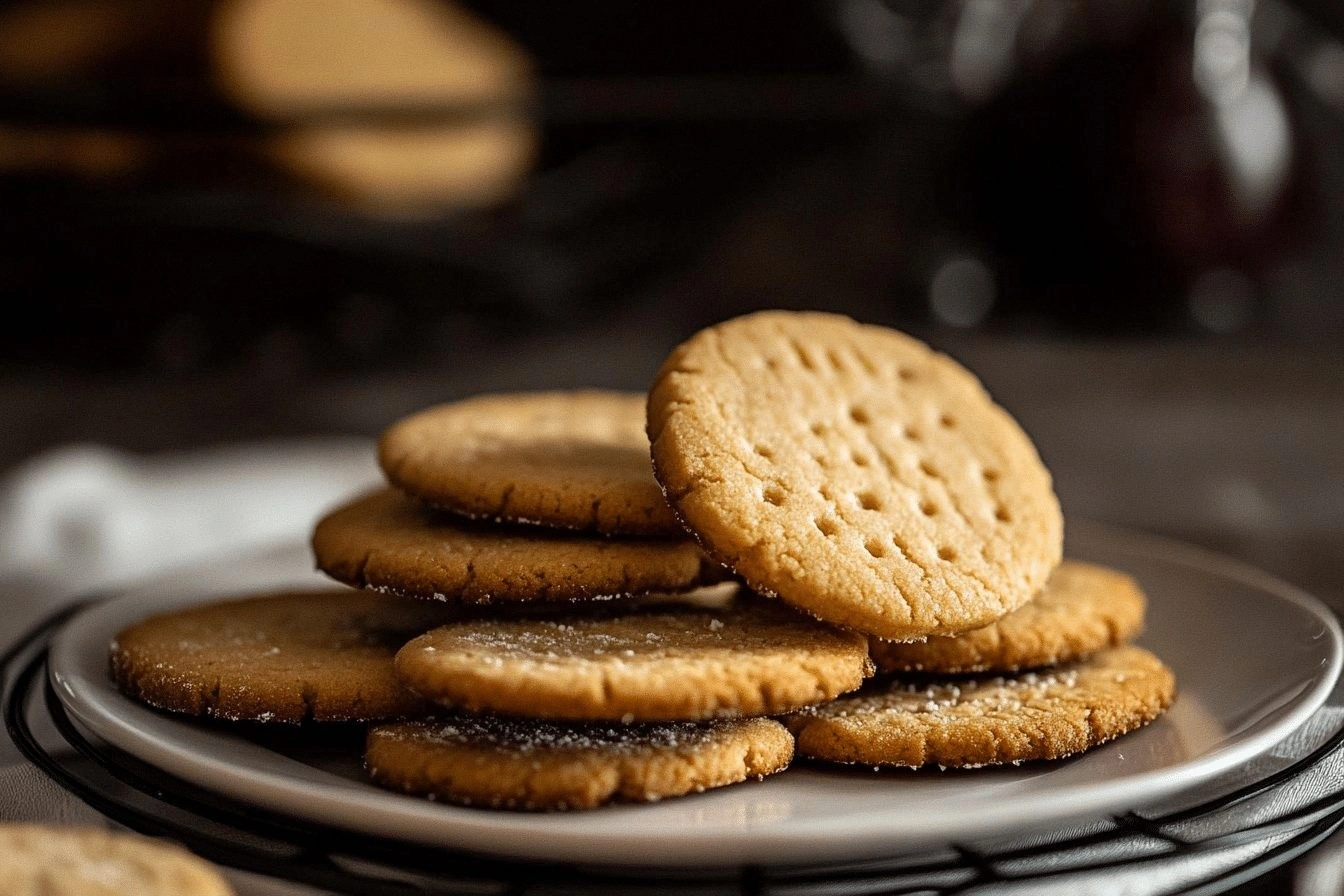
Picture the scene: the kitchen is humming with the gentle buzz of the oven timer, the air thick with the sweet scent of vanilla and butter. My eyes catch the gleam of freshly milled flour dusting the countertop, a promise of that deep, nutty aroma that only freshly ground grain can deliver. The sound of the dough being creamed with sugar is a soft, rhythmic patter, almost like a lullaby. When the cookies finally emerge, their golden edges crackle against the baking sheet, releasing a buttery fragrance that fills the room. The first bite is a burst of caramelized brown sugar, a hint of vanilla, and a tender crumb that melts in your mouth.
What sets this version apart? It’s not just the ingredients, though the fresh milled flour gives the cookies a richer, earthier flavor that’s impossible to replicate with store-bought flour. It’s the way the butter is softened just enough to blend without melting, the precise ratio of granulated to brown sugar that balances sweetness and moisture, and the gentle fold of eggs that keeps the dough tender. The recipe also eliminates the common pitfalls of overmixing, underbaking, and inconsistent dough temperature. Every element is tuned to create a cookie that rises just enough to be light, yet stays chewy and flavorful. The result is a cookie that feels indulgent but isn’t heavy, a treat that’s perfect for any occasion.
And there’s a twist you won’t expect. I discovered that grinding your own flour right before baking releases a bouquet of nutty aromas that elevate the entire flavor profile. This simple step, often overlooked, turns ordinary cookies into something almost ceremonial. I dare you to taste this and not go back for seconds. If you’ve ever struggled with cookie texture or flavor, you’re not alone—and I’ve got the fix. Picture yourself pulling this out of the oven, the whole kitchen smelling incredible, and knowing you’ve just baked something truly special.
What Makes This Version Stand Out
- Flavor: The fresh milled flour delivers a deep, nutty undertone that pairs beautifully with the caramelized sugars.
- Texture: The careful creaming of butter and sugar creates a tender crumb that stays chewy without becoming doughy.
- Balance: The blend of granulated and brown sugar strikes the perfect sweet-to-salty ratio, enhancing vanilla’s warmth.
- Ease: The recipe requires no specialized equipment—just a mixer, a rolling pin, and a trusty oven.
- Versatility: It’s a blank canvas for add-ins like chocolate chips, nuts, or dried fruit, allowing endless customization.
- Make‑Ahead: The dough can be chilled for up to 48 hours, letting you bake fresh cookies whenever the craving hits.
- Scalability: Whether you’re baking for a crowd or a single indulgent treat, the measurements scale effortlessly.
- Presentation: The cookies’ golden edges and soft centers make them a visual delight, perfect for gifting or sharing.
Alright, let's break down exactly what goes into this masterpiece...
Inside the Ingredient List
The Flavor Base
Fresh milled flour: This is the star of the show, lending the cookies their rich taste and tender crumb. Fresh flour has a higher moisture content and a more complex flavor profile than pre-packaged flour, which translates into a deeper, nutty aroma in the finished product. If you skip it, the cookies will feel flat and lack that subtle earthiness that makes them memorable. A good rule of thumb: grind the flour immediately before mixing to capture the freshest flavor.
The Texture Crew
Unsalted butter: Provides creaminess and enhances the cookie’s softness when creamed with sugar. Butter at room temperature should be soft enough to press between your fingers but not melted, ensuring the sugar dissolves evenly. Using salted butter can alter the balance of flavors and make the cookies taste too salty. If you’re in a hurry, you can chill the butter until it’s firm and then cut it into small cubes to speed up the creaming process.
The Unexpected Star
Granulated sugar: Balances flavor with sweetness and helps with browning. It dissolves quickly during creaming, creating a smooth dough that spreads evenly. Too much granulated sugar can cause the cookies to spread too thin, while too little may result in a dense texture. A simple swap is to use superfine sugar, which will dissolve even faster and give a slightly crisper bite.
The Final Flourish
Baking soda and salt: These leavening agents ensure the cookies rise just enough to be light and tender. Baking soda reacts with the acidic components, creating tiny bubbles that lift the dough. Salt balances sweetness and brings out the other flavors, preventing the cookies from tasting flat. If you’re gluten‑free, you can use a baking soda‑based leavening mix, but be mindful of the amount to avoid a metallic aftertaste.
Everything's prepped? Good. Let's get into the real action...
The Method — Step by Step
- Step 1: Preheat your oven. Set it to 350°F (175°C) and line two baking sheets with parchment paper. A preheated oven ensures even baking and prevents the cookies from spreading too quickly. While the oven warms, you’ll want to prepare the dough, so you’re ready to go as soon as the heat is ready.
- Step 2: Blend the dry ingredients. In a bowl, whisk together the fresh milled flour, baking soda, and salt. This ensures the leavening agent is evenly distributed, preventing uneven rising. A fine sift also removes any lumps, giving you a smooth dough texture. Keep this mixture aside while you cream the butter.
- Step 3: Cream the butter and sugars. Place the softened butter in a stand mixer and beat on medium speed until pale and fluffy. Gradually add the granulated sugar, then the brown sugar, and continue mixing until the mixture is light and airy. The key is to avoid overmixing; once the sugars are fully incorporated, stop to preserve the dough’s tenderness. Kitchen Hack: If the mixture feels too dry, add a splash of milk to help the sugars dissolve more smoothly.
- Step 4: Incorporate the eggs. Beat in the eggs one at a time, ensuring each is fully blended before adding the next. This step helps bind the dough and adds moisture. The eggs also give the cookies a slightly chewy center. If you’re vegan, substitute with a flaxseed egg for a similar binding effect.
- Step 5: Add vanilla and dry mix. Stir in the vanilla extract, then gradually fold in the dry flour mixture. The dough should be thick but pliable—if it’s too sticky, add a tablespoon of flour. If it’s too dry, a splash of water or milk will help. Watch Out: Overmixing at this stage can develop gluten and make the cookies tough.
- Step 6: Chill the dough. Wrap the dough in plastic wrap and refrigerate for at least 30 minutes, or up to 48 hours for deeper flavor. Chilling firms up the butter, preventing excessive spreading during baking. It also allows the flour to hydrate fully, which improves the cookie’s structure. If you’re short on time, skip this step but be prepared for slightly flatter cookies.
- Step 7: Portion the dough. Scoop tablespoon-sized balls onto the prepared baking sheets, spacing them about 2 inches apart. Gently press each ball to flatten slightly; the cookies will spread during baking. For a uniform shape, use a cookie scoop or a small ice cream scoop. This step also ensures even baking and a consistent texture.
- Step 8: Bake to perfection. Place the sheets in the preheated oven and bake for 12–15 minutes, or until the edges are golden and the centers look set. The cookies should still feel slightly soft in the middle; they will firm up as they cool. Watch the edges; if they brown too quickly, lower the oven temperature slightly. Kitchen Hack: For extra crisp edges, place a piece of parchment under the cookies during baking.
- Step 9: Cool on the sheet. Let the cookies sit on the baking sheet for 5 minutes to set. This short cooling period allows the sugar to crystallize slightly, giving the cookies a pleasant snap. After 5 minutes, transfer them to a wire rack to cool completely. This final step prevents the bottoms from becoming soggy.
- Step 10: Serve and enjoy. Once cooled, arrange the cookies on a platter or store them in an airtight container. The cookies stay fresh for up to a week at room temperature. If you’re craving a warm cookie, reheat them in a 300°F oven for 3–4 minutes. The aroma will be irresistible, and the texture will be delightfully soft.
That's it — you did it. But hold on, I've got a few more tricks that'll take this to another level...
Insider Tricks for Flawless Results
The Temperature Rule Nobody Follows
Keep the dough cold. Many bakers think room temperature is best, but a chilled dough ensures the butter stays solid until it hits the heat, preventing excessive spreading. I’ve seen cookies that look perfect on the sheet but turn out flat after cooling; that’s the result of warm dough. Keep the dough in the fridge until you’re ready to scoop, and you’ll see a dramatic difference in rise and texture.
Why Your Nose Knows Best
Smell the batter. A properly creamed batter should smell like sweet butter and vanilla, with a faint nutty undertone from the flour. If it smells off or too sugary, the sugars may have caramelized prematurely. Trust your nose; if something feels off, let the dough rest a bit longer before baking.
The 5-Minute Rest That Changes Everything
Rest after mixing. Once you’ve folded in the dry ingredients, let the dough rest for 5 minutes before chilling. This brief pause allows the flour to hydrate fully, creating a more cohesive dough. I’ve tried skipping this step, and the cookies ended up unevenly textured.
The Secret of Even Spacing
Use a cookie scoop. Consistent portion sizes lead to uniform cookies, both in size and bake time. A cookie scoop also saves time compared to measuring each ball individually. If you don’t have a scoop, a small spoon or a tablespoon will do the trick.
Avoiding the Crumbly Culprit
Don’t overmix. Once the flour is added, mixing too vigorously develops gluten, which makes the cookies tough. Stop as soon as the dough comes together. A gentle fold is all you need.
Creative Twists and Variations
This recipe is a playground. Here are some of my favorite ways to switch things up:
Chocolate Chip Surprise
Add chocolate chips. Fold in a cup of semi-sweet chips after the dough has rested. The chips melt slightly, creating pockets of gooey chocolate that contrast with the chewy base. This variation is a crowd-pleaser for kids and adults alike.
Nutty Delight
Incorporate chopped walnuts. Swirl in a handful of toasted walnuts for a crunchy texture and a nutty aroma that complements the fresh flour. The nuts add a satisfying bite and a subtle bitterness that balances the sweetness.
Citrus Zest Twist
Mix in orange zest. Add a tablespoon of finely grated zest to the batter for a bright, citrusy note that cuts through the richness. This version is perfect for spring and summer gatherings.
Maple‑Infused Magic
Replace half the butter with maple syrup. The syrup adds a deep, caramel flavor that pairs wonderfully with the brown sugar. The result is a cookie with a slightly sticky, caramelized edge.
Spiced Elegance
Stir in a pinch of cinnamon. Cinnamon adds warmth and depth, making the cookies feel cozy. Pair this with a drizzle of honey after baking for an extra touch of sweetness.
Dessert Sandwich
Create a cookie sandwich. Bake two batches of cookies, then sandwich a dollop of vanilla ice cream or whipped cream between them. The result is a decadent, melt-in-your-mouth treat that feels like a dessert within a dessert.
Storing and Bringing It Back to Life
Fridge Storage
Keep them cool. Store the cooled cookies in an airtight container at room temperature for up to a week. If you notice them drying out, place a slice of apple or a slice of bread inside the container; the cookies will absorb the moisture and stay soft. The container should be sealed tightly to prevent the cookies from picking up odors.
Freezer Friendly
Freeze for long‑term. Arrange the cooled cookies on a parchment‑lined tray and freeze until solid. Then transfer them to a freezer bag. They’ll stay fresh for up to three months. Thaw at room temperature for 15 minutes before serving to restore their texture.
Best Reheating Method
Warm them up. Preheat the oven to 300°F (150°C). Place the cookies on a baking sheet and bake for 3–4 minutes, or until the edges are slightly crisp. Add a tiny splash of water to the baking sheet before reheating; the steam will keep the cookies from becoming too hard and will restore their original softness.