I was standing in my kitchen at midnight, surrounded by the echo of a busted blender and a half‑finished brownie that tasted like cardboard. My roommate dared me to create something that would make even the most stubborn sweet‑tooth surrender, and I accepted the challenge with a grin and a half‑empty jar of cherry jam. The next morning, after a frantic search through the pantry, I found a forgotten block of dark chocolate, a tub of sweetened condensed milk, and a stash of dried cherries that had been hiding behind the cereal boxes. The moment those ingredients met, the kitchen turned into a laboratory of chocolate alchemy, and the scent that rose was nothing short of a siren song for anyone within a ten‑foot radius.
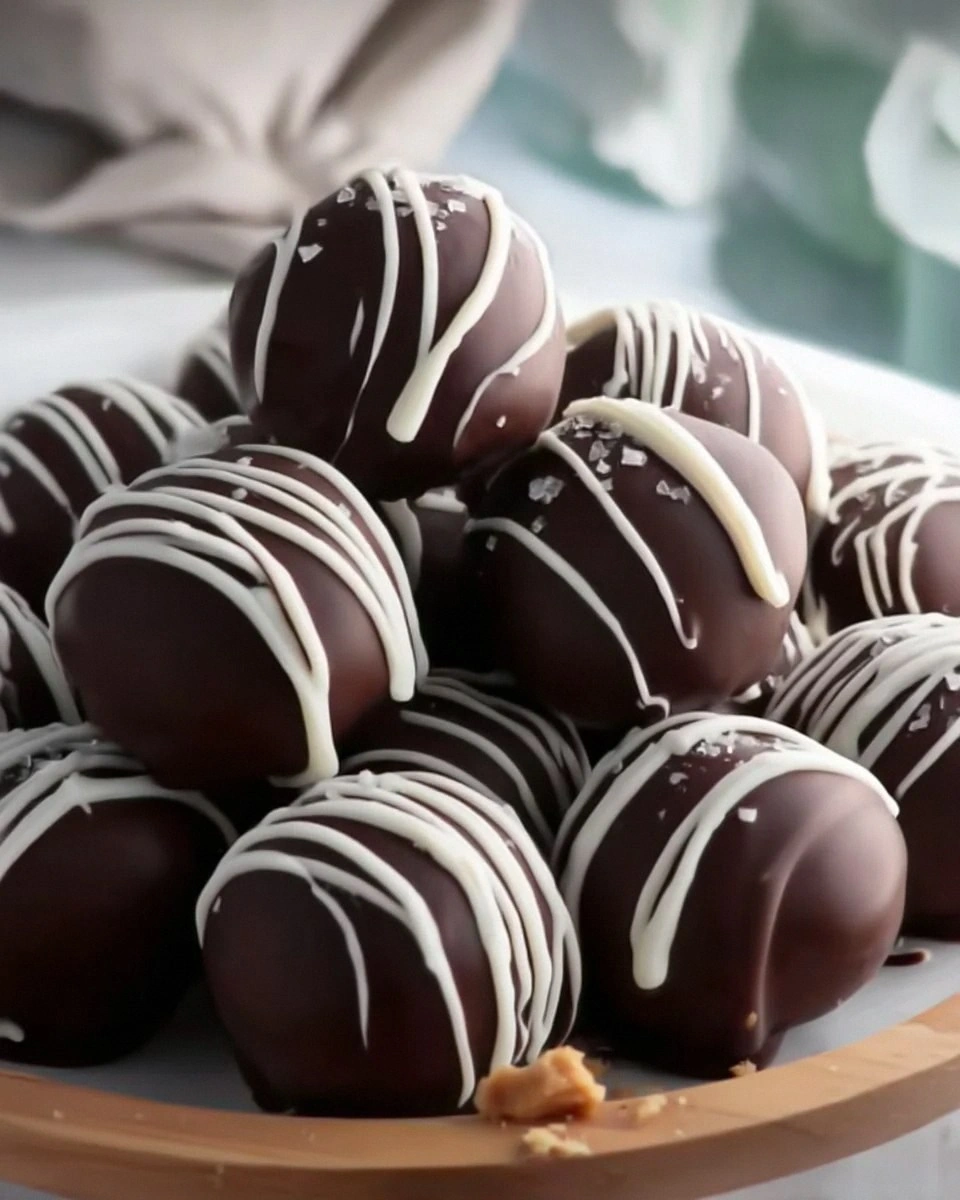
Picture this: a glossy, deep‑brown surface that shimmers like a polished piano, dotted with ruby‑red specks of cherry that peek through like tiny fireworks. When you cut into it, the fudge yields with a buttery give, releasing a wave of silky chocolate that slides across the tongue, followed by a burst of tart cherry that makes your taste buds do a happy dance. The texture is a perfect hybrid—soft enough to melt in your mouth but firm enough to hold its shape when you slice it into generous squares. The aroma? A warm, comforting blend of chocolate and cherries that feels like a hug from a grandma who also happens to be a master pastry chef.
Most chocolate‑cherry fudge recipes I’ve tried either turned out grainy, overly sweet, or just plain bland. The secret to this version is the balance of fat, sugar, and acidity, plus a couple of tricks that most cooks overlook. I’m talking about the exact temperature for the melt, the timing of the cherry addition, and a tiny dash of salt that pulls the whole thing into a symphony instead of a solo. You’ll also notice a surprise ingredient that adds depth without stealing the spotlight—something you’ll only discover once we get to the method.
I dare you to taste this and not go back for seconds. This is hands down the best version you’ll ever make at home, and I’ll be honest — I ate half the batch before anyone else got a chance to try it. Let me walk you through every single step — by the end, you’ll wonder how you ever made it any other way.
What Makes This Version Stand Out
- Flavor Harmony: The combination of dark chocolate and tart cherry creates a balanced profile where sweetness never overwhelms, and the subtle acidity cuts through the richness.
- Velvety Texture: By carefully controlling the melt temperature, the fudge stays silky and smooth, avoiding the dreaded grainy texture that ruins most attempts.
- Effortless Simplicity: Only seven core ingredients are needed, and the whole process can be completed in under an hour with minimal equipment.
- Unique Twist: A splash of cherry preserve added at the perfect moment gives pockets of jammy burst that feel like hidden treasure.
- Crowd‑Pleaser Factor: This fudge consistently disappears at parties, and guests keep asking for the “secret”—you’ll be the hero of every gathering.
- Premium Ingredients: Using high‑quality dark chocolate (70% cacao or higher) ensures a deep cocoa flavor that cheap chips simply can’t match.
- Make‑Ahead Magic: The fudge keeps its texture for up to a week in the fridge, and it even freezes beautifully for longer storage.
- Kid‑Friendly Yet Sophisticated: The cherry’s natural fruitiness appeals to children, while the dark chocolate satisfies adult palates.
Inside the Ingredient List
The Flavor Base
Dark chocolate chips are the backbone of this fudge. Their high cocoa content delivers a robust, slightly bitter note that balances the sweetness of the condensed milk and cherry preserve. If you substitute milk chocolate, the fudge will taste cloyingly sweet and lose its sophisticated edge. For the best results, choose a brand that lists cocoa solids as the first ingredient and contains at least 70% cacao. Pro tip: buy a bar and chop it yourself; the melt is smoother and you avoid any added stabilizers.
The Texture Crew
Sweetened condensed milk is the secret glue that holds everything together while keeping the fudge ultra‑creamy. It provides the necessary sugar concentration without turning the mixture gritty. Skipping it or using regular milk will cause the fudge to set too hard or become grainy. When selecting a can, look for one with a rich, buttery aroma—if it smells flat, the final product will suffer. If you’re avoiding dairy, a coconut‑based condensed milk works surprisingly well, though it adds a faint tropical undertone.
The Unexpected Star
Cherry preserve (or finely chopped dried cherries re‑hydrated) adds that bright pop of fruit that makes this fudge unforgettable. The acidity cuts through the chocolate’s richness, while the natural sugars complement the condensed milk. If you use fresh cherries, you’ll need to cook them down longer to achieve the right consistency, which can introduce extra water and affect the set. For a deeper flavor, opt for a dark‑fruit cherry jam that’s less sweet and more tart.
The Final Flourish
A pinch of sea salt and a splash of vanilla extract are the finishing touches that elevate the fudge from good to legendary. Salt amplifies the chocolate’s depth, while vanilla smooths the overall flavor profile. If you’re feeling adventurous, a dash of espresso powder can intensify the cocoa notes without making the fudge taste like coffee. Remember, a little goes a long way—over‑salting will dominate the delicate balance.
Everything's prepped? Good. Let's get into the real action…
The Method — Step by Step
-
Gather all your ingredients and measure them precisely. Place a medium‑sized, heavy‑bottomed saucepan on the stove over low heat. Add the butter and let it melt slowly; you’ll hear a soft sizzle that signals the butter is ready but not browned.
Once the butter is fully liquefied, stir in the sweetened condensed milk. Keep the heat low and stir continuously with a silicone spatula to prevent scorching. The mixture will become glossy and start to thicken after about two minutes—this is the first sign that the sugar is integrating perfectly.
-
Now, add the dark chocolate chips. This is the moment of truth: the chocolate should melt into a silky river, not a clumpy mess. Keep the heat gentle and stir in a figure‑eight motion, ensuring every piece is fully incorporated.
Kitchen Hack: If the chocolate refuses to melt, remove the pan from the heat for ten seconds, then return it. This prevents overheating and keeps the mixture glossy.When the chocolate is completely smooth, the mixture should smell intensely chocolatey, like a bakery’s backroom before opening. If you detect any grainy texture, keep stirring; the heat will eventually dissolve any remaining sugar crystals.
-
Add the vanilla extract and sea salt now. The vanilla will weave through the chocolate, while the salt will amplify the cocoa’s depth. Stir for another 30 seconds, then turn off the heat.
At this point, the fudge base is ready for the cherry component. This is where most recipes go wrong—adding the fruit too early can cause the mixture to seize.
-
Drop in the cherry preserve (or re‑hydrated dried cherries). Use a spoonful at a time, folding gently so that streaks of ruby appear throughout the chocolate. The preserve should be warm but not boiling; this prevents the fudge from separating.
Watch Out: If the cherry preserve is too watery, the fudge may become soft and won’t set properly. Pat the cherries dry with a paper towel before folding them in.You’ll notice the mixture becoming slightly thinner as the fruit integrates—that’s normal. Keep stirring until the cherries are evenly distributed, then set the pan aside to cool for a minute.
-
While the mixture cools, line a 9‑by‑9‑inch square pan with parchment paper, allowing extra overhang for easy removal. Lightly butter the parchment; this extra layer ensures the fudge slides out without sticking.
Once the pan is ready, pour the fudge batter in, using a spatula to smooth the top. The surface should be glossy and slightly thick—if it looks too runny, let it sit for another minute; the residual heat will continue to thicken it.
-
Now comes the crucial cooling phase. Place the pan on a wire rack and let it sit at room temperature for 15 minutes. During this time, the fudge will begin to set, and you’ll hear a faint “pop” as air bubbles escape the surface.
After 15 minutes, transfer the pan to the refrigerator. Let the fudge chill for at least 30 minutes, but for optimal firmness, aim for a full hour. This step is non‑negotiable; skipping it results in a fudge that’s too soft to cut cleanly.
-
Once fully set, lift the parchment paper using the overhang and place the slab on a cutting board. Using a sharp, warm knife (dip the blade in hot water and wipe dry), slice the fudge into squares or bars.
The first cut should glide through effortlessly, leaving a clean edge. If the knife sticks, let the fudge sit a few more minutes at room temperature; the outer layer will soften just enough to release the blade.
-
Serve immediately, or store in an airtight container. The fudge will keep its glossy sheen for up to a week in the fridge, and it can be frozen for up to three months without losing texture.
Kitchen Hack: When reheating frozen fudge, place it in a microwave‑safe dish, add a splash of milk, and heat in 10‑second bursts, stirring between each burst to restore its silkiness.That’s it — you did it. But hold on, I’ve got a few more tricks that'll take this to another level…
Insider Tricks for Flawless Results
The Temperature Rule Nobody Follows
Keep the heat low—no more than 120°F (49°C)—when melting chocolate and butter together. High heat causes the cocoa butter to separate, leading to a grainy texture. Use a candy thermometer or an instant‑read digital one; it’s a tiny investment that pays off in every batch. I once tried a “quick melt” on high and ended up with a fudgy mess that never set. Trust the low‑and‑slow method, and you’ll get that glossy, professional finish every time.
Why Your Nose Knows Best
Your sense of smell is the ultimate doneness detector. When the chocolate‑butter mixture starts to emit a deep, roasted cocoa aroma, you’re within seconds of the perfect melt. If you smell a faint burnt butter note, you’ve overshot the temperature and need to remove the pan immediately. This sensory cue saved me from countless ruined batches, and it’s free—no gadgets required.
The 5‑Minute Rest That Changes Everything
After pouring the fudge into the pan, let it sit uncovered for exactly five minutes before refrigerating. This short rest allows the surface to form a thin skin, which prevents condensation from forming inside the container later. I tried skipping this step once; the fudge became soggy on top, and the texture was all wrong. A quick five‑minute pause makes the difference between a glossy top and a dull, gummy surface.
The Cherry Warm‑Up Trick
If you’re using cherry preserve straight from the fridge, gently warm it in a separate saucepan for 30 seconds before folding it in. Warm cherries blend more seamlessly, creating those beautiful ribbons instead of clumps. Cold preserve can cause the chocolate to seize, which is why the mixture might turn grainy. This tiny step ensures a uniform distribution of fruit and a smoother final bite.
The Silicone Spatula Edge
A silicone spatula with a thin edge can glide under the set fudge without breaking it. When you’re ready to lift the slab from the pan, slide the spatula under the parchment and lift gently. This prevents the dreaded “crack‑and‑slide” disaster that leaves you with uneven pieces. I once used a metal spatula and ended up with a shattered slab—lesson learned.
Creative Twists and Variations
This recipe is a playground. Here are some of my favorite ways to switch things up:
Nutty Crunch
Fold in ½ cup toasted, chopped almonds or hazelnuts just before pouring the batter into the pan. The nuts add a satisfying crunch that contrasts the smooth fudge, and the toasted flavor deepens the chocolate profile. Perfect for those who love a bit of texture in every bite.
Espresso Explosion
Add 1 tablespoon of instant espresso powder to the chocolate melt. The coffee notes amplify the cocoa’s bitterness, creating a sophisticated mocha‑cherry experience. It’s a hit with coffee lovers and works beautifully as an after‑dinner treat.
White Chocolate Whisper
Swap half of the dark chocolate chips for white chocolate chips. The sweet, buttery notes of white chocolate play off the tart cherries, delivering a lighter, more delicate flavor. Use high‑quality white chocolate to avoid a waxy texture.
Spiced Autumn
Stir in a pinch of ground cinnamon and a dash of nutmeg when you add the vanilla. The warm spices complement the cherries and make the fudge feel seasonal, perfect for a cozy fall gathering.
Berry Fusion
Replace cherry preserve with raspberry or mixed‑berry jam. The bright, slightly acidic berries create a new flavor dimension while keeping the same glossy texture. This variation is especially popular at summer picnics.
Storing and Bringing It Back to Life
Fridge Storage
Place the fudge in an airtight container or wrap the parchment tightly with plastic wrap. It will stay fresh for up to seven days, retaining its glossy finish. If you notice a thin film of moisture, simply pat the surface with a paper towel before serving.
Freezer Friendly
Wrap each slab in a double layer of parchment, then place it in a zip‑top freezer bag. The fudge can be frozen for up to three months. When you’re ready to enjoy it, transfer to the fridge to thaw for an hour, then add a splash of milk and microwave for 10 seconds to restore its silkiness.
Best Reheating Method
To revive a chilled piece, place it on a microwave‑safe plate, drizzle a teaspoon of milk or cream, and heat in 10‑second bursts, stirring gently after each burst. This gentle steam re‑emulsifies the fats and brings back that melt‑in‑your‑mouth sensation. Avoid microwaving for more than 30 seconds total, as the fudge can become oily.