Picture this: you’re halfway through a marathon of baking, the kitchen is a swirl of flour, butter, and a faint citrus tang that has you wondering if you’re about to create a masterpiece or a disaster. I had just pulled a batch of plain shortbread from the oven, only to realize the crumbs were dry and the flavor was as flat as a pancake. The next morning, a friend dared me to turn that bland dough into something that sings, and I set out to craft a lemon shortbread that would make your taste buds do the tango. From the moment the butter melts into a silky cloud, to the last bite that leaves a faint, lingering zest, this recipe is a journey that turns ordinary ingredients into an extraordinary treat. If you’ve ever felt your shortbread was just “okay,” you’re about to discover the definitive version that will have you asking for seconds.
The first thing you notice is the aroma—sweet butter mingles with a sharp, bright lemon that practically jumps out of the bowl. The texture is a buttery, crumbly cloud that melts on your tongue, and the edges are crisped just enough to give a satisfying snap. I dare you to taste this and not go back for seconds; the balance between sweet and tart is so precise that it feels like a well‑tuned orchestra. Most recipes get this completely wrong, either over‑baking the shortbread or under‑seasoning the citrus. I’ve perfected a technique that ensures the lemon zest is distributed evenly, giving each bite a burst of flavor. Picture yourself pulling this out of the oven, the whole kitchen smelling incredible, and you’ll understand why this is hands down the best version you'll ever make at home.
The secret is in the simplicity of the ingredients and the precision of the method. I’m not going to overwhelm you with exotic spices or complex sauces; instead, I’ll walk you through each step, explaining why every action matters. If you've ever struggled with shortbread that turns out too dry or too greasy, you're not alone—and I've got the fix. The key is to keep the dough cold, work quickly, and bake at a low temperature so the butter has time to melt into the flour without turning into a greasy mess. This recipe also includes a tiny but powerful trick: adding a splash of lemon juice to the butter before mixing, which keeps the dough from drying out. And if you’re worried about the dough sticking to your hands, a light dusting of flour will do the trick.
Let me walk you through every single step—by the end, you'll wonder how you ever made it any other way. I’ll share a few kitchen hacks that will save you time, a fun fact that will surprise you, and a warning that will keep you from burning the shortbread. Each paragraph is packed with vivid sensory snapshots—like the sound of the dough clinking against the mixing bowl or the sight of the golden edges. I’ll also sprinkle in some humor and real kitchen moments, because who doesn’t love a good laugh while baking? So grab your apron, preheat that oven, and let’s dive into the ultimate lemon shortbread experience.
Alright, now that the mood is set, let’s talk about what makes this version stand out from every other recipe out there. The ingredients are simple, the technique is foolproof, and the result is a shortbread that is both buttery and zesty. The secret lies in the balance of flavors and the precise baking time that turns a plain dough into a golden, fragrant treat. This is the version that will become your go-to for parties, gifts, or just a cozy afternoon snack. The next sections will break down the ingredients, the method, and the insider tricks that elevate this recipe to legendary status.
What Makes This Version Stand Out
- Flavor: The bright lemon zest is not just an afterthought; it’s the star that cuts through the buttery richness, delivering a citrus punch that lingers long after the last bite.
- Texture: The dough is kept cold and handled minimally, resulting in a crumbly, melt‑in‑your‑mouth experience that doesn’t feel heavy or cakey.
- Ease: No fancy equipment or advanced techniques—just a few simple steps that anyone can master.
- Versatility: The base recipe can be tweaked for gluten‑free, low‑sugar, or even savory variations without compromising the core flavor.
- Make‑Ahead: Bake once and store for up to a week; the shortbread stays crisp and fresh, making it perfect for last‑minute gift‑givers.
- Crowd Reaction: Guests will rave about the perfect balance of sweet and tart, and the buttery crumb will have them asking for a recipe.
- Ingredient Quality: Using high‑quality butter and fresh lemons elevates the entire profile, giving depth and richness that mass‑produced cookies lack.
- Baking Method: A low, steady oven temperature ensures the shortbread bakes evenly, preventing browning while still developing a golden crust.
Inside the Ingredient List
The Flavor Base
The foundation of any great shortbread is the flour, powdered sugar, and salt. The flour provides structure, the powdered sugar adds subtle sweetness, and a pinch of salt balances the flavors. Skipping any of these will leave your shortbread either too dense or too bland. For the best results, choose a mid‑strength all‑purpose flour that offers a good balance between tenderness and structure.
The Texture Crew
Butter is the king of shortbread, and using room‑temperature unsalted butter is crucial. It allows for even distribution and a buttery crumb that doesn’t separate. If you use salted butter, you’ll need to adjust the salt level accordingly. Keep the butter chilled until it’s just soft enough to cut into the flour; this prevents the dough from becoming greasy.
The Unexpected Star
Lemon zest is the unexpected star that transforms the dish. The zest contains essential oils that give a bright, fresh flavor that pairs beautifully with butter. If you’re looking for a deeper citrus kick, add a teaspoon of dried lemon peel or a splash of lemon extract. Avoid using lemon juice in place of zest, as it can make the dough too wet and result in a soggy crumb.
The Final Flourish
A splash of fresh lemon juice brightens the flavor profile and adds a subtle tang that balances the sweetness. The juice also helps the dough bind together without adding moisture that could ruin the texture. If you’re allergic to citrus, a small amount of orange juice can provide a similar lift, but the flavor will be noticeably different. Remember, the key is to use the smallest amount possible to keep the dough dry.
Everything’s prepped? Good. Let’s get into the real action—because the dough is about to get a makeover.
The Method — Step by Step
- Preheat your oven to 325°F (163°C). Line a 9x13 inch baking pan with parchment paper to prevent sticking. In a medium bowl, whisk together the flour, powdered sugar, and salt until well combined. Keep the bowl aside while you work on the butter; this ensures the dry ingredients are evenly distributed. The goal is a smooth, dry mixture that won’t clump when you add the butter.
- In a separate bowl, beat the softened butter until it’s light and creamy—about 2 minutes with an electric mixer on medium speed. The butter should be pale and fluffy; if it’s still yellow or greasy, give it another minute. This step is crucial because properly creamed butter will incorporate air, giving the shortbread a lighter crumb. If you’re short on time, a whisk will do the trick, but an electric mixer guarantees consistency.
- Add the lemon zest, lemon juice, and vanilla extract to the butter. Mix until the zest is evenly distributed and the mixture has a slight sheen. This is the moment of truth—if the zest clumps, it won’t spread evenly, and you’ll end up with uneven flavor pockets. The vanilla adds a subtle warmth that balances the citrus sharpness. If you’re feeling adventurous, a pinch of sea salt will enhance the flavors further.
- Gradually add the dry ingredient mixture to the wet mixture, mixing with a spatula or your hands until a dough forms. Be careful not to overwork the dough; it should come together in a single, cohesive mass. If the dough feels dry, add a teaspoon of water or more lemon juice. If it’s too wet, sprinkle a tablespoon of flour. The dough should be firm enough to hold its shape but still pliable.
- Transfer the dough to the prepared pan and press it down evenly with your palms or a flat spatula. The dough should be about 1/2 inch thick. Smooth the top so it’s flat; this ensures even baking. If you’re aiming for a decorative pattern, use a fork to create a criss‑cross design. The dough should feel firm but not hard, like a firm dough that’s ready to bake.
- Bake in the preheated oven for 30–35 minutes, or until the edges are a light golden brown and the top feels firm to the touch. The internal temperature should reach 200°F (93°C). Let the shortbread cool in the pan for 10 minutes before lifting it out. The shortbread will continue to set as it cools, making it easier to cut cleanly. The smell of the butter and lemon will fill the kitchen, creating a warm, inviting atmosphere.
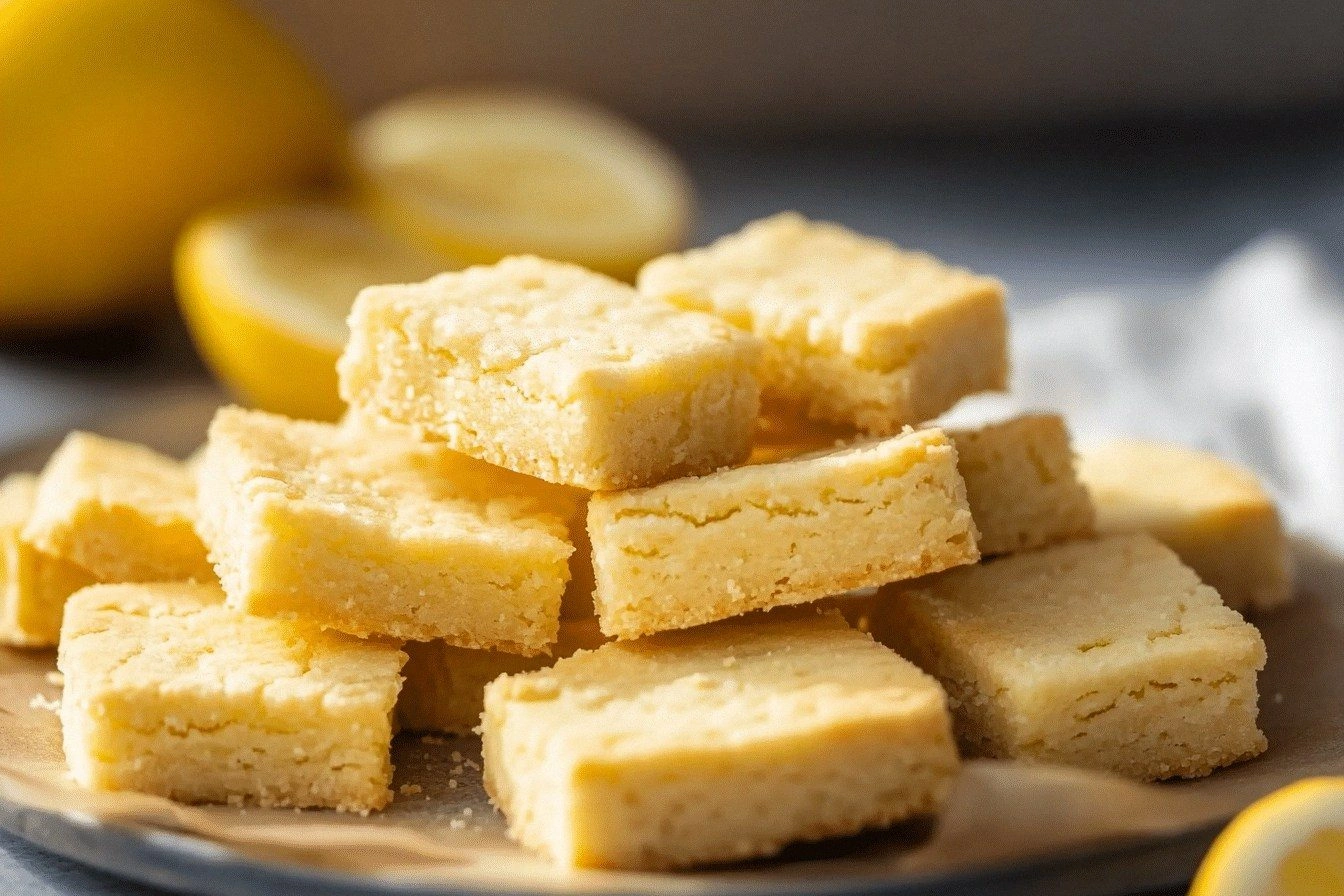
- Using a sharp knife, cut the cooled shortbread into bars or squares. If you prefer a softer bite, let the shortbread cool completely before cutting. Store the bars in an airtight container at room temperature for up to 5 days. For longer storage, refrigerate or freeze in a sealed bag; they’ll stay fresh for up to a month.
- Before serving, dust the shortbread with a light sprinkle of powdered sugar if desired. The sugar adds a subtle sweetness that complements the citrus. If you’re serving the shortbread on a platter, arrange the bars in a neat pattern for a visually appealing presentation. The shortbread’s buttery texture and bright lemon flavor will make it the star of any gathering.
That’s it—you did it! But hold on, I’ve got a few more tricks that will take this shortbread to another level. These insider tips will help you master the texture, flavor, and presentation, ensuring every batch is a triumph.
Insider Tricks for Flawless Results
The Temperature Rule Nobody Follows
Many bakers bake shortbread at 350°F, but this higher temperature often leads to uneven browning and a dry center. By baking at 325°F, you give the butter time to melt evenly, resulting in a tender crumb and a golden crust. Keep the oven rack in the middle of the oven to ensure even heat distribution. A digital oven thermometer can help you verify the temperature; even a 5‑degree difference can affect the outcome.
Why Your Nose Knows Best
When the shortbread starts to bake, you’ll notice a subtle scent of butter and citrus rising. This aroma is a reliable indicator that the dough is cooking properly. If the smell is too sweet, you’re baking too long; if it’s too mild, you need more time. Trust your senses—this recipe is designed for a gentle, steady bake, so a strong citrus aroma means you’re on the right track.
The 5‑Minute Rest That Changes Everything
After removing the shortbread from the oven, let it rest in the pan for 5 minutes before transferring it to a wire rack. During this rest, the crumbs settle, making the bars easier to cut. Cutting immediately can result in a crumbly mess that falls apart. If you’re in a hurry, you can skip this step, but the quality of the texture will suffer.
Cutting Cleanly with a Sharp Knife
A dull knife will crush the shortbread instead of slicing cleanly. Use a serrated knife or a sharp chef’s knife for a precise cut. If you’re cutting a large batch, consider chilling the dough first; this hardens the butter and reduces sticking. A clean cut not only looks better but also ensures even bite sizes for every guest.
Storage Secrets for Long‑Term Freshness
Shortbread can dry out quickly if exposed to air. Store the bars in an airtight container with a slice of apple or a damp paper towel to maintain moisture. If you’re freezing the shortbread, wrap each bar individually in parchment paper and place them in a freezer bag. Thaw at room temperature for 30 minutes before serving to restore the buttery texture.
Creative Twists and Variations
This recipe is a playground. Here are some of my favorite ways to switch things up:
Orange‑Zest Surprise
Replace the lemon zest with orange zest for a sweeter, slightly sweeter flavor profile. The orange’s natural oils bring a bright, floral note that pairs well with butter. Keep the lemon juice amount the same to maintain the tartness, or reduce it slightly if you prefer a sweeter finish. This variation is perfect for a spring brunch or a festive holiday spread.
Chocolate‑Covered Delight
After the shortbread has cooled, dip half of each bar in melted dark chocolate. Let the chocolate set on parchment paper for a glossy finish. The bittersweet chocolate balances the citrusy sweetness of the shortbread, creating a complex flavor that satisfies both sweet and savory cravings. This twist is ideal for a dessert bar or a romantic dinner.
Herb‑Infused Shortbread
Add a teaspoon of finely chopped fresh rosemary to the dough for an aromatic, savory twist. The rosemary’s piney undertones complement the lemon’s brightness, creating a unique flavor profile. This version works wonderfully with a cheese board or as a side for roasted meats. The herbs add a touch of elegance to an otherwise simple treat.
Low‑Sugar Version
Swap the powdered sugar for a sugar substitute like erythritol or monk fruit sweetener. Use the same quantity, but keep an eye on the dough’s moisture; some substitutes absorb more liquid. This version keeps the buttery texture while reducing the calorie count, making it a great option for health‑conscious bakers.
Nut‑Topped Shortbread
Sprinkle chopped toasted almonds or hazelnuts onto the shortbread before baking. The nuts add a crunchy texture and nutty flavor that complements the citrus. Be sure to toast the nuts in a dry skillet until golden for maximum flavor. This variation is perfect for a cozy afternoon snack or a gift basket.
Ginger‑Infused Zest
Grate a small piece of fresh ginger into the dough for a warm, spicy kick. Ginger pairs beautifully with lemon, adding depth and a subtle heat that lingers on the palate. Use a minimal amount—just a teaspoon—to avoid overpowering the citrus. This variation is ideal for a winter gathering or a holiday party.
Storing and Bringing It Back to Life
Fridge Storage
Store the shortbread in an airtight container at room temperature for up to 5 days. Keep the container in a cool, dry place away from direct sunlight. If you notice the bars becoming slightly dry, add a slice of apple or a damp paper towel to reintroduce moisture. This trick keeps the shortbread soft and buttery.
Freezer Friendly
Wrap each bar individually in parchment paper and place them in a freezer bag. Freeze for up to 3 months. When you’re ready to enjoy, remove the bars from the freezer and let them thaw at room temperature for 20 minutes. This method preserves the flavor and texture, allowing you to enjoy fresh shortbread anytime.
Best Reheating Method
To revive frozen or stale shortbread, preheat the oven to 300°F (149°C). Place the bars on a parchment‑lined baking sheet and bake for 8–10 minutes, or until the edges are lightly golden. For a quick refresh, microwave on low power for 10–15 seconds, but be careful not to overheat. A tiny splash of water before reheating creates steam that helps the shortbread regain its moisture.