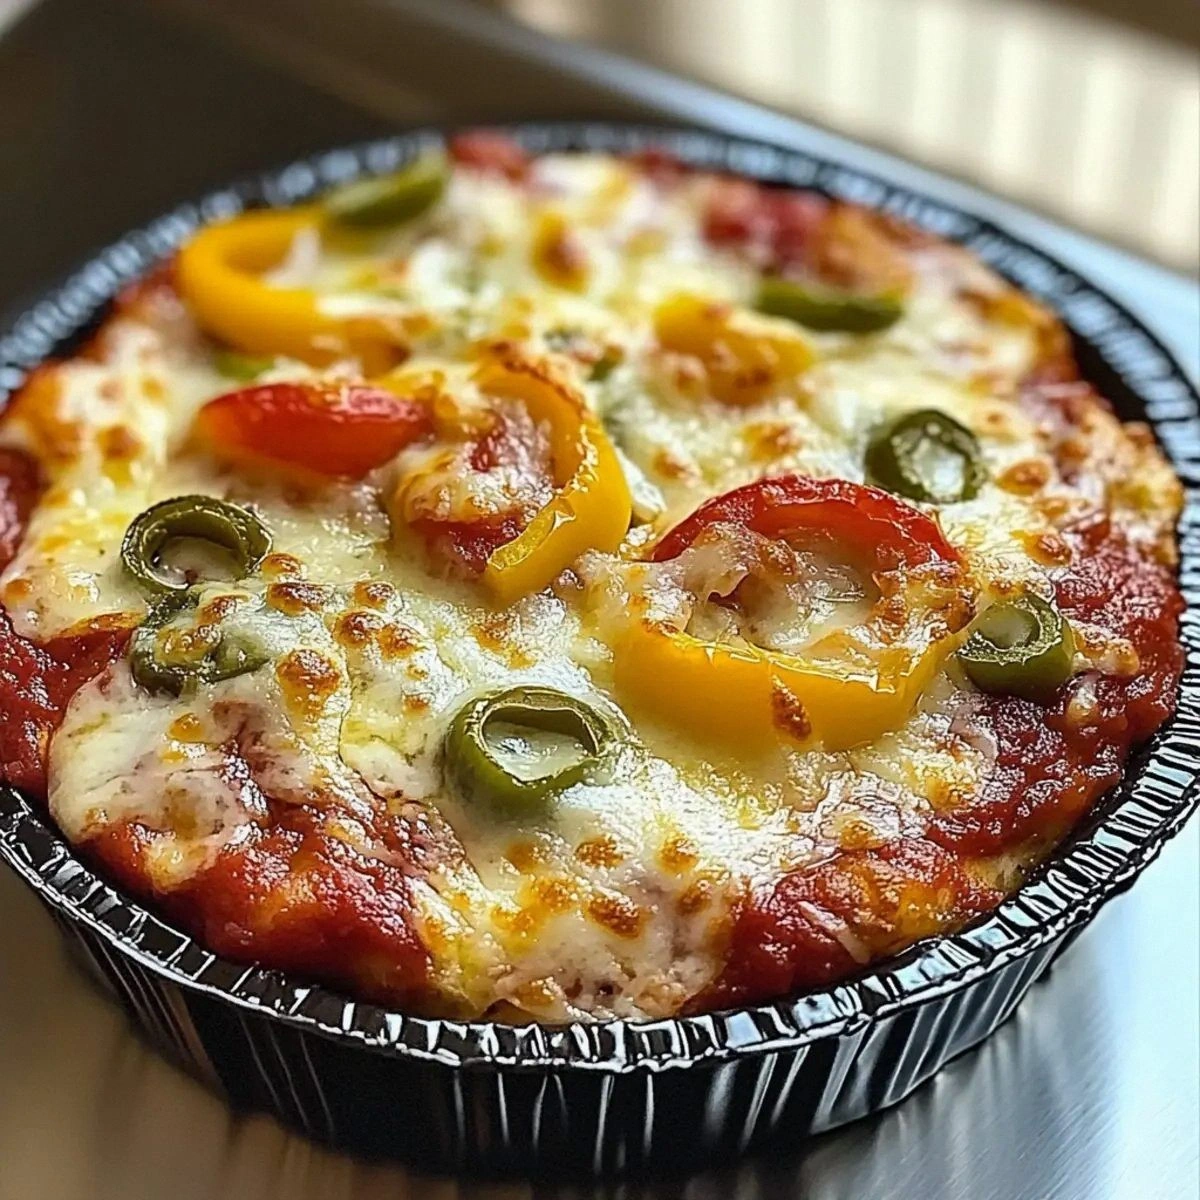
I still remember the night I accidentally invented Sushi Pizza. My roommate had dared me to combine my two greatest loves — the delicate artistry of sushi and the unapologetic comfort of a crispy, cheesy pizza base — and I, fueled by three espressos and a stubborn streak a mile wide, accepted. What followed was a blur of soy-splattered countertops, nori sheets curling like autumn leaves, and the smell of toasted sesame oil mingling with bubbling mozzarella. At 2:13 a.m. the oven timer dinged, I pulled out a golden disc that looked like Tokyo and Naples had a wild night, took one bite, and promptly burned my tongue in the most euphoric way imaginable.
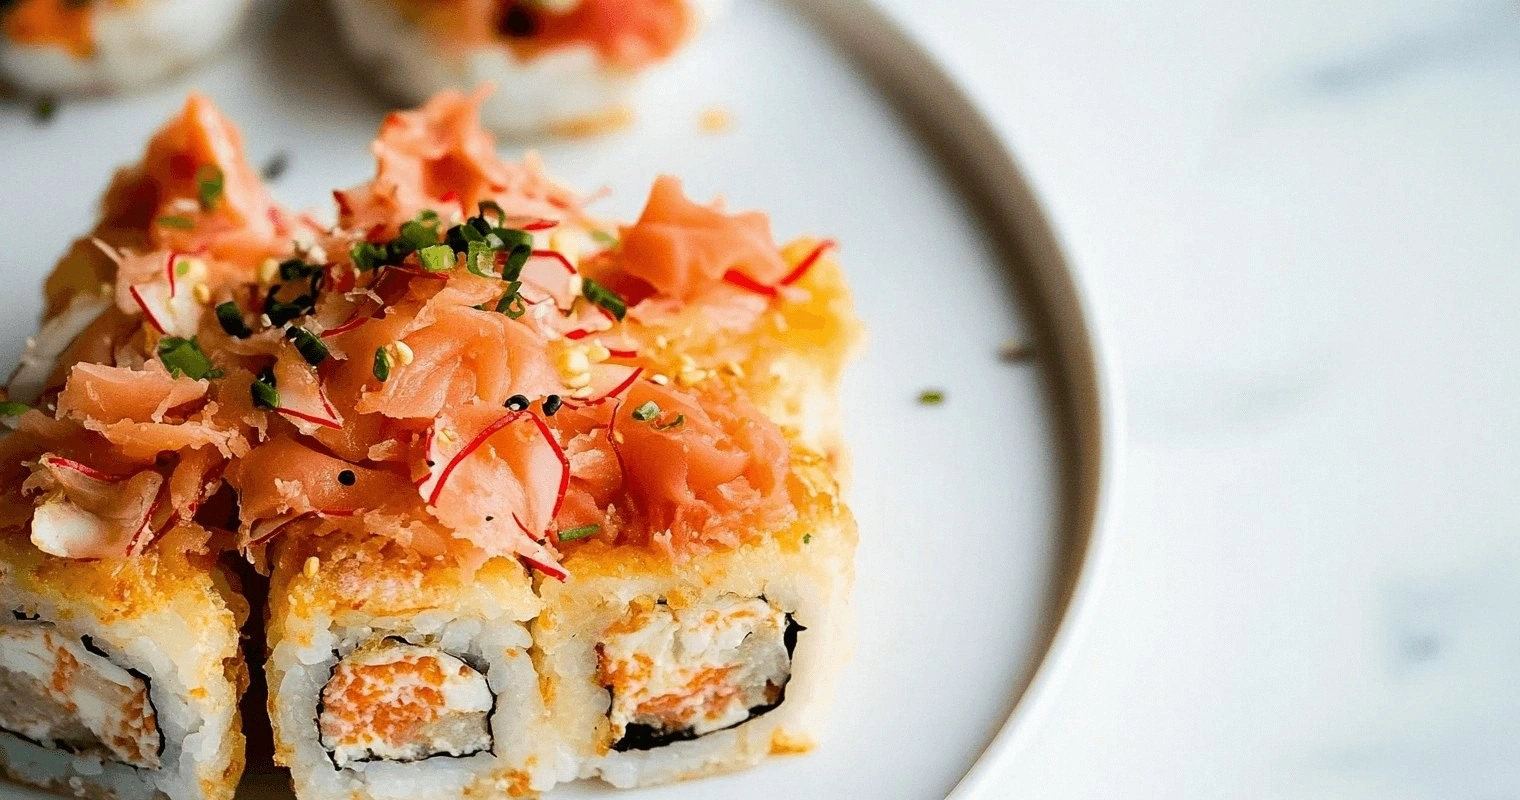
Picture this: you're standing in your kitchen, the lights low, your favorite playlist humming, and the scent of warm rice vinegar wafting up like a gentle reminder that magic is happening. The crust crackles under your fork, giving way to a layer of seasoned sushi rice that's somehow creamy yet each grain still sings. A glossy swipe of wasabi-spiked Kewpie mayo snakes across the top, crowned with avocado slices so perfectly ripe they look lacquered. That first bite is a textural symphony — crunch, chew, silk, snap — and your brain short-circuits trying to decide if you're at a neon-soaked izakaya or a candle-lit trattoria.
Most fusion recipes feel like awkward blind dates, but this one's a whirlwind romance that actually lasts. I dare you to taste this and not go back for seconds. I've watched skeptical sashimi purists roll their eyes, only to snatch three slices "for research." I've seen die-hard pizza traditionalists mutter that rice has no business on a crust, then quietly ask for the recipe. The truth is, this isn't some gimmicky mash-up; it's a thoughtful balance of umami, acid, fat, and crunch that respects both cuisines while creating something entirely new.
Okay, ready for the game-changer? Instead of tomato sauce, we're brushing the crust with a soy-mirin glaze that caramelizes into sticky umami candy. And instead of plain cheese, we're scattering a whisper-thin layer of low-moisture mozzarella that melts into a translucent sheet, holding everything together without drowning the delicate flavors. Stay with me here — this is worth it. Let me walk you through every single step — by the end, you'll wonder how you ever made it any other way.
What Makes This Version Stand Out
- Rice-On-Rice Crunch: We parbake a thin sushi-rice crust until the bottom forms a shattering golden shell while the interior stays fluffy. Most recipes skip this step and end up with sad, gummy slices.
- Speedy Stovetop Finish: After the initial bake, we slide the pizza under a broiler for exactly 90 seconds so the nori frizzles like chiffon in a wind tunnel while the toppings stay cool and vibrant.
- Layered Umami Bomb: A double-hit of reduced soy-mirin syrup plus a final drizzle of smoked sesame oil creates depth that makes anchovy pizza taste like cardboard.
- Make-Ahead Hero: You can prep the rice base, sauce, and sliced toppings up to two days ahead. When friends show up hungry, assembly takes six minutes flat.
- Gluten-Free Without Tears: The rice crust is naturally gluten-free, so celiac buddies can dive in without the usual cardboard-crust sadness.
- Instagram Gold: Those jewel-toned salmon cubes against neon pickled ginger? Your feed will look like a Harajuku street mural.
Alright, let's break down exactly what goes into this masterpiece...
Inside the Ingredient List
The Flavor Base
Short-grain sushi rice is the soul of this pizza. Its high starch content fuses into a cohesive sheet that slices cleanly yet flexes like a gymnast. Rinse it under cold water until the runoff is almost clear — this removes surface starch that can turn gummy. Season the hot rice with a dressing of rice vinegar, sugar, and salt while it's steaming; the grains drink up the mixture like parched tourists at happy hour. Skimp on this step and your crust will taste like cardboard confetti.
Low-sodium soy sauce may sound wimpy, but it lets us reduce the glaze for ten minutes without ending up with a salt lick. Look for one labeled "brewed" rather than "hydrolyzed" — the flavor is rounder, almost malty. If you only have regular soy, cut the mirin reduction time by half to prevent over-salting. The goal is a glossy syrup that coats a spoon like melted chocolate, not a briny puddle.
The Texture Crew
Nori sheets provide that whisper of oceanic snap. Toast them for five seconds over a low gas flame until they turn a deeper emerald; this awakens their nutty aroma. Once they hit the hot pizza, they'll crisp into brittle shards that dissolve on the tongue. Avoid the pre-toasted snack packs — they're already brittle and will burn under the broiler like autumn leaves in a bonfire.
Avocado must be ripe but not mushy. I buy them four days ahead and let them soften on the counter next to bananas (the ethylene gas speeds things up). When the stem nub pops off with gentle pressure and reveals green underneath, it's showtime. Cube it just before serving so the edges stay peridot-bright.
The Unexpected Star
Kewpie mayonnaise is the clandestine weapon that ties everything together. Its rice-vinegar twang and custardy texture slide across the crust like silk pajamas. If you can't find the Japanese brand, whisk a teaspoon of rice vinegar and a pinch of sugar into regular mayo, then let it chill for 30 minutes to meld. The difference between this and straight Hellmann's is like the difference between studio lights and a phone flash.
The Final Flourish
Pickled ginger isn't just a palate cleanser here — it's a neon pop of sweet-sharp acidity that cuts through the richness. Pat it dry with paper towels before scattering, or it'll bleed pink streaks across your avocado like watercolor on wet paper. If you're feeling fancy, julienne a few strips into hair-thin ribbons that flutter when you slice the pizza.
Everything's prepped? Good. Let's get into the real action...
The Method — Step by Step
- Start by cooking the rice using the absorption method: 1 cup rice to 1¼ cups water. Bring to a boil, cover, drop heat to low, and ignore it for 12 minutes. When the timer dings, kill the heat and let it stand another 10 minutes — this steams the bottom layer into a cozy, chewy cake. While it's still hot, fold in the seasoning blend with a silicone spatula, using a slicing motion so you don't mash the grains into paste. The rice should glisten like tiny pearls under moonlight.
- Preheat your oven to 450 °F (230 °C) with a pizza stone or upside-down sheet pan inside. You want that surface screaming hot so the rice crust sears on contact and doesn't stick like wet tissue paper. While it heats, line a 12-inch pizza pan with parchment and brush it lightly with toasted sesame oil — this adds invisible flavor armor.
- Dump the seasoned rice onto the parchment. Dip your fingers in the water-vinegar mix and press the rice outward from the center, building a ½-inch-thick disc with a slight rim. Think of it as pottery: gentle, even pressure prevents cracks. Slide the pan onto the hot stone and bake for 18 minutes, rotating halfway. Your kitchen will start smelling like popcorn and faintly sweet rice candy — that's when you know the bottom is turning golden.
- While the crust bakes, reduce the soy-mirin glaze. Combine ½ cup low-sodium soy, ¼ cup mirin, 2 tablespoons sugar, and a 1-inch knob of ginger (sliced) in a small saucepan. Simmer over medium heat until it bubbles into thick, lazy glugs — about 10 minutes. Swirl the pan instead of stirring to prevent crystallization along the sides. You're aiming for the consistency of warm honey; it will thicken further as it cools.
- Prep your toppings now: cube the salmon into ½-inch pieces, toss with a whisper of yuzu kosho for gentle heat, and park it in the fridge. Slice the avocado but leave it in its skin; press plastic wrap directly onto the surface to prevent oxidization. Whisk the Kewpie mayo with wasabi paste — start with ½ teaspoon, taste, then live dangerously. Julienne the pickled ginger and toast the nori sheets. Everything should feel like a mise en place rainbow waiting to party.
- Pull the rice crust out when the bottom is freckled chestnut brown. Switch the oven to broil on high. Brush the surface with a thin veil of the glaze — just enough to act as tasty glue. Scatter the mozzarella sparingly; you're not building a cheese blanket, more like a translucent net that will vanish and leave structure behind. Return to the stone for 90 seconds. Stay glued to the oven window: when the cheese forms glassy blisters and the nori edges curl like elf shoes, yank it out.
- Immediately transfer the pizza (still on parchment) to a wooden board. Working quickly, arrange salmon cubes in a loose constellation, letting some pieces nestle into the molten cheese for partial cooking. Spoon avocado cubes into the gaps, drizzle the wasabi mayo in Jackson Pollock swoops, and shower everything with toasted sesame seeds. The residual heat warms the fish just enough to intensify its sweetness while keeping the center silky.
- Finish with a final whisper of smoked sesame oil, a squeeze of lime, and the pickled ginger confetti. Slice with a sharp wet knife — the rice crust will cleave cleanly if you press down confidently rather than sawing. Serve instantly while the nori is still crisp and the contrast between hot crust and cool toppings is at its dramatic peak. That's it — you did it. But hold on, I've got a few more tricks that'll take this to another level...
Insider Tricks for Flawless Results
The Temperature Rule Nobody Follows
Most people dump fridge-cold fish onto a hot crust and wonder why the texture goes cottony. Let the salmon sit on the counter for 10 minutes while the crust bakes — it relaxes the proteins so they accept gentle heat without seizing. Conversely, chill your mayo so it doesn't slide into translucent streaks. These tiny temperature tweaks turn good sushi pizza into face-meltingly great sushi pizza.
Why Your Nose Knows Best
Trust your olfactory alarm system. When the rice crust toasts, it should smell like popcorn and faint caramel. If you catch even a whiff of bitter burnt grain, yank it out — rice goes from nutty to acrid faster than milk boils over. On the flip side, if you smell nothing after 15 minutes, crank the heat 25 degrees; your oven is lying to you.
The 5-Minute Rest That Changes Everything
After assembly, walk away for five minutes. I know, the suspense is torture, but this brief pause lets the glaze seep into the rice, the mayo firm slightly, and the toppings settle so your first slice doesn't avalanche. Cover loosely with foil to trap a whisper of steam that rehydrates the nori just enough to shimmer without wilting.
Creative Twists and Variations
This recipe is a playground. Here are some of my favorite ways to switch things up:
Spicy Tuna Crunch
Swap salmon for diced sushi-grade tuna folded with sriracha and a touch of flying fish roe. Add a handful of tempura bits right before serving so they stay shatter-crisp. The roe pops like savory bubble tea pearls, making every bite a tiny fireworks show.
Veggie Rainbow
Skip the fish entirely and layer roasted beets, mango cubes, and shiso leaves. The beets bring earthy sweetness that plays beautifully against tangy mayo, while shiso adds a mint-basil note that makes herb lovers swoon. Top with black sesame for dramatic contrast.
Smoky Eel Deluxe
Brush unagi glaze over the hot crust, then arrange pre-grilled eel slices and tiny mounds of foamed milk cheese (think Japanese cappuccino foam). The smoky-sweet eel melts into the rice, creating a luxurious mouthfeel that tastes like Tokyo street food at 2 a.m.
California Roll Remix
Imitate the classic roll by adding surimi crab sticks, cucumber batons, and a sprinkle of toasted panko for crunch. Finish with a zigzag of eel sauce and a shower of tobiko. It's the comfort food equivalent of wearing fuzzy socks in December.
Korean Fire Edition
Stir gochujang into the mayo for a sweet-spicy kick, then crown the pizza with quick-pickled radish threads and thin beef sashimi. The radish bleeds hot-pink juice that stains the mayo into sunset swirls — your camera will weep with joy.
Storing and Bringing It Back to Life
Fridge Storage
Store leftover slices in an airtight container with a sheet of parchment between layers to prevent the nori from absorbing moisture and turning into seaweed-flavored rubber. Keep the avocado separate if possible; a quick lime spritz and plastic-wrap seal prevents the dreaded brown swamp. Eat within 24 hours — after that the rice hardens into edible concrete.
Freezer Friendly
You can freeze the parbaked rice crust for up to a month. Cool it completely, wrap tightly in plastic plus foil, and label with smug superiority. When the craving strikes, bake from frozen at 425 °F for 8 minutes, then proceed with toppings. Do not freeze assembled pizza — the raw fish and avocado will stage a texture mutiny.
Best Reheating Method
Revive refrigerated slices in a dry skillet over medium heat for 3 minutes, then cover with a lid for 30 seconds to create a steam sauna that rehydrates the rice. Microwaves turn the crust into sad rice porridge, so just don't. Add a splash of water to the pan first; the resulting micro-steam brings back that fresh-from-the-oven bounce without sogginess.