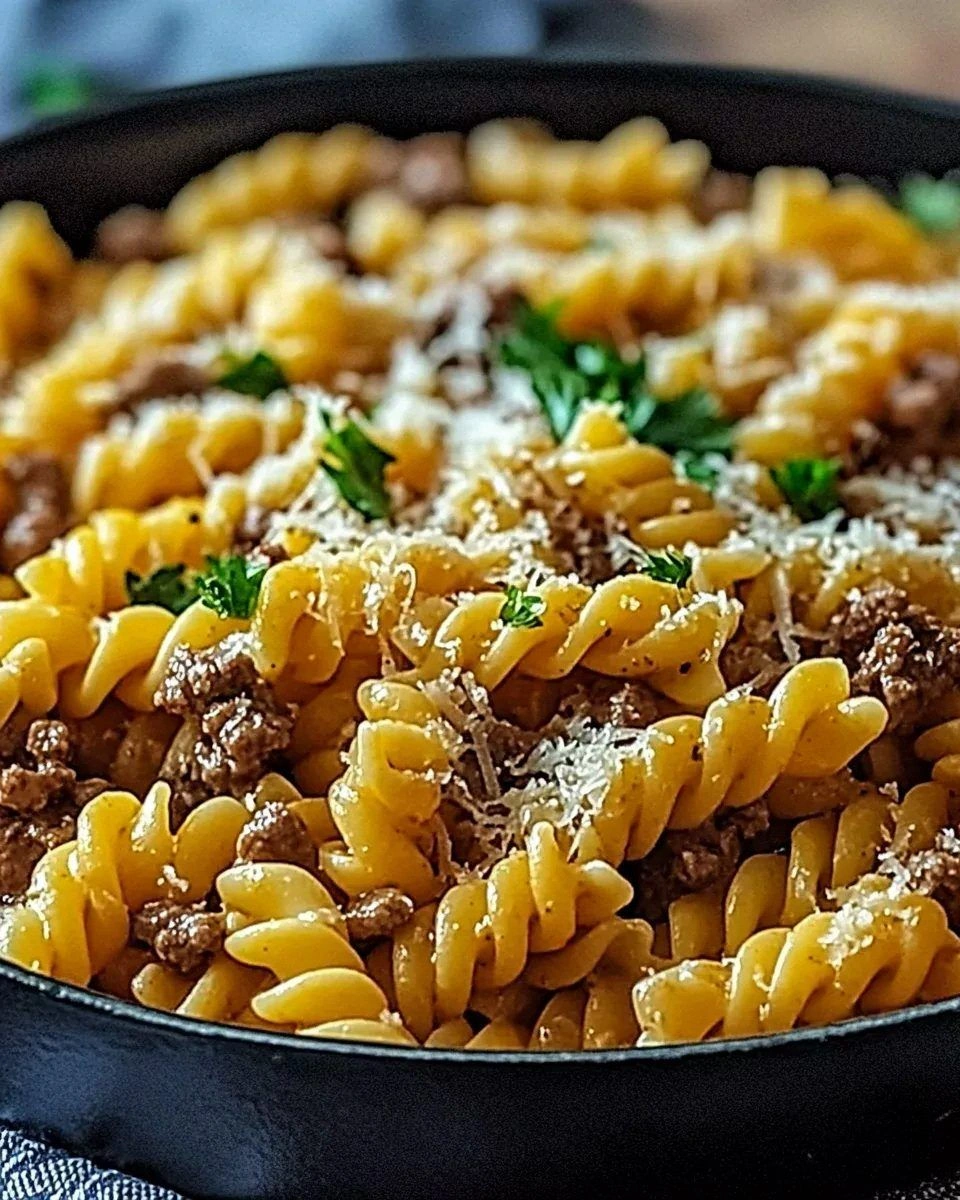
Picture this: a late‑night craving, a pantry that’s more “what can I turn into a casserole?” than “what do I need to buy,” and a sudden burst of culinary inspiration that feels like a secret handshake with the universe. I was standing in my kitchen, staring at a bag of ground beef that had seen better days, when a stray idea sparked—why not turn that humble protein into a molten, cheesy masterpiece that feels like a hug in a bowl? That night, I tossed the beef into a pan, added onions, garlic, tomatoes, and a generous handful of cheese, and the aroma that followed was the kind of scent that makes you forget about the burnt toast from earlier. I dared myself to taste this and not go back for seconds, and the verdict was unequivocal: this is the best version of cheesy ground beef you’ll ever make at home.
When you first open the pan, the sizzling sound is a promise of flavor. The beef browning to a caramelized hue releases a savory perfume that mingles with the sharp, sweet scent of onions. As the garlic joins the mix, its aroma deepens, creating a fragrant tapestry that makes you wonder how you ever ate ground beef without it. The instant that tomatoes hit the heat, they burst, releasing a tangy, sweet burst that coats the meat like velvet. The cheese, when added, melts into a silky, golden blanket that turns the dish from ordinary to extraordinary in a matter of minutes. The final result is a dish that’s not just a meal but a comforting, gooey, savory experience that feels like a warm hug after a long day.
What sets this version apart is that it’s not just about piling cheese on top. It’s about layers of flavor, textures that pop, and a technique that ensures every bite is balanced. The recipe’s secret lies in the way the beef is browned, the timing of the tomato addition, the choice of cheeses, and a finishing step that locks in moisture while creating that irresistible golden crust. I’ve spent months tweaking this recipe, and the result is a dish that will have your friends asking for the recipe after the first bite. If you’ve ever struggled with cheesy meat dishes that end up dry or too greasy, you’re not alone—and I’ve got the fix.
Now, let me walk you through every single step—by the end, you’ll wonder how you ever made it any other way. I’ll show you how to turn a simple pot of ground beef into a decadent, crowd‑pleasing dish that can be served for dinner, a quick week‑night meal, or even as a side for a family gathering. Let’s dive into the details that make this recipe the ultimate cheesy ground beef experience.
What Makes This Version Stand Out
Flavor: The combination of fresh tomatoes, garlic, and Italian seasoning creates a savory base that elevates the beef, turning it from ordinary to unforgettable.
Texture: The dual cheese blend—sharp cheddar for bite and smooth mozzarella for melt—provides a harmonious mouthfeel that satisfies every craving.
Ease: With just a single pan and a few quick steps, this dish is a breeze to prepare, making it ideal for busy weeknights.
Versatility: Whether you serve it over pasta, with crusty bread, or as a standalone casserole, the dish adapts effortlessly to your mood.
Make‑Ahead Potential: The dish can be assembled ahead of time, refrigerated, and baked fresh when needed, saving you time without sacrificing taste.
Crowd‑Pleaser: The gooey cheese and robust flavor profile guarantee that guests will be asking for seconds—if not thirds—right after the first bite.
Ingredient Quality: Using high‑quality ground beef and fresh herbs ensures the dish is packed with flavor right from the start.
Alright, let’s break down exactly what goes into this masterpiece…
Inside the Ingredient List
The Flavor Base
Ground beef is the star, but it’s the foundation that determines the entire flavor profile. I always choose a 80/20 blend—80% lean, 20% fat—to keep the meat juicy and rich. The fat content is essential because it carries the spices and creates a luscious mouthfeel. If you opt for a leaner cut, the dish can become dry, so consider adding a tablespoon of olive oil to compensate. The beef also absorbs the aromatics, so it’s crucial to brown it properly before adding any liquids.
The Texture Crew
Cheddar and mozzarella are the dynamic duo that gives this recipe its signature gooeyness. Cheddar adds a sharp bite that cuts through the richness, while mozzarella provides a silky melt that coats each strand of pasta. If you’re a fan of a sharper flavor, use a sharper cheddar; if you prefer a milder, more elastic melt, opt for a higher moisture mozzarella. For an extra crunchy topping, sprinkle breadcrumbs mixed with a little grated parmesan before baking.
The Unexpected Star
Tomato paste is the secret sauce that brings depth to the dish. It’s concentrated, so a small amount packs a punch, creating a sauce that’s both thick and flavorful. The paste caramelizes slightly when it hits the hot pan, adding a subtle nutty undertone. If you prefer a sweeter sauce, add a teaspoon of sugar or a splash of balsamic vinegar to balance the acidity.
The Final Flourish
Pasta is the vehicle that carries everything. I recommend penne or rigatoni for their ridges, which hold onto the sauce and cheese. Cook the pasta al dente so it doesn’t become mushy when baked. Toss the cooked pasta with the beef mixture right before baking to keep the noodles from drying out. A handful of fresh basil or parsley added at the end lifts the dish with bright, herbal notes.
Everything’s prepped? Good. Let’s get into the real action…

The Method — Step by Step
- Prepare the Ingredients: Dice the onion, mince the garlic, and set aside the pasta, cheese, and tomatoes. This step might seem trivial, but having everything ready to go will keep the cooking process smooth and prevent any last‑minute scrambling.
- Brown the Beef: Heat a large skillet over medium‑high heat and add the ground beef. Break it apart with a spatula, letting it sear without stirring too much. The goal is to develop a brown crust that locks in flavor. I dare you to taste the beef after it’s browned—if it’s still raw, keep cooking until the color deepens.
- Introduce Aromatics: Add the diced onion to the skillet. Sauté until translucent, about 3-4 minutes. Then add the minced garlic and cook for an additional 30 seconds until fragrant. The sizzling sound here is a sign that the flavors are blending beautifully.
- Add Tomatoes and Tomato Paste: Stir in the diced tomatoes and tomato paste. Cook for 2-3 minutes, allowing the tomato paste to caramelize slightly. This step deepens the sauce’s flavor and creates a richer base for the beef.
- Season: Sprinkle the Italian seasoning, salt, and pepper. Stir until the beef is evenly coated. Taste the mixture and adjust seasoning if needed. At this point, the beef should have a robust, savory profile that’s ready to be combined with pasta and cheese.
- Combine Pasta and Beef: Add the cooked pasta to the skillet and toss to coat with the sauce. This step ensures the noodles are evenly distributed and ready for baking. Let the mixture sit for a minute so the pasta can absorb some of the sauce.
- Transfer to Baking Dish: Pour the pasta and beef mixture into a greased baking dish. Spread it evenly to create an even baking surface. This is where the cheese magic happens.
- Top with Cheese: Sprinkle shredded cheddar and mozzarella evenly over the top. If you like a crispy crust, add a thin layer of breadcrumbs mixed with a dash of parmesan on top of the cheese.
- Bake: Preheat the oven to 375°F (190°C). Place the dish in the oven and bake for 15-20 minutes, or until the cheese is bubbling and golden. Watch for the edges—when they start pulling away from the sides, that’s the sign of a perfect bake.
- Finish and Serve: Remove from the oven and let it rest for 5 minutes. This brief rest allows the cheese to set slightly, making it easier to cut and serve. Garnish with fresh parsley or basil if desired. Serve hot, straight from the oven, and watch the smiles appear.
That’s it — you did it. But hold on, I've got a few more tricks that'll take this to another level…
Insider Tricks for Flawless Results
The Temperature Rule Nobody Follows
Many people bake at 350°F, but this dish thrives at 375°F. The higher temperature ensures a crisp, golden crust while keeping the interior moist. If you’re using a larger baking dish, lower the temperature to 350°F and extend the baking time by 5 minutes to avoid uneven cooking.
Why Your Nose Knows Best
During the browning stage, the aroma of the beef and onions will give you a clear indication of readiness. If the smell is sweet and caramelized, you’re in the right zone. If it’s still raw or has a metallic tang, keep cooking a bit longer. Trust your nose—it’s the best judge of flavor development.
The 5-Minute Rest That Changes Everything
After baking, let the dish sit for exactly five minutes. This pause allows the cheese to set, preventing a mess when you cut it. It also gives the flavors time to meld, resulting in a more cohesive taste profile. I’ve seen people skip this step and end up with a gooey, uneven bite.
Fresh Herbs Over Time‑Poor Herbs
Fresh basil or parsley added at the end adds a bright, herbal counterpoint to the richness of the cheese. If you’re in a pinch, a sprinkle of dried oregano can suffice, but fresh herbs are the gold standard for flavor. I’ve tried both, and the fresh version always wins.
Serve with a Crunch
Accompany the casserole with a side of garlic bread or a crisp salad. The contrast of textures—soft, cheesy interior versus crunchy exterior—creates a satisfying dining experience. I love pairing it with a simple arugula salad dressed in lemon vinaigrette.
Make‑Ahead Tip
Assemble the dish the night before and refrigerate. When you’re ready to bake, just pop it in the oven and bake as usual. This method saves you precious time on busy weekdays.
Creative Twists and Variations
This recipe is a playground. Here are some of my favorite ways to switch things up:
Spicy Mexican Twist
Swap the Italian seasoning for cumin, smoked paprika, and a pinch of cayenne. Add diced jalapeños and a handful of shredded pepper jack cheese for heat. Serve with a side of guacamole.
Greek Inspiration
Replace the cheddar with feta and add diced olives, spinach, and a splash of oregano. Finish with a drizzle of olive oil and a sprinkle of fresh oregano. The result is a Mediterranean‑style casserole.
Vegetarian Upgrade
Use lentils or crumbled tofu instead of ground beef. Add sautéed mushrooms, zucchini, and a splash of soy sauce for depth. The texture remains hearty, and the cheese still provides that irresistible gooeyness.
Breakfast Casserole
Add diced breakfast sausage or bacon, sautéed onions, and a handful of shredded cheddar. Serve with a side of fresh fruit or a small salad for a balanced morning meal.
Cheese Swap
Experiment with Gruyère or Gouda for a different flavor profile. These cheeses melt beautifully and add a subtle nutty undertone that complements the tomato base.
Low‑Carb Variation
Replace pasta with cauliflower rice or spiralized zucchini. Keep the cheese and beef mixture the same. The dish stays satisfying while cutting down on carbs.
Storing and Bringing It Back to Life
Fridge Storage
Cool the casserole completely, then cover tightly with foil or plastic wrap. Store in the refrigerator for up to 3 days. When reheating, add a splash of milk or water to the top before microwaving to maintain moisture.
Freezer Friendly
Pack the casserole in a freezer‑safe container or zip‑lock bag. Freeze for up to 2 months. Thaw overnight in the refrigerator before reheating. Reheat in a preheated oven at 350°F until heated through.
Best Reheating Method
For optimal flavor, reheat in the oven at 350°F for 15-20 minutes. If you’re short on time, use the microwave with a splash of water and cover with a microwave‑safe lid. The cheese will stay creamy, and the pasta won’t dry out.