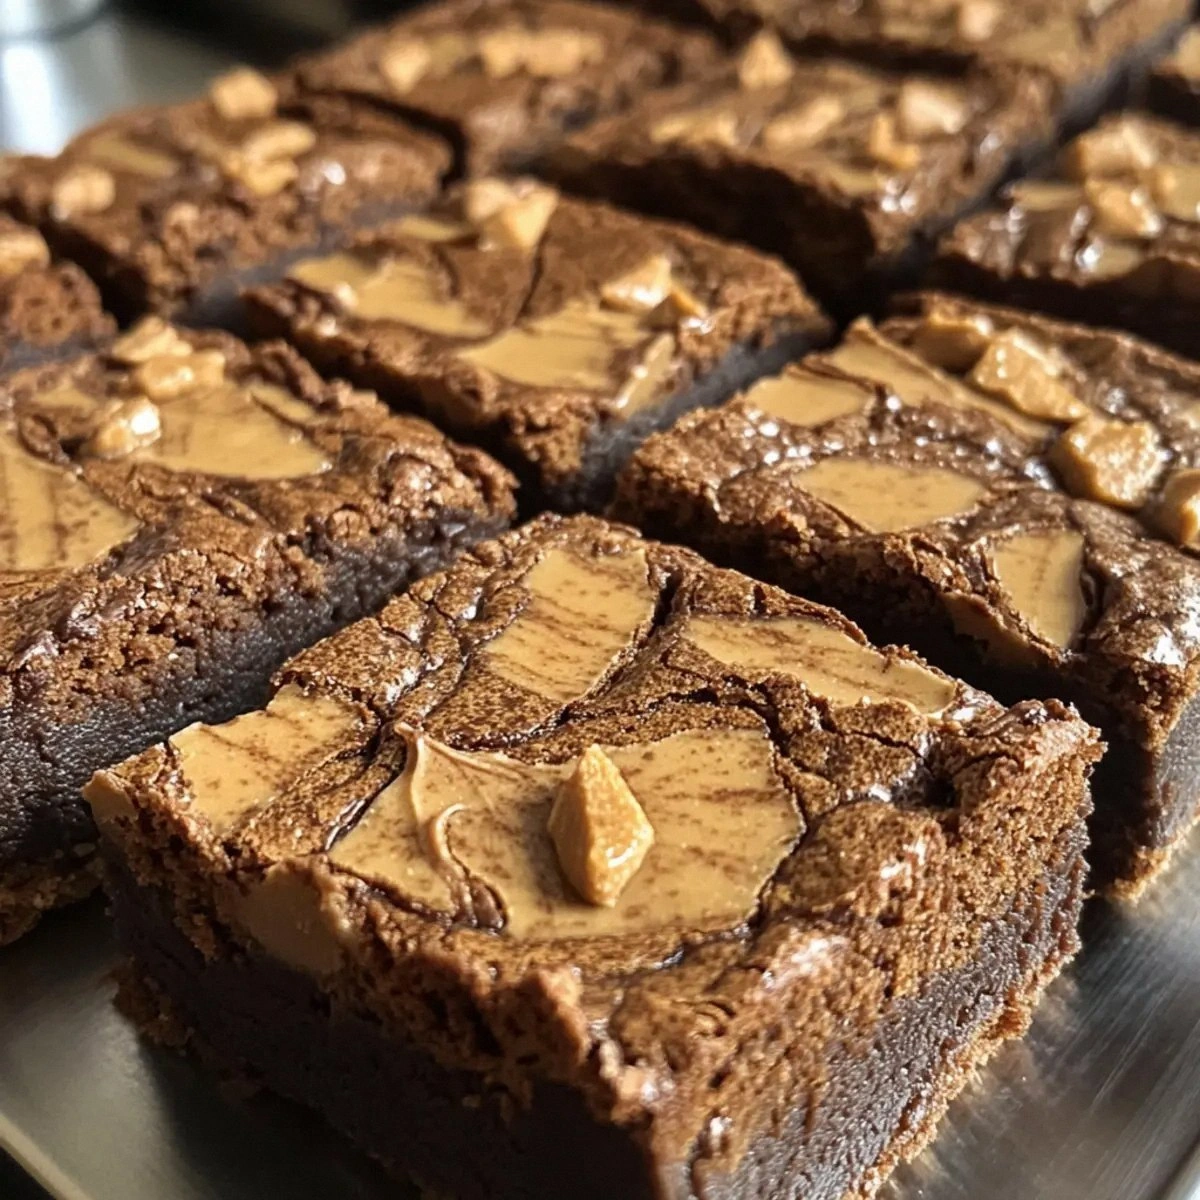
I was standing in my kitchen, staring at a half‑melted slab of chocolate that had somehow turned into a sticky, sad mess. The timer had gone off, the smoke alarm chirped like a nervous bird, and I realized my usual brownie recipe had betrayed me—dry edges, a gummy center, and absolutely no hint of that caramel‑spiced crunch I crave. I threw a daring challenge at myself: “I dare you to taste this and not go back for seconds,” and set out to create a version that would make even the most seasoned dessert snob bow down. The result? A brownie so silky it practically slides off the fork, studded with caramelized Biscoff shards that melt in your mouth like buttered clouds.
Picture this: the oven door swings open, releasing a wave of warm, buttery chocolate that hugs the air like a cozy blanket. You hear the faint crackle of the crust as it pulls away from the pan, a subtle reminder that the edges are crisping just right. The aroma of roasted cocoa mingles with the sweet, spicy perfume of Biscoff cookie butter, making your nose do a little happy dance. When you finally bite in, the first thing you notice is the glossy sheen of the top, then the soft, fudgy interior that gives way to pockets of crunchy cookie crumbs that shatter like thin ice under a gentle tap.
Most brownie recipes get the texture completely wrong—either they’re cakey, overly dense, or they lack that luxurious melt‑in‑your‑mouth quality that separates a good treat from a legendary one. The secret here is a combination of high‑quality dark chocolate, a precise butter‑to‑sugar ratio, and the magic of Biscoff cookie butter, which adds a caramel‑spice depth you won’t find in any ordinary brownie. I’ll be honest — I ate half the batch before anyone else got to try it, and that’s because the flavor hits you like a warm hug from your favorite aunt.
Okay, ready for the game‑changer? In this post I’m spilling every detail, from why I chose a specific brand of chocolate to the exact moment you should fold in the crushed Biscoff cookies for maximum crunch. By the end, you’ll wonder how you ever made brownies any other way. Let me walk you through every single step — by the end, you’ll wonder how you ever made it any other way.
What Makes This Version Stand Out
- Taste: The marriage of rich dark chocolate with the caramel‑spiced notes of Biscoff cookie butter creates a flavor profile that feels both familiar and wildly indulgent.
- Texture: A fudgy interior meets a slightly crisp top and crunchy cookie bits, delivering a multi‑dimensional bite that keeps you reaching for more.
- Simplicity: Despite its gourmet aura, the ingredient list is short, and the technique is straightforward enough for a weekend rookie.
- Uniqueness: Most brownies never see Biscoff, and that’s where this recipe pulls ahead—adding a sweet, buttery spice that most people haven’t even imagined.
- Crowd Reaction: Serve these at a gathering and watch the room light up; even the toughest critics admit these are hands down the best version you’ll ever make at home.
- Ingredient Quality: Using real Biscoff cookie butter (not a generic spread) ensures an authentic flavor that artificial substitutes can’t match.
- Cooking Method: The gentle melt‑and‑pour technique keeps the batter glossy and prevents over‑mixing, which is the silent killer of fudgy brownies.
- Make‑Ahead Potential: These brownies freeze beautifully, letting you enjoy that melt‑in‑your‑mouth experience weeks later.
Inside the Ingredient List
The Flavor Base
Butter is the foundation of any good brownie, providing richness and a tender crumb. I recommend using unsalted, European‑style butter because its higher fat content yields that melt‑in‑your‑mouth feel. If you skip the butter, you’ll end up with a dry, crumbly texture that feels more like a cookie than a brownie. For a dairy‑free twist, you can substitute with coconut oil, but expect a faint coconut aroma to sneak in.
Semi‑sweet or dark baking chocolate brings the deep cocoa intensity that makes these brownies feel luxurious. Choose a chocolate with at least 70% cacao for a balanced bitterness that cuts through the sweetness of the Biscoff. Low‑quality chocolate will taste flat and can make the batter greasy. If you’re a fan of even richer flavor, add a tablespoon of espresso powder—it amplifies chocolate without tasting like coffee.
The Texture Crew
Granulated sugar not only sweetens but also contributes to the glossy crust as it caramelizes during baking. Using too much sugar can make the brownies overly crisp, while too little leads to a gummy center. For a subtle caramel note, swap half the granulated sugar with brown sugar, but keep an eye on the moisture level.
Eggs act as the binder, giving the brownies structure while keeping them moist. Large eggs are ideal; their volume ensures the batter lifts just enough without becoming cake‑like. If you’re avoiding eggs, a blend of flaxseed meal and water (1 tbsp flaxseed + 3 tbsp water per egg) works, though the texture will be slightly denser.
The Unexpected Star
Biscoff cookie butter is the secret weapon here, adding caramel, cinnamon, and a hint of ginger—all wrapped in a buttery spread. This ingredient is what makes the brownies sing; without it, you’d have a perfectly good chocolate brownie, but nothing extraordinary. If you can’t find Biscoff, blend Biscoff cookies with a touch of melted butter until you achieve a spreadable consistency.
Fun Fact: Biscoff cookies were originally created in Belgium in 1936 for the airline industry, designed to stay fresh on long flights. Their unique spice blend was intended to calm nerves, which is why they’re so comforting in desserts.
The Final Flourish
All‑purpose flour provides the structure without making the brownies cakey. The amount is deliberately low to keep the crumb dense and fudgy. If you prefer a gluten‑free version, swap the flour with an equal part almond flour, but expect a nuttier flavor and slightly crumbly texture.
Cocoa powder deepens the chocolate flavor and gives the brownies that classic dark hue. Use Dutch‑processed cocoa for a smoother, less acidic taste. Salt is the unsung hero; it balances the sweetness and enhances the chocolate’s depth. A pinch too much can make the brownies taste briny, so stick to the ½ tsp measurement.
Crushed Biscoff cookies add that delightful crunch that shatters like thin ice when you bite. They also distribute pockets of caramel throughout the brownie. If you want extra crunch, toast the crumbs lightly before folding them in. This step is optional but highly recommended for texture contrast.
Everything's prepped? Good. Let's get into the real action...
The Method — Step by Step
Preheat your oven to 350°F (175°C) and line a 9×13‑inch baking pan with parchment paper, letting the edges hang over for an easy lift. While the oven warms, place a medium saucepan over low heat and melt the butter together with the chopped chocolate, stirring constantly. The mixture should become a glossy, velvety pool; you’ll hear a faint sizzle as the butter hits the pan—absolute perfection.
Kitchen Hack: Add a splash of heavy cream (about 2 tbsp) while melting the chocolate; this creates a ganache‑like consistency that makes the brownies extra fudgy.Remove the pan from heat and whisk in the granulated sugar until fully incorporated. The sugar will dissolve slightly, giving the batter a slightly thickened appearance. Let the mixture cool for about 5 minutes—this is the moment you hear the kitchen timer tick, reminding you patience is part of the magic.
One at a time, beat in the eggs, making sure each is fully emulsified before adding the next. Follow with the vanilla extract, which adds a subtle aromatic lift. The batter should look shiny and a bit thick, like a luxurious chocolate mousse.
Sift together the flour, cocoa powder, and salt over the chocolate mixture, then gently fold with a rubber spatula. Over‑mixing will develop gluten and ruin the fudgy texture, so stop as soon as you no longer see streaks of flour. At this point, the batter will be thick but still pourable.
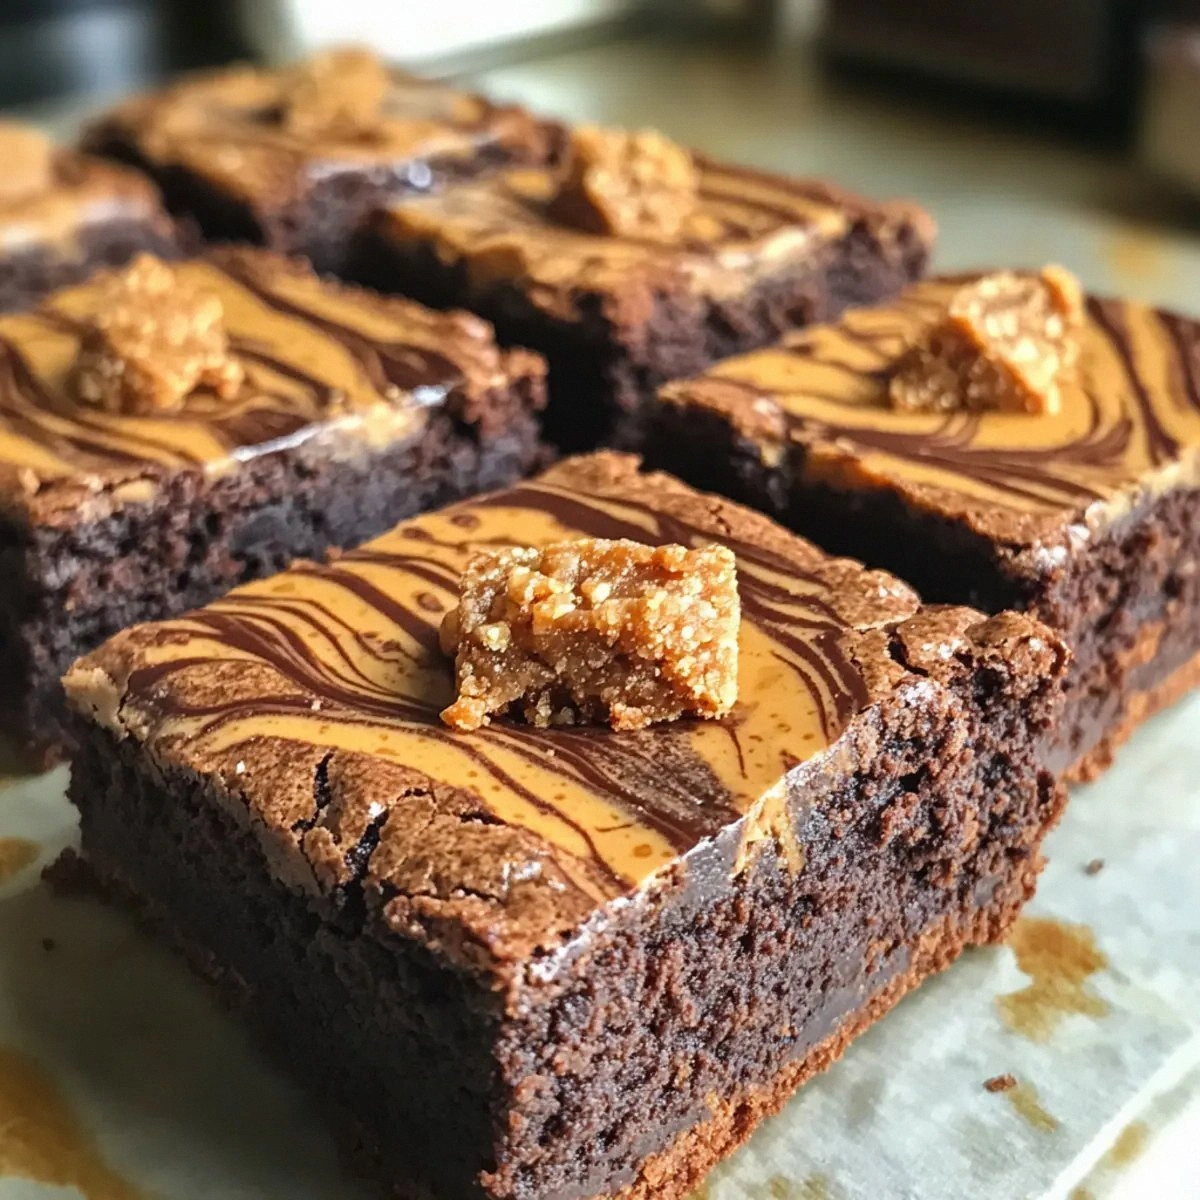
Stir in the Biscoff cookie butter, making sure it’s fully blended into the batter. You’ll notice a beautiful caramel‑spiced swirl forming; that’s the flavor foundation taking shape. This step is crucial—if the butter isn’t fully incorporated, you’ll end up with pockets of raw spread, which is a texture disaster.
Fold in the crushed Biscoff cookies, distributing them evenly but leaving some larger chunks for that surprise crunch. Watch Out: If you over‑fold, the cookies will break down into powder, losing the desired texture. Keep your hand light and use a gentle folding motion.
Watch Out: Adding the cookies too early can cause them to melt into the batter; fold them in just before pouring into the pan.Pour the batter into the prepared pan, using a spatula to smooth the top. Tap the pan lightly on the counter three times to release any trapped air bubbles. You’ll see the surface start to set and a faint sheen appear—that’s the crust forming.
Bake for 25‑30 minutes, or until a toothpick inserted about two‑thirds of the way down comes out with a few moist crumbs attached. The edges should pull away slightly from the parchment, signaling a perfect crust. Resist the urge to open the oven door early; the heat loss can cause the brownies to collapse.
Allow the brownies to cool completely in the pan—this can take about 20 minutes. Once cool, lift them out using the parchment overhang and place on a cutting board. Cut into squares with a warm knife for clean edges; the warm blade slices through the fudgy center like a hot knife through butter.
That's it — you did it. But hold on, I've got a few more tricks that'll take this to another level...
Insider Tricks for Flawless Results
The Temperature Rule Nobody Follows
Never bake brownies at a temperature higher than 350°F. Higher heat creates a dry top and a gummy interior. By keeping the oven at a moderate temperature, the batter sets evenly, allowing the center to stay molten while the edges crisp. A friend once cranked the heat to 400°F and ended up with a crust that resembled burnt toast—lesson learned.
Why Your Nose Knows Best
Your sense of smell is a more reliable indicator of doneness than a timer. When the aroma shifts from raw chocolate to a toasted, caramel‑spiced scent, you’re nearing perfection. Trust that nose; if you open the oven and smell a faint burnt sugar, pull the pan out immediately. This trick saved me from a batch of overcooked brownies once.
The 5‑Minute Rest That Changes Everything
After removing the brownies from the oven, let them rest undisturbed for five minutes before cutting. This short pause lets the steam redistribute, ensuring the interior stays soft and the edges don’t crumble. I used to cut straight away and end up with crumbly squares that looked sad on the plate.
The Double‑Layered Glaze
For an extra glossy finish, melt a tablespoon of Biscoff cookie butter with a splash of cream and drizzle over the cooled brownies. The glaze sets into a thin, shiny veil that adds an extra burst of caramel flavor. This step is optional but makes the brownies look restaurant‑ready.
The Secret of the Parchment Overhang
Leaving a generous overhang of parchment paper makes lifting the brownies a breeze and prevents the dreaded “stuck to the pan” disaster. It also creates a clean, uniform edge that looks professional. I once tried using foil; the brownies stuck, and the bottom turned soggy.
Creative Twists and Variations
This recipe is a playground. Here are some of my favorite ways to switch things up:
Salted Caramel Swirl
After pouring the batter, dollop caramel sauce and use a knife to swirl it through. The salty caramel threads contrast the sweet Biscoff, creating a sophisticated flavor duet. Perfect for a date night dessert.
Espresso Infusion
Add 1 tsp instant espresso powder to the melted chocolate. The coffee deepens the chocolate flavor without tasting overtly coffee, making the brownies feel more adult and complex.
Nutty Crunch
Stir in ½ cup toasted chopped hazelnuts or pecans along with the crushed Biscoff. The nuts add a buttery crunch that complements the caramel notes and adds a bit of healthy fat.
White Chocolate & Raspberry
Replace half of the dark chocolate with white chocolate chips and fold in fresh raspberries before baking. The tartness of the berries cuts through the richness, while the white chocolate adds a creamy contrast.
Vegan Velvet
Swap butter for coconut oil, use flax eggs, and choose a dairy‑free dark chocolate. The result is a plant‑based brownie that still boasts that melt‑in‑your‑mouth texture, proving you don’t need dairy to be decadent.
Storing and Bringing It Back to Life
Fridge Storage
Place cooled brownies in an airtight container and store in the refrigerator for up to 5 days. The cool environment keeps the crumb firm while preserving the fudgy interior. When ready to serve, let them sit at room temperature for 15 minutes to regain softness.
Freezer Friendly
Wrap individual squares tightly in plastic wrap, then place them in a freezer‑safe bag. They’ll keep for up to 3 months. To reheat, microwave a single square for 15‑20 seconds, or oven‑warm at 300°F for 8 minutes.
Best Reheating Method
Add a tiny splash of water (about a teaspoon) to the plate before microwaving; the steam revives the brownie’s moisture, making it taste fresh‑baked. Avoid over‑microwaving, as that turns the center rubbery.