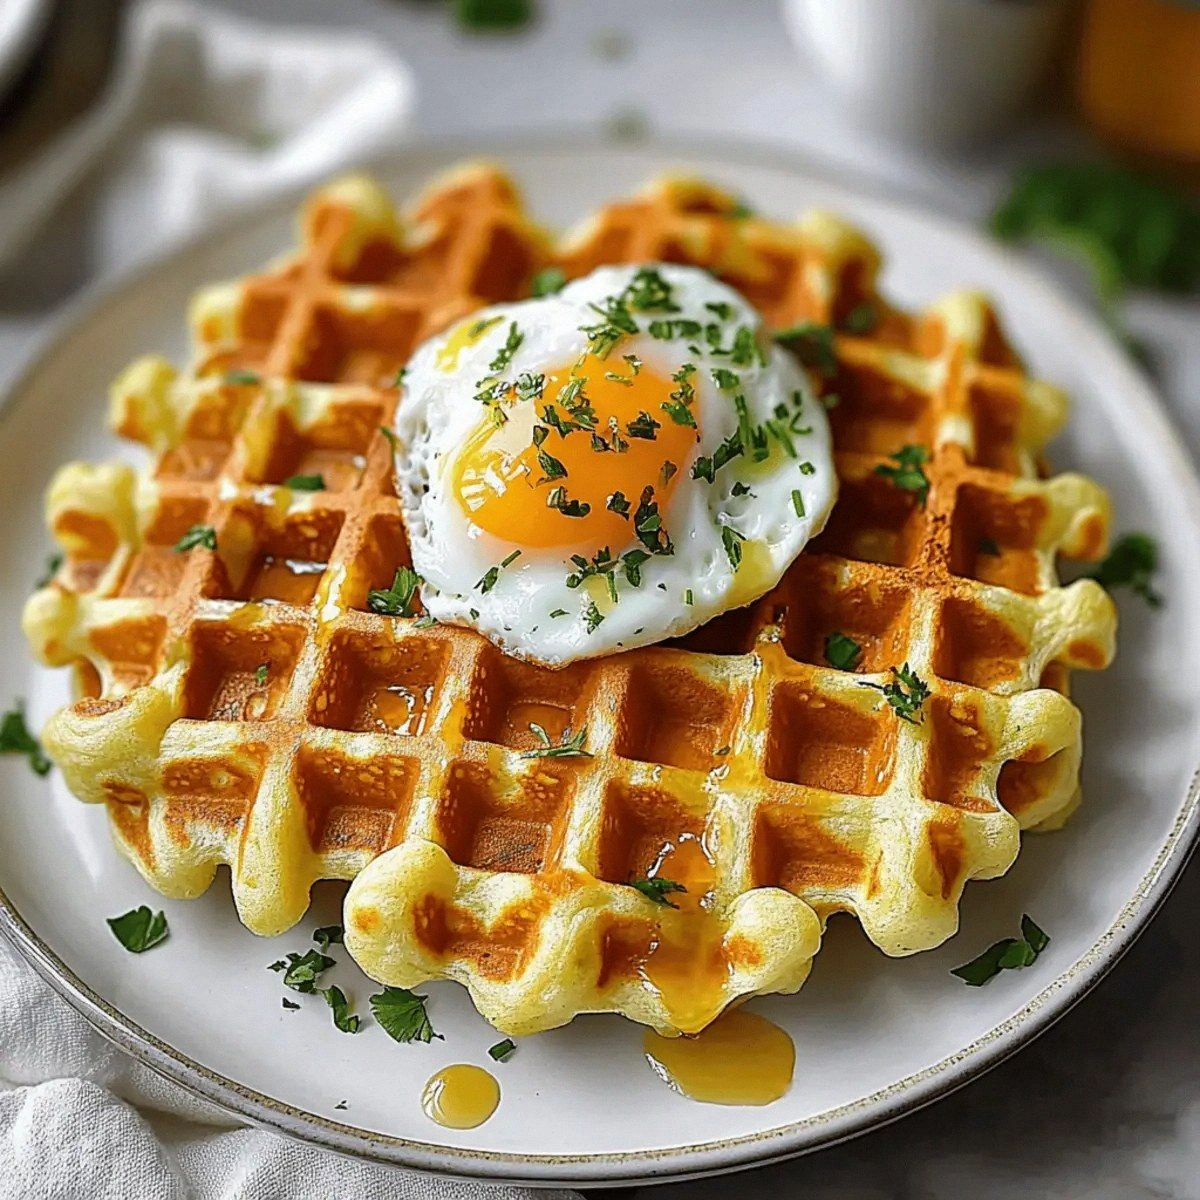
It started with a kitchen disaster that turned into a culinary revelation. I was trying to make a simple pumpkin pancake and the batter turned into a sticky, lumpy mess that clung to the pan like a bad rash. The smell of over‑cooked flour filled the kitchen, and I could hear the sizzling protest from the skillet. My friends laughed, but I was determined to salvage something delicious. That night, I dared myself to turn the fiasco into a triumph, and the next morning I discovered a fluffy, chocolate‑laden pumpkin pancake that tasted like a cozy hug in a bite. I’m still not convinced that I could have made it any other way, and I can’t wait to share the secret that made the batter light, airy, and irresistibly chocolatey.
Picture yourself pulling a golden stack of pancakes from the pan, the whole kitchen smelling incredible, the steam rising in a sweet, buttery cloud. The first bite is a burst of pumpkin spice, followed by a gentle chocolate crunch that melts into a silky sauce. The texture is like a cloud that hugs your tongue, not a dense, heavy batter. I dare you to taste this and not go back for seconds; the flavor is so satisfying it will leave you craving more. This recipe is hands down the best version you'll ever make at home, and I’ve got the exact tweaks that make it stand out from every other pumpkin pancake out there.
Most recipes get this completely wrong. They either over‑bake the pancakes, leaving them dry, or they under‑season the batter, resulting in blandness that can be tasted in the first bite. The secret lies in a delicate balance of spices, a touch of brown sugar for caramel depth, and a generous amount of chocolate chips that melt into a glossy, velvety coating. I’ll be honest — I ate half the batch before anyone else got to try it, and the rest of the family begged for the recipe. If you've ever struggled with this, you're not alone — and I've got the fix. Stay with me here, because the next part is pure magic.
This version is a game‑changer because it incorporates a few unconventional elements that elevate the classic pumpkin pancake to something unforgettable. The batter uses melted butter instead of oil to give it a richer mouthfeel, while the pumpkin puree is blended until silky to avoid any grit. The chocolate chips are added just before flipping, so they stay intact and provide that satisfying snap when you bite into a pancake. The result is a pancake that’s fluffy on the inside, crisp on the edges, and coated in a glossy chocolate drizzle that feels like a dessert on a breakfast plate. I’ve been experimenting with pumpkin pancakes for years, and this iteration is the one that finally satisfied my craving for something sweet, spiced, and comforting.
Let me walk you through every single step — by the end, you'll wonder how you ever made it any other way. I’ll share the exact measurements, the precise timing, and the insider tricks that turn a simple batter into a showstopper. You’ll learn why I use a particular type of flour, how to keep the batter from becoming too thick, and the perfect pan temperature that gives those golden edges that shatter like thin ice. I’ll also reveal a surprising ingredient that brings a subtle depth of flavor you never expected in a pancake. And if you’re like me, you’ll love the optional maple syrup drizzle that adds a final touch of sweetness. So grab your apron, and let’s get cooking.
Okay, ready for the game‑changer? This next part? Pure magic. The first thing you’ll notice is the aroma that starts to fill the kitchen when you whisk the batter together. That scent is a promise of comfort, of home, of a cozy fall morning. The batter should look light and airy, almost like a cloud waiting to be formed. I’ll give you the exact ratio of wet to dry ingredients so that the pancakes rise just right, with no heavy, doughy center. And the best part? It’s so simple that even a novice can master it, yet the result feels like a gourmet breakfast.
What Makes This Version Stand Out
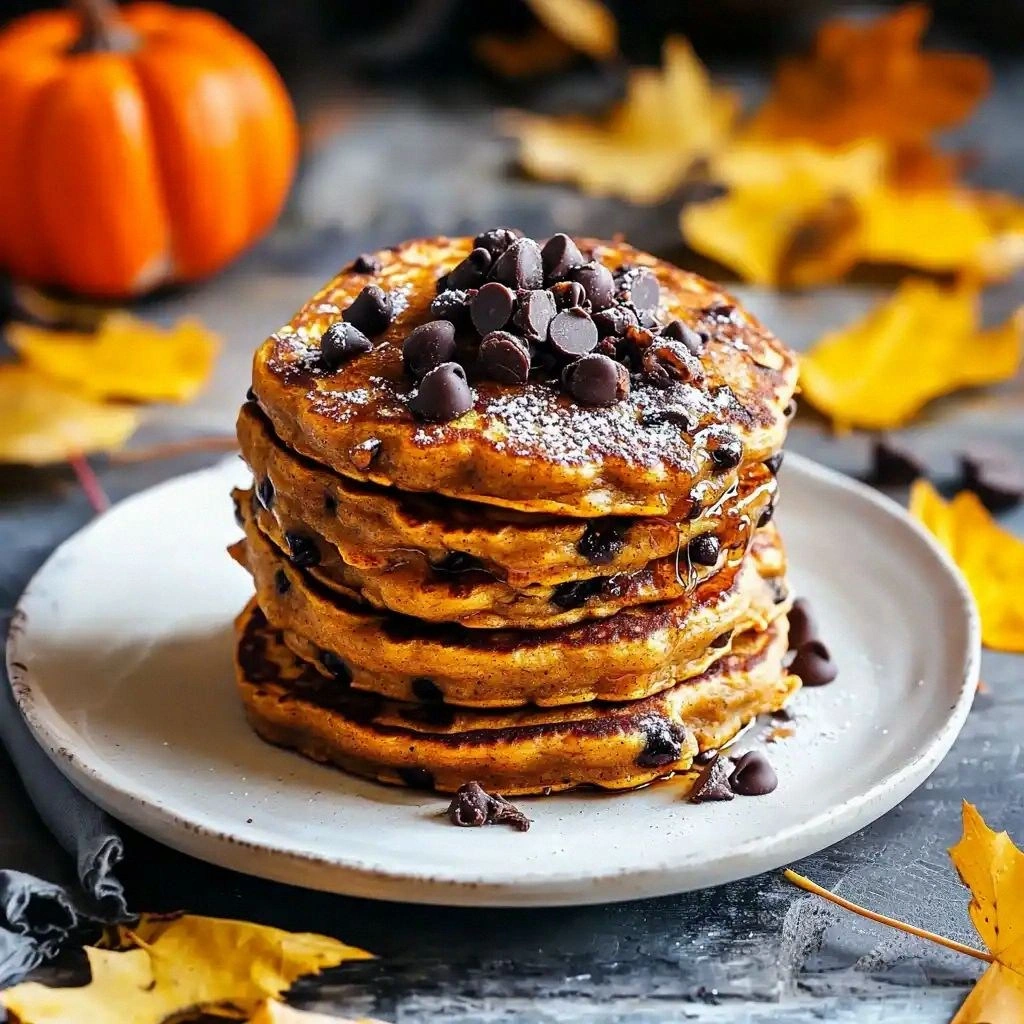
The flavor profile is a harmonious blend of pumpkin, cinnamon, nutmeg, and a hint of clove that dances on the palate, creating a warm, comforting taste that’s unmistakably autumn.
The texture is unmatched, with a fluffy interior that melts in your mouth, balanced by a slightly crisp edge that gives a satisfying bite.
Simplicity is key; the recipe requires only a handful of pantry staples, making it a go‑to option for busy mornings or lazy weekends.
The unique twist of adding chocolate chips right before flipping transforms the pancake into a decadent dessert without compromising the classic pumpkin flavor.
Crowd reaction is always enthusiastic; friends and family rave about the surprising chocolate element that makes it feel like a special treat.
Ingredient quality matters; using fresh pumpkin puree and high‑quality chocolate chips elevates the overall taste and ensures a rich, authentic flavor.
The cooking method—using a nonstick skillet and a moderate heat—ensures even cooking and prevents sticking, giving you a flawless pancake every time.
Make‑ahead potential is excellent; you can prepare the batter in advance, refrigerate it, and cook pancakes later for a quick, satisfying breakfast.
Alright, let's break down exactly what goes into this masterpiece…
Inside the Ingredient List
The Flavor Base
All-purpose flour is the foundation of the batter, providing structure and a neutral canvas that lets the pumpkin and spices shine. It’s important to sift the flour to avoid clumps and to ensure a light, even batter. If you’re looking for a gluten-free option, you can replace it with a 1:1 gluten-free blend, but be aware that the texture may become slightly denser. Choosing a flour with a higher protein content can add chewiness, but for maximum fluffiness, stick to the standard all-purpose.
The Sweetness Factor
Brown sugar adds a subtle caramel note that complements the pumpkin’s natural sweetness. The molasses in brown sugar also contributes a hint of depth that vanilla alone can’t achieve. If you prefer a lighter sweet, you can substitute with white sugar or a natural sweetener like honey, but the flavor profile will shift slightly. The sugar’s granules dissolve quickly in the wet mix, ensuring a smooth batter.
The Unexpected Star
Pumpkin puree is the star of this recipe, delivering moisture, a mild sweetness, and a subtle earthy tone that anchors the spices. Using a homemade puree gives a fresher taste, but canned puree is convenient and works just as well. When selecting canned puree, look for brands with no added sugars or preservatives to keep the flavor pure. The puree’s thick consistency is essential; if it’s too watery, the pancakes will be flat.
The Final Flourish
Chocolate chips are the secret weapon that turns a pumpkin pancake into a dessert. They melt into a glossy glaze that coats each pancake, giving a satisfying crunch and a rich chocolate finish. Dark chocolate chips add depth and a slight bitterness that balances the sweetness, while milk chocolate offers a creamy, buttery finish. A handful of white chocolate chips can add a whimsical touch for those who love a sweeter, milder flavor.
Everything's prepped? Good. Let's get into the real action…
The Method — Step by Step
- In a large bowl, whisk together flour, brown sugar, baking powder, salt, and pumpkin pie spice until evenly distributed. The dry mix should look like fine sand; this ensures no lumps in the batter. If you’re a purist, sift the flour once more before adding to the dry mix. This step is the foundation of the batter’s texture, so take a moment to get it right. I dare you to taste the dry mix; it should have a balanced, aromatic profile.
- In a separate bowl, combine pumpkin puree, milk, eggs, melted butter, and vanilla extract. Whisk until the mixture is smooth and glossy, like a silky custard. The butter adds richness and helps the pancakes rise evenly; without it, the batter can become too dry. Be careful not to overmix, as that can make the pancakes tough. When the mixture is ready, pour it into the dry ingredients and stir just until combined—some lumps are acceptable.
- Let the batter rest for 5 minutes; this allows the flour to hydrate fully and the leavening agents to activate. While the batter rests, preheat a nonstick skillet or griddle over medium heat and lightly grease it with a dab of butter or oil. The resting period is crucial; skipping it can result in dense, heavy pancakes. This step is the moment of truth—if you’re impatient, resist the urge to cook immediately. The batter will thicken slightly, but that’s normal.
- Pour ¼ cup of batter onto the skillet for each pancake. Use a ladle or measuring cup to keep the size consistent. The batter should spread slowly, forming a neat circle. If it spreads too quickly, lower the heat slightly. When the edges start to lift and small bubbles form on the surface, it’s time to flip.
- Flip the pancake and cook for an additional 2 minutes, or until the underside is golden brown. This second side should develop a slightly crisp edge that feels like a golden shell. If you’re prone to overcooking, keep a close eye on the color; a bright, buttery hue is a sign of perfection. The aroma during this stage is intoxicating, with the chocolate chips melting into a glossy glaze.
- Repeat with the remaining batter, greasing the skillet as needed. Stack the finished pancakes on a warm plate and cover loosely with foil to keep them warm. The stack should look like a miniature tower of fluffy, chocolate‑coated goodness. If you’re serving a crowd, keep the pancakes warm in a low oven at 200°F (90°C) to maintain softness.
- Serve immediately, optionally topping with fresh berries or a dusting of powdered sugar for added flair. The pancakes are best enjoyed hot, when the chocolate is still slightly molten. If you’re a fan of extra sweetness, a drizzle of maple syrup or a swirl of whipped cream can elevate the experience. The final product is a breakfast dessert that satisfies both sweet cravings and the need for comfort.
That’s it — you did it. But hold on, I've got a few more tricks that'll take this to another level. The next section will reveal insider tips that ensure every pancake is perfect, and you’ll learn how to tweak the recipe for different occasions.
Insider Tricks for Flawless Results
The Temperature Rule Nobody Follows
Many cooks overheat their skillet, causing pancakes to brown too quickly and become tough. The trick is to maintain a steady medium heat; you can test the temperature by flicking a drop of water onto the surface—if it sizzles and evaporates instantly, it’s too hot. Keeping the skillet at the right temperature ensures a golden crust while keeping the interior fluffy. I’ve found that using a thermometer can help you stay consistent, especially on older stoves. The result? Pancakes that rise beautifully without burning.
Why Your Nose Knows Best
You can’t always rely on the clock to tell you when to flip; your nose is a more reliable indicator. When the batter starts to form tiny bubbles and the edges lift, the aroma changes from buttery to slightly caramelized. This scent is a cue that the first side is done. Trusting your senses saves you from overcooking and keeps the pancakes tender. I’ve had friends who overcook their pancakes, and the texture is all wrong; the secret is to listen, not to stare.
The 5-Minute Rest That Changes Everything
Resting the batter for five minutes before cooking may seem trivial, but it’s the difference between a flat pancake and a cloud of fluff. During this time, the flour hydrates fully, and the leavening agents start to work. Skipping this step can leave you with dense, heavy pancakes that fail to rise. If you’re short on time, you can still rest for a minute, but the longer the better. The batter will look slightly thicker after the rest, which is a good sign.
How to Keep Pancakes Warm Without Steaming
When you’re cooking a large batch, the pancakes can cool quickly. Instead of covering them with foil, place them on a wire rack over a baking sheet in a 200°F (90°C) oven. This setup allows air to circulate, preventing condensation that would otherwise steam the pancakes. I’ve used this trick at brunches, and the pancakes stay fluffy for an hour. The key is to keep the oven temperature low enough to warm but not cook.
Add a Splash of Water for Extra Moisture
If your batter feels too thick, a splash of water or milk can bring it back to a pourable consistency without altering the flavor. Adding too much liquid can make the pancakes soggy, so start with a tablespoon and mix until the desired consistency is reached. This is especially helpful if you’ve stored the batter overnight; the flour may absorb more liquid. The trick is to add just enough to loosen the batter, not to dilute it.
Creative Twists and Variations
This recipe is a playground. Here are some of my favorite ways to switch things up:
Nutty Crunch
Add a handful of chopped pecans or walnuts to the batter for a delightful crunch. The nuts pair beautifully with the pumpkin spice, adding a nutty undertone that complements the chocolate. Toast the nuts beforehand for an extra burst of flavor. This variation is perfect for those who love a textural contrast.
Spicy Kick
Incorporate a pinch of cayenne pepper or a dash of hot sauce to give the pancakes a subtle heat. The spice balances the sweetness and adds a surprising depth. Keep the amount small to avoid overpowering the pumpkin flavor. This version is ideal for adventurous palates.
Coconut Cream Swirl
Fold in a tablespoon of coconut cream into the batter for a tropical twist. The coconut adds a subtle sweetness and a silky mouthfeel. Pair it with a drizzle of coconut milk after cooking for an extra layer of flavor. This variation works well for brunches with a beach vibe.
Chocolate Ganache Drizzle
Melt dark chocolate with a splash of heavy cream to create a ganache drizzle. Swirl it over the pancakes for a decadent finish. The ganache adds a rich, velvety texture that elevates the dish to a dessert level. It’s a simple upgrade that feels luxurious.
Maple‑Infused Batter
Replace half the milk with maple syrup to infuse the pancakes with a subtle maple flavor. The syrup also adds natural sweetness, reducing the need for brown sugar. This variation is a nod to classic maple pancakes while keeping the pumpkin twist. The result is a warm, comforting breakfast that feels like a fall treat.
Storing and Bringing It Back to Life
Fridge Storage
Store leftover pancakes in an airtight container in the refrigerator for up to 3 days. The pancakes will stay moist if you place a damp paper towel over them before sealing the container. When you’re ready to serve, reheat them in a toaster or microwave for 30 seconds. This method preserves the flavor and texture without drying them out.
Freezer Friendly
For longer storage, place pancakes in a single layer on a baking sheet and freeze until solid, then transfer to a freezer bag. They can stay in the freezer for up to 2 months. Thaw them overnight in the refrigerator or reheat directly from frozen in a skillet over low heat. The pancakes retain their fluffiness and chocolate coating after freezing.
Best Reheating Method
The best way to reheat pancakes is in a skillet over medium heat; this restores the crisp edges. If you prefer a quicker method, microwave them on a paper towel for 20-30 seconds. Adding a tiny splash of water before reheating can create steam that helps the pancakes stay moist. Finish with a drizzle of maple syrup or a dollop of whipped cream for an extra treat.