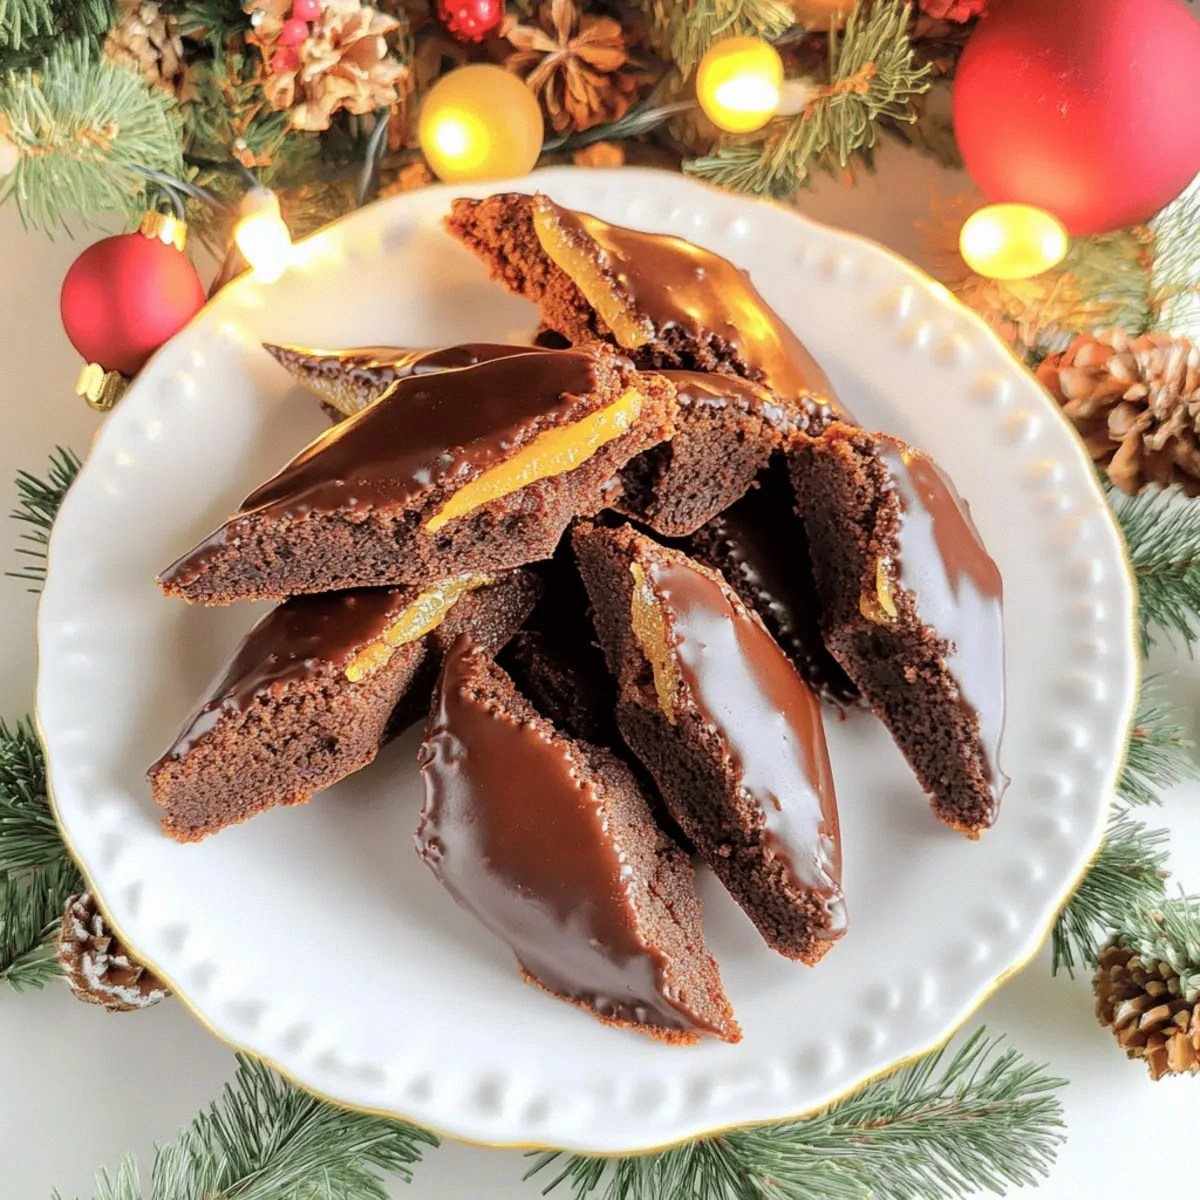
Picture this: it’s a frosty December evening, the wind is howling outside, and you’ve just burned the last batch of gingerbread men because you forgot to pre‑heat the oven. I was standing there, half‑defeated, half‑determined, and a friend dared me to create a cookie that could actually bring the whole house back to life. I stared at the empty mixing bowl, imagined the scent of cinnamon and cocoa swirling through the kitchen, and thought, “Why not make something that’s soft, spicy, and downright addictive?” That moment of kitchen chaos sparked the birth of my ultimate Magenbrot, a German‑style cookie that feels like a warm hug in every bite.
The first bite is a revelation: the dough is tender enough to melt on your tongue, yet it holds a firm enough structure to give that satisfying chew. The aroma—rich cocoa, bright lemon zest, and a whisper of toasted hazelnut—spreads through the house like a festive perfume, making even the grumpiest neighbor peek through the window. You’ll hear the faint crackle of the sugar glaze as it sets, a sound that says “this is the real deal.” And the taste? Imagine a spice market in a snow globe—sweet, spicy, citrusy, and nutty, all dancing together in perfect harmony.
Most recipes for Magenbrot either end up dry and crumbly or overly sweet, missing that delicate balance between spice and softness. I’ve tried dozens of versions, and I can honestly say this is hands down the best version you’ll ever make at home. The secret? A double‑water system that keeps the dough moist, a precise blend of Lebkuchen spice mix, and a glaze that adds just the right amount of sparkle without turning the cookies into a sugary slab. Oh, and the toasted hazelnuts? They add a buttery crunch that takes the whole thing to the next level.
But here’s the kicker: I’m going to reveal the little technique that most bakers overlook—how to temper the cocoa and sugar glaze so it stays glossy and doesn’t become a sticky mess. Trust me, once you master this, you’ll never look back. Let me walk you through every single step — by the end, you’ll wonder how you ever made it any other way.
What Makes This Version Stand Out
- Flavor Explosion: The combination of Lebkuchen spice, lemon zest, and toasted hazelnuts creates a complex palate that’s both festive and comforting.
- Soft Texture: A double‑water method keeps the dough moist, resulting in a cookie that stays tender for days.
- Simple Prep: Despite the impressive flavor profile, the ingredient list is straightforward and the steps are easy to follow.
- Unique Glaze: A glossy cocoa‑lemon glaze adds a subtle bitterness that balances the sweetness perfectly.
- Crowd‑Pleaser: Guests can’t stop reaching for seconds; I dare you to taste this and not go back for more.
- Premium Ingredients: Using high‑quality cocoa and fresh zest makes a world of difference in the final taste.
- One‑Pan Magic: Everything bakes on a single sheet, minimizing cleanup and keeping the flavors locked together.
- Make‑Ahead Friendly: These cookies keep their texture for up to a week, and the glaze even improves after a day.
Inside the Ingredient List
The Flavor Base
Water (1 cup) is the silent hero here, providing the necessary moisture for a soft crumb. If you skimp on it, the dough becomes dry and crumbly—trust me, I’ve learned that the hard way. Sugar (1 cup) not only sweetens but also contributes to the caramelization that gives the cookies their golden edge. Honey (½ cup) adds a floral note and keeps the interior moist, acting like a natural humectant.
The Texture Crew
Mixed candied citrus peel (½ cup) injects bright, tangy bursts that cut through the richness of the cocoa. Toasted ground hazelnuts (½ cup) bring a buttery crunch and a subtle nuttiness that deepens the flavor profile. Flour (2 cups) forms the structure, but the key is using a low‑protein, all‑purpose variety to keep the cookies tender.
The Unexpected Star
Unsweetened cocoa powder appears twice: first as ¼ cup in the dough for a deep chocolate backbone, then 2 tablespoons in the glaze for a glossy finish. Lemon zest (1 tablespoon) lifts the whole recipe with a citrusy zing, while the Lebkuchen spice mix (2 teaspoons) is the secret blend of cinnamon, cloves, nutmeg, and allspice that gives the cookies their traditional German character. If you can’t find Lebkuchen mix, combine equal parts cinnamon, ground ginger, and a pinch of ground cloves.
The Final Flourish
Fine sea salt (1 teaspoon) balances the sweetness and enhances every spice note. Baking soda and baking powder (each 1 teaspoon) work together to give the cookies a slight rise without making them cake‑like. Milk (¼ cup) adds richness, and the large egg (1) binds everything together while adding a touch of silkiness. Finally, the icing sugar (1 cup) and lemon juice (2 tablespoons) create the glaze that sets the cookie apart.
Everything's prepped? Good. Let's get into the real action...

The Method — Step by Step
Start by heating a saucepan over medium heat and adding 1 cup of water, 1 cup of sugar, and ½ cup of honey. Stir constantly until the sugar fully dissolves and the mixture begins to bubble—this is where the magic starts. Once it reaches a gentle boil, let it simmer for about 2 minutes, then remove from heat. The scent of caramelizing sugar will fill your kitchen, signaling that you’re on the right track.
While the syrup cools slightly, whisk together the dry ingredients in a large bowl: 2 cups flour, ¼ cup unsweetened cocoa powder, 2 teaspoons Lebkuchen spice mix, 1 teaspoon cinnamon, 1 teaspoon fine sea salt, 1 teaspoon baking soda, and 1 teaspoon baking powder. This ensures the spices are evenly distributed and prevents any bitter pockets of cocoa. I dare you to taste this dry mix; you’ll already detect the warm spice aroma.
In a separate bowl, combine ¼ cup milk, 1 large egg, and 1 tablespoon lemon zest. Beat until the mixture is smooth and slightly frothy. The lemon zest adds a bright note that will cut through the richness later on.
Now, pour the cooled syrup into the wet mixture, whisking continuously. Once combined, gradually add the wet mixture to the dry ingredients, stirring with a wooden spoon until a shaggy dough forms. At this point, the dough should feel soft but not sticky—if it’s too wet, sprinkle a tablespoon of flour; if too dry, add a splash of water.
Fold in the ½ cup mixed candied citrus peel and ½ cup toasted ground hazelnuts. These additions give bursts of citrus and a nutty crunch that make each bite exciting. Let the dough rest for 10 minutes; this rest allows the gluten to relax, resulting in a tender cookie.
Preheat your oven to 350°F (175°C). Line two baking sheets with parchment paper. Using a tablespoon or a small ice‑cream scoop, portion out dough onto the sheets, spacing them about 2 inches apart. Press each ball lightly with the back of a spoon to flatten them just a touch; they’ll spread a little while baking.
Slide the trays into the oven and bake for 12‑15 minutes, or until the edges are set and the tops have a faint crackle. The cookies should still be soft in the center—remember, they’ll firm up as they cool. When you open the oven, you’ll hear a faint “sizzle” as the glaze sets—absolute perfection.
While the cookies bake, prepare the glaze: combine 1 cup icing sugar, 2 tablespoons unsweetened cocoa powder, 2 tablespoons lemon juice, and 1 cup water in a small saucepan. Whisk over low heat until smooth, then bring to a gentle boil for 1 minute. The glaze should be glossy and slightly thick—if it’s too runny, let it simmer a few seconds longer.
When the cookies are done, remove them from the oven and let them cool on the sheet for 5 minutes—this allows the glaze to set slightly. Then, transfer the cookies to a wire rack and brush or drizzle the glaze over each one. The glaze will harden as it cools, creating a shiny, crackly surface that looks as good as it tastes.
Allow the glazed cookies to rest for at least 15 minutes before serving. This resting time lets the flavors meld together, and the glaze becomes perfectly crisp. Picture yourself pulling this out of the oven, the whole kitchen smelling incredible, and a plate of glossy, spiced cookies waiting for you. That moment? Pure holiday bliss.
That's it — you did it. But hold on, I've got a few more tricks that'll take this to another level...
Insider Tricks for Flawless Results
The Temperature Rule Nobody Follows
Most bakers set the oven and forget about it, but the real secret is to let the oven fully preheat and then lower the temperature by 10‑15°F after the first 5 minutes of baking. This gentle heat reduction prevents the edges from over‑browning while keeping the center soft. I tried baking at a steady 350°F once and ended up with a crust that was too hard—adjusting the heat saved the day.
Why Your Nose Knows Best
Never rely solely on a timer. The moment the cookies start to emit a nutty, caramel scent, you know they’re nearing perfection. Trust that aromatic cue; it’s more reliable than any digital timer. I once pulled a batch out too early because the timer rang, and the result was a doughy disappointment.
The 5‑Minute Rest That Changes Everything
After mixing, let the dough rest for at least five minutes. This short pause lets the flour fully hydrate and the leavening agents activate gently. The result? A cookie that stays tender for days without drying out. Skipping this rest is the most common mistake I see, and it leads to a crumbly texture.
Glaze Consistency is Key
If the glaze is too thin, it will run off the cookies; too thick, and it will clump. The trick is to whisk continuously while heating, and to test the consistency by dipping a spoon: it should coat the back of the spoon but flow off slowly. A quick tip: add a drop of lemon juice if the glaze looks too thick—it will loosen just enough.
Storage Hack for Maximum Freshness
Store the cookies in a single layer inside an airtight container with a slice of fresh apple. The apple releases a bit of humidity, keeping the cookies soft without making them soggy. I tried this with a zip‑top bag once, and the cookies stayed fresh for a full week.
Creative Twists and Variations
This recipe is a playground. Here are some of my favorite ways to switch things up:
Chocolate Hazelnut Dream
Swap the mixed candied citrus peel for ½ cup chopped chocolate and double the toasted hazelnuts. The result is a richer, more indulgent cookie that feels like a mini tiramisu.
Spiced Orange Delight
Replace the lemon zest with orange zest and add a teaspoon of orange blossom water to the glaze. The citrus becomes brighter, perfect for a winter brunch.
Vegan Version
Use a flax egg (1 tbsp ground flaxseed + 3 tbsp water) instead of the large egg, and replace butter with coconut oil. The texture stays soft, and the flavor gets a subtle tropical twist.
Gluten‑Free Adaptation
Swap the all‑purpose flour for a 1‑to‑1 gluten‑free flour blend, and add ½ teaspoon xanthan gum. The cookies remain tender, and the glaze stays just as glossy.
Holiday Peppermint
Stir in ½ teaspoon crushed peppermint candy into the dough and drizzle a thin layer of white chocolate over the glaze after it sets. This gives a festive minty finish that’s perfect for Christmas parties.
Nut‑Free Option
If you’re avoiding nuts, replace the hazelnuts with toasted pumpkin seeds. They provide a similar crunch and a slightly earthy flavor that pairs well with the spices.
Storing and Bringing It Back to Life
Fridge Storage
Place the cooled cookies in an airtight container and store them in the refrigerator for up to a week. The cool environment preserves the glaze’s crispness and prevents the cookies from drying out.
Freezer Friendly
For longer storage, arrange the cookies on a parchment‑lined tray and freeze them solid, then transfer to a zip‑top freezer bag. They’ll keep for up to three months. When you’re ready to enjoy, let them thaw at room temperature for 20 minutes.
Best Reheating Method
To revive that fresh‑out‑of‑the‑oven softness, preheat your oven to 300°F (150°C), place the cookies on a baking sheet, and warm for 5‑7 minutes. Add a tiny splash of water to the tray before heating; the steam will re‑hydrate the interior while the glaze regains its shine.