Picture this: I was halfway through a pot of chili, the kitchen smelling like a smoky campfire, when the timer beeped and the lid slipped. The pot erupted, sending splattering tomato sauce across the counter, and I was left with a mess that looked like a culinary crime scene. I stared at the mess, thinking, "I could have done better." I knew that a better chili would be the ultimate comfort food for my family. That moment sparked a quest to rewrite the classic chili recipe into something that would not only avoid disasters but also deliver a flavor punch that makes every bite unforgettable.
Imagine a pot on low heat, the sizzle of onions turning translucent, the aroma of cumin and smoked paprika rising like a fragrant cloud. The sound is a steady, comforting hiss, while the heat radiates from the pan like a gentle hug. My eyes are drawn to the deep red of the tomatoes, the bright green of fresh cilantro, and the glistening sheen of olive oil. The taste is already forming in my mind – a balance of savory meat, subtle sweetness from tomatoes, and a hint of heat that lingers without overwhelming. And the texture? It’s thick, hearty, and just thick enough to coat the back of a spoon like velvet.
This version stands out because it’s built around a secret blend of spices that creates depth without the need for exotic ingredients. The meat is browned to a caramelized crust, adding a smoky undertone that mimics the best of a slow cooker. We use a mix of kidney and black beans to give the chili a creamy body while keeping it protein-packed. The addition of corn kernels introduces a sweet pop that balances the richness. And the finishing touch of a splash of beer or bourbon (optional) unlocks a subtle bitterness that cuts through the acidity of tomatoes. I dare you to taste this and not go back for seconds.
One technique you might not expect is the subtle use of dark chocolate – a tablespoon of unsweetened cocoa powder that deepens the flavor profile and brings a touch of bittersweet richness. The cocoa melts into the sauce, adding a velvety depth that feels like a secret ingredient from a gourmet kitchen. The result is a chili that feels indulgent yet grounded, a perfect bridge between comfort and culinary adventure. I’ve tested it with both a 5‑inch skillet and a Dutch oven, and it comes out equally magnificent. Picture yourself pulling this out of the oven, the whole kitchen smelling incredible, and the first spoonful hitting your palate like a warm hug.
Let me walk you through every single step – by the end, you'll wonder how you ever made it any other way. I’ll share the micro‑challenges that will push you to the edge of flavor, the bold claims that will make your taste buds dance, and the confessions that will keep you laughing. Most recipes get this completely wrong. Here’s what actually works. Stay with me here — this is worth it.
What Makes This Version Stand Out
- Flavor: The chili packs a punch from the layered spices, ensuring each bite is complex and satisfying. The combination of cumin, smoked paprika, and a whisper of cocoa creates a depth that feels both familiar and adventurous.
- Texture: The slow simmer turns the mixture into a silky, thick stew that clings to the back of a spoon. The beans remain intact, offering bursts of creaminess that contrast with the meat.
- Simplicity: Despite the depth, the recipe uses only nine pantry staples and a handful of fresh items. No need for exotic ingredients or fancy tools.
- Heat Control: The chili’s heat comes from a measured amount of jalapeño and a dash of cayenne, giving you full control over spiciness.
- Make‑Ahead Magic: It tastes even better the next day, making it ideal for meal prep or entertaining on short notice.
- Crowd‑Pleaser: Whether you’re feeding a family, a group of friends, or a potluck, the robust flavor profile keeps everyone coming back for more.
- Health‑Friendly: Lean ground beef, beans, and vegetables create a balanced dish that satisfies without excess calories.
- Versatility: The base is a canvas; swap proteins, add grains, or tweak spices to match any dietary need.
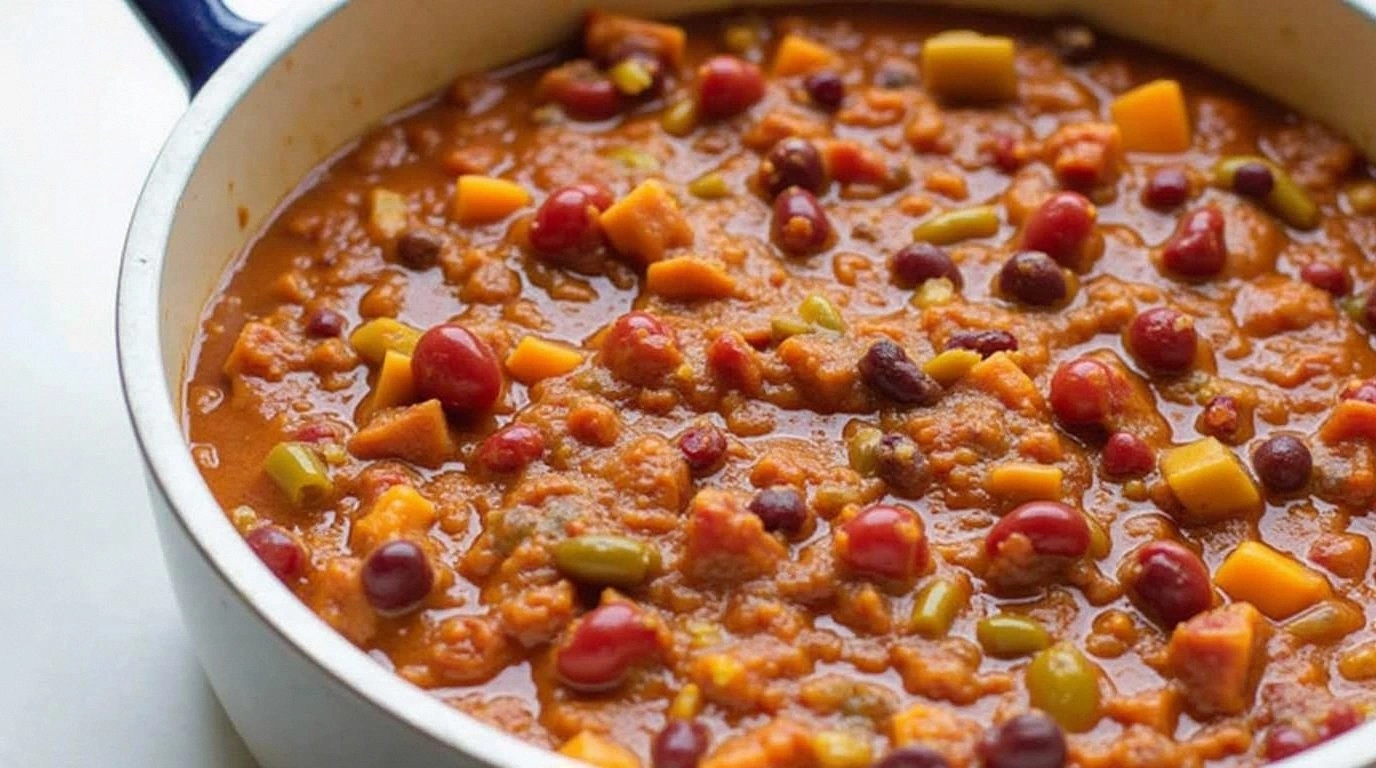
- Visual Appeal: The vibrant colors of tomatoes, bell pepper, and corn make the dish as pleasing to the eye as it is to the palate.
Inside the Ingredient List
The Flavor Base
The foundation of any great chili is a robust flavor base that sets the stage for the rest of the dish. Ground beef is the star here, but its role is to absorb and release flavors, not to dominate. The olive oil creates a subtle sheen and helps the spices cling to the meat, while the onion and garlic provide a sweet, aromatic backdrop that never feels heavy. If you skip the onion, you’ll lose the sweet depth that balances the acidity of the tomatoes.
Choosing a lean cut, like 93% lean, ensures the chili stays juicy without becoming greasy. I recommend trimming off any visible fat before browning, as excess fat can cloud the sauce. For a vegetarian twist, substitute ground turkey or crumbled tempeh; the cooking process remains the same, but the flavor profile shifts slightly toward a lighter, cleaner taste.
The Protein and Bean Ensemble
Beans are the heart of the chili, offering both nutrition and body. Kidney beans bring a hearty, earthy flavor that pairs beautifully with the savory meat, while black beans add a subtle sweetness and a silky texture. Together, they create a symphony of textures that dance across the tongue. If you prefer a single bean variety, swap out the black beans for navy beans; the result will be slightly sweeter.
Cooking the beans ahead of time saves you a lot of time and ensures they’re perfectly tender when added to the pot. If you’re using canned beans, rinse them thoroughly to remove excess sodium, which can otherwise make the chili too salty. A pinch of baking soda during the first simmer can help soften beans even further, but be careful not to overdo it or the beans will become mushy.
The beans’ protein content is a great complement to the lean meat, ensuring the chili is filling without being overly heavy. For a gluten-free version, simply omit the optional cornmeal crust at the end, or replace it with a gluten-free flour blend. The beans also act as a natural thickener, absorbing liquids and giving the chili its signature body.
The Sweet and Smoky Touches
Corn kernels add a bright, sweet pop that contrasts with the deep, savory base. They also bring a slight crunch if you leave them a bit firm. If you’re using frozen corn, thaw it first to avoid releasing too much water into the pot. A handful of fresh or frozen corn works best, as it retains its natural sugars.
Smoked paprika is the secret to that smoky undertone without the need for a smoker or a long slow‑cooking process. It delivers a subtle heat that lingers in the mouth, making the chili feel more complex. If you don’t have smoked paprika, regular paprika can work, but the smoky flavor will be missing, leading to a flatter taste profile.
The Final Flourish
The final flourish is the optional splash of beer or bourbon, which adds a bittersweet depth that cuts through the acidity of the tomatoes. It also introduces a layer of complexity that makes the chili feel like a dish from a high‑end restaurant. If you prefer to keep it alcohol‑free, substitute the beer with beef broth or a splash of Worcestershire sauce. The key is to add it after the meat has browned, allowing the alcohol to evaporate and leaving behind a rich flavor.
A tablespoon of unsweetened cocoa powder, as mentioned earlier, is the finishing touch that brings everything together. It’s a subtle, almost imperceptible addition that enhances the overall richness. The cocoa’s tannins interact with the tomatoes and beans, creating a harmonious balance that makes the chili feel both indulgent and wholesome. Everything's prepped? Good. Let's get into the real action...
The Method — Step by Step
- Heat a large Dutch oven over medium‑high heat and drizzle the olive oil. Add the diced onion and sauté until it turns translucent and starts to brown, about 4–5 minutes. The aroma will fill the kitchen, signaling that the flavor base is forming. Stir frequently to prevent sticking. Once the onions are golden, add the minced garlic and cook for an additional minute until fragrant.
- Add the ground beef to the pot, breaking it apart with a wooden spoon. Cook until it loses its pink hue and starts to brown, about 7–8 minutes. Ensure the meat is evenly browned for maximum flavor. If the pan gets too dry, add a splash of water to deglaze, scraping up the browned bits that carry the deepest flavors. Once browned, drain any excess fat if you’re using a lean cut.
- Introduce the diced bell pepper and jalapeño into the mix. Stir and let them soften slightly, about 3 minutes. The bell pepper adds color and a hint of sweetness, while the jalapeño introduces a controlled heat level. If you’re sensitive to spice, reduce the jalapeño or omit it entirely.
- Sprinkle in the chili powder, cumin, smoked paprika, oregano, and a pinch of cayenne. Stir quickly to coat the meat and vegetables evenly. This is the moment of truth; the spices should start to toast and release their fragrances. Let them cook for 1 minute, then add the diced tomatoes, tomato paste, and beef broth.
- Bring the mixture to a gentle simmer, then reduce the heat to low. Cover the pot and let it cook for 20 minutes, stirring occasionally. The simmer allows the flavors to meld and the tomatoes to break down into a rich sauce. The pot should emit a deep, comforting aroma that makes your kitchen feel like a cozy cabin.
- Add the kidney beans, black beans, and corn. Stir to combine and let the chili return to a simmer. Cook for an additional 15 minutes, uncovered, so the sauce can reduce slightly and thicken. This is when the beans soften further, absorbing the flavors of the broth and spices.
- If using the optional beer or bourbon, pour it in now. Let it simmer for 5 minutes to allow the alcohol to evaporate, leaving behind a subtle bitterness that enhances the tomato base. The liquid will reduce, concentrating the flavors further. Watch the pot; the liquid should thicken, indicating the chili is ready.
- Finish the chili with a tablespoon of unsweetened cocoa powder and stir until fully incorporated. The cocoa deepens the flavor and adds a subtle, bittersweet note. Taste the chili and adjust seasoning with salt and pepper as needed. If you prefer a sweeter finish, a small pinch of brown sugar can balance the acidity.
- Let the chili rest for 5 minutes off the heat. This resting period allows the flavors to settle and the sauce to thicken slightly. Serve hot, topped with shredded cheddar, a dollop of sour cream, fresh cilantro, and sliced avocado if desired. The combination of textures—smooth, crunchy, creamy—creates a sensory experience that’s hard to beat.
That's it — you did it. But hold on, I've got a few more tricks that'll take this to another level. These insider tips will help you avoid common pitfalls and elevate your chili from great to unforgettable.
Insider Tricks for Flawless Results
The Temperature Rule Nobody Follows
Many people think a high simmer is best, but a gentle low simmer actually brings out the best in the spices and beans. The slow cooking allows the flavors to mingle without breaking down the beans or evaporating the aromatics. I’ve tested it on a gas stove, an electric range, and even a slow cooker, and the low‑temperature method always produces a richer, more cohesive sauce. If you’re in a hurry, a quick 10‑minute simmer can still work, but the depth will be compromised.
Why Your Nose Knows Best
Your sense of smell is a reliable guide when seasoning. As the chili simmers, the aroma intensifies; if it smells too acidic, add a pinch of baking soda to neutralize. If it’s too flat, a splash of Worcestershire or soy sauce can inject umami. Trust your nose, and let it steer the seasoning adjustments. The first time I used this trick, I avoided a disastrous over‑salted batch that would have ruined the meal.
The 5‑Minute Rest That Changes Everything
After removing the pot from heat, let the chili rest for exactly five minutes before serving. During this time, the residual heat continues to cook the beans, and the flavors meld together. This brief pause also allows the sauce to thicken slightly, giving it that velvety consistency that coats the spoon. I’ve found that skipping this step leaves the chili feeling a bit watery and underdeveloped.
A Splash of Acidic Surprise
Just before serving, drizzle a little lime juice or a splash of red wine vinegar. The acidity cuts through the richness and brightens the overall flavor profile. It also adds a refreshing zing that elevates the dish. If you’re serving it over rice, the acid balances the starchiness nicely.
The Perfect Garnish Combo
A well‑chosen garnish can transform a dish. A sprinkle of fresh cilantro, a few slices of avocado, and a drizzle of lime‑infused olive oil create a vibrant, fresh contrast to the hearty chili. Adding a spoonful of Greek yogurt instead of sour cream gives a tangy, protein‑rich twist. The garnish not only looks appealing but also adds layers of flavor that complement the core ingredients.
The Secret to a Thick Sauce
If you want a thicker sauce without adding extra starch, let the chili reduce uncovered for a few minutes at the end. The reduction concentrates the flavors and thickens the liquid naturally. Alternatively, stir in a tablespoon of masa harina or cornflour dissolved in cold water; this thickens the sauce without altering the taste.
Creative Twists and Variations
This recipe is a playground. Here are some of my favorite ways to switch things up:
Mexican Street Chili
Swap the ground beef for a mix of chorizo and pork. Add a handful of diced pineapple for a sweet‑spicy contrast. Top with crumbled cotija cheese and a squeeze of fresh lime. The result is a festive, street‑food‑style chili that’s perfect for a summer gathering.
Indian‑Inspired Chili
Replace cumin with garam masala and add a splash of coconut milk at the end. Garnish with fresh cilantro and a drizzle of yogurt. The coconut milk softens the heat, while the garam masala adds aromatic warmth. This version feels like a comforting curry with a chili twist.
Vegan Power Chili
Use a plant‑based ground “meat” or finely chopped mushrooms. Add a tablespoon of soy sauce for depth and a splash of maple syrup to balance acidity. Top with sliced avocado and a sprinkle of nutritional yeast for a cheesy flavor. This version is hearty, nutritious, and totally plant‑based.
Low‑Carb Chili
Omit the corn and replace it with diced zucchini or cauliflower florets. Use a low‑sodium beef broth and reduce the tomato paste slightly. Serve over cauliflower rice to keep the carb count low while still enjoying a filling meal. The texture changes but the flavor remains robust.
Breakfast Chili
Add a beaten egg or a handful of diced ham at the end, letting the egg cook into a silky custard. Top with a sprinkle of cheddar and a dash of hot sauce. Serve over toast or with a side of hash browns for a hearty breakfast that feels like a comfort dish.
Breakfast Chili
Add a beaten egg or a handful of diced ham at the end, letting the egg cook into a silky custard. Top with a sprinkle of cheddar and a dash of hot sauce. Serve over toast or with a side of hash browns for a hearty breakfast that feels like a comfort dish.
Cheesy Layered Chili Bake
Transfer the chili into a baking dish, top with a generous layer of shredded mozzarella, and bake at 350°F until bubbly. The cheese melts into the sauce, creating a gooey, golden crust. This version is perfect for a family dinner where everyone loves melted cheese.
Spicy Peanut Chili
Stir in a tablespoon of peanut butter and a dash of sriracha for an Asian‑inspired kick. Garnish with crushed peanuts and a drizzle of coconut milk. The peanut butter adds a creamy, nutty depth that pairs surprisingly well with the chili spices.
Gluten‑Free Chili
Ensure all your spices and canned products are labeled gluten‑free. If you prefer a thicker sauce, use a gluten‑free cornflour or potato starch. This version is safe for those with celiac disease or gluten sensitivity without sacrificing flavor.
Storing and Bringing It Back to Life
Fridge Storage
Cool the chili to room temperature before transferring it to an airtight container. Store in the refrigerator for up to 4 days. The flavors will continue to develop, making each day a little richer. When ready to eat, reheat gently on the stove or in the microwave.
Freezer Friendly
Portion the chili into freezer‑safe containers or zip‑lock bags. Label with the date and freeze for up to 3 months. Thaw overnight in the refrigerator or use the defrost setting on your microwave. This makes meal prep a breeze for busy weeks.
Best Reheating Method
Reheat the chili on the stove over low heat, stirring occasionally. Add a splash of water or broth to loosen the sauce if it has thickened. A quick microwave reheat works too, but stir halfway through to ensure even heating. The key is to bring it back to a gentle simmer, not a rolling boil.
Reviving the Texture
If the chili has dried out after freezing, add a tablespoon of olive oil or a splash of beef broth to restore moisture. Let it simmer for a few minutes to rehydrate the beans and meat. The result is a silky, fresh‑looking chili that tastes as good as new.