I still remember the great pumpkin cookie disaster of 2022. There I was, standing in my kitchen at 11:47 PM on a Tuesday night, surrounded by what looked like orange hockey pucks. The recipe I'd followed promised "soft and chewy pumpkin cookies" but delivered something closer to weaponized baked goods. My roommate bit into one and literally chipped a tooth. That sound — the unmistakable crack of enamel meeting over-baked dough — haunted me for weeks.
But here's the thing about failure: it either breaks you or makes you obsessed. I became obsessed. I spent the next three months testing, tweaking, and basically turning my kitchen into a pumpkin cookie laboratory. I tested 47 different versions. I tried every possible ratio of butter to pumpkin, every combination of spices, every trick in the book. My neighbors started avoiding me because I'd show up at their doors with yet another batch of "experimental" cookies. My Instagram became a graveyard of sad, deflated baked goods.
Then one rainy October afternoon, inspiration struck like lightning. What if I combined the gooey, melty magic of s'mores with the warm, cozy flavors of pumpkin? What if instead of fighting the moisture in pumpkin puree, I embraced it and used it to create the chewiest, most irresistible cookie texture known to humankind? I raced to the kitchen, my hands shaking with excitement, and started baking. The first batch came out of the oven, and that smell — oh my god, that smell — was like autumn and campfire and childhood memories all wrapped into one glorious aroma.
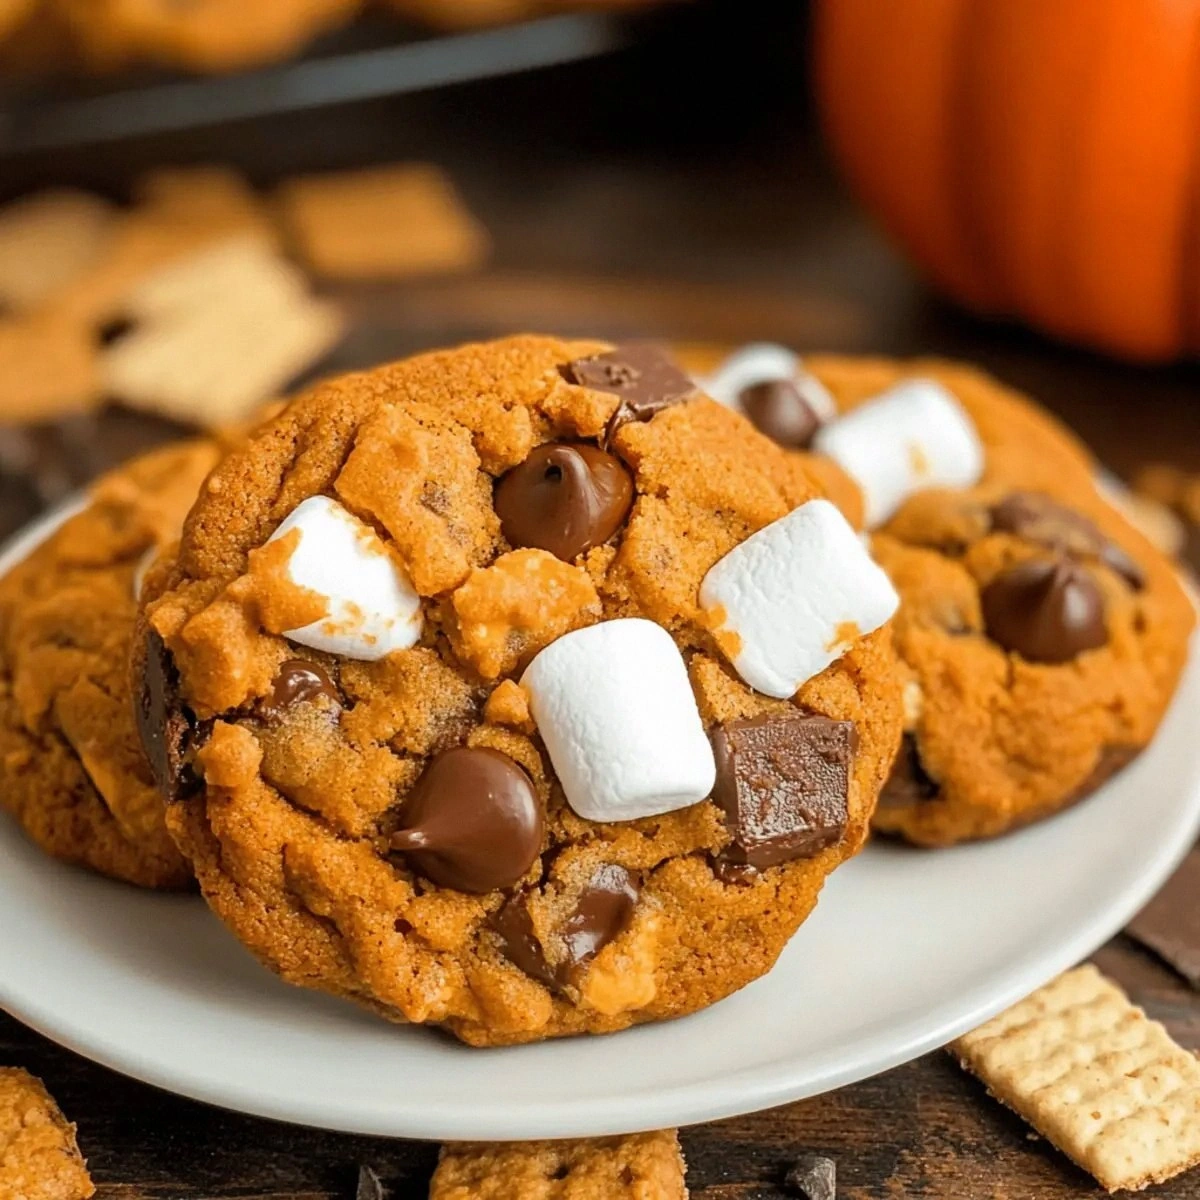
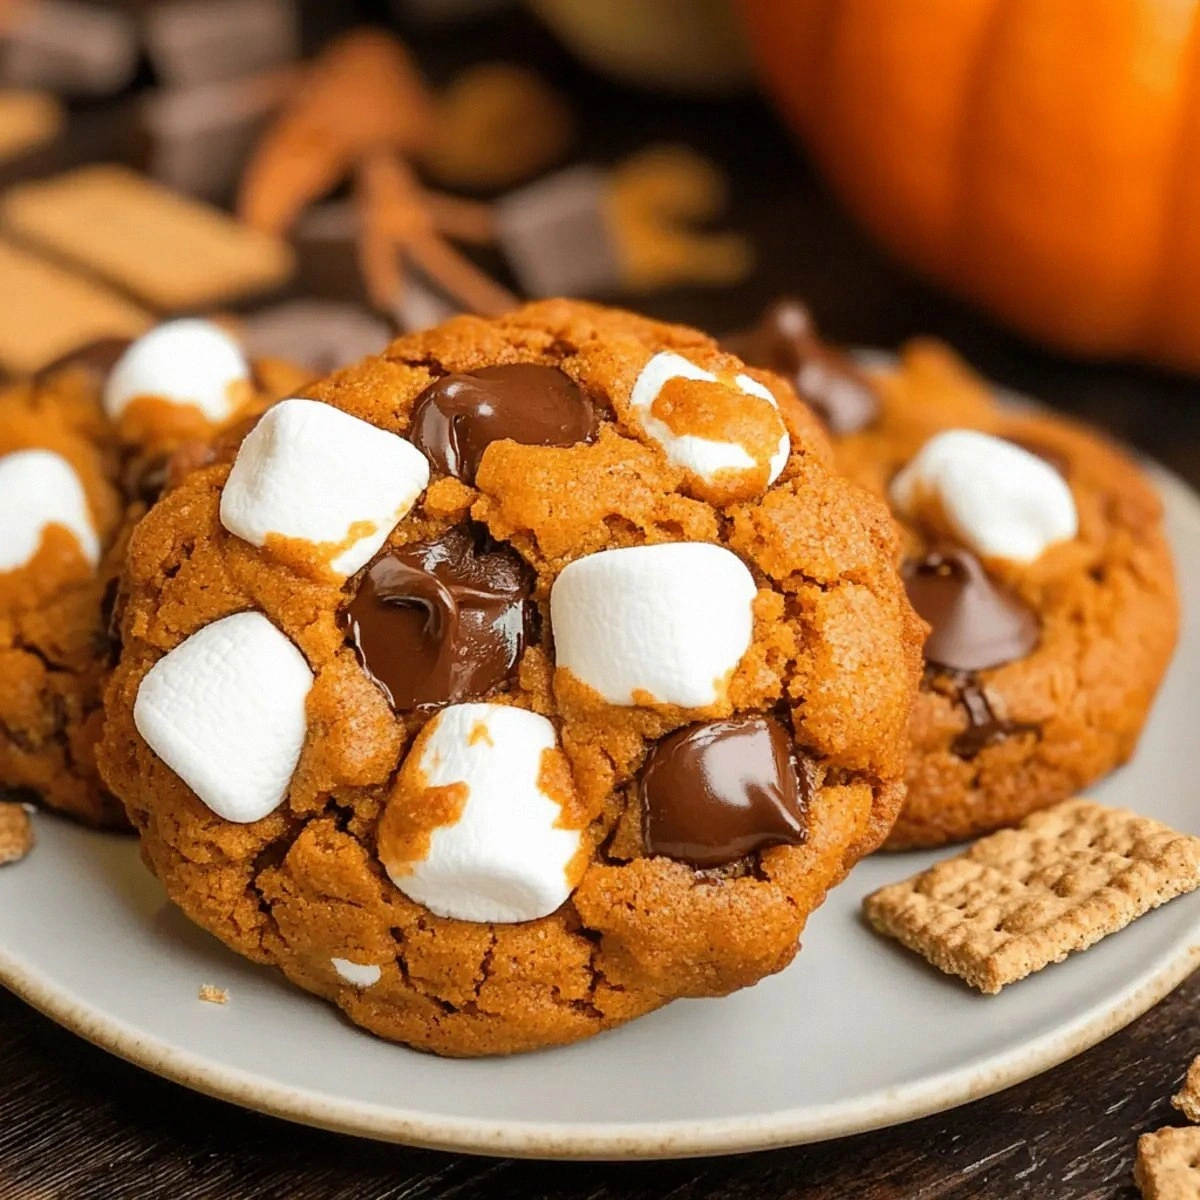
Picture this: a cookie with the perfect chewy texture that bends rather than breaks, studded with pools of melted chocolate, pockets of gooey marshmallow, and little crunchy surprises of graham cracker. The pumpkin flavor is present but not overwhelming, like a warm hug rather than a pumpkin spice assault. The edges get these gorgeous lacy bits that shatter delicately, while the centers stay soft and almost fudgy. I dare you to taste these and not go back for seconds. Actually, I double-dog dare you. Because here's my bold claim: this is hands down the best version of pumpkin cookies you'll ever make at home.
What Makes This Version Stand Out
Most recipes get pumpkin cookies completely wrong. They treat pumpkin like it's just another liquid ingredient, but pumpkin is a game-changer that demands respect and understanding. Here's why this recipe actually works:
- Texture Revolution: Instead of cakey or hockey-puck cookies, these stay perfectly chewy for days thanks to the magical interaction between pumpkin moisture and the right fat ratio. The edges caramelize while the centers stay soft — it's like having two cookies in one.
- Flavor Harmony: We're not dumping in a truckload of pumpkin pie spice and calling it a day. The spice blend is carefully calibrated to enhance, not mask, the warm pumpkin flavor. Think of it as a symphony where every note has its moment to shine.
- S'mores Integration: Most bakers just throw some chocolate chips into pumpkin dough and hope for the best. We're creating actual s'mores pockets by strategically placing marshmallows and graham crackers so you get that campfire experience in every bite.
- Foolproof Technique: No more guessing when cookies are done. I'll teach you the visual and textural cues that guarantee success every single time. No more opening the oven door every 30 seconds.
- Make-Ahead Magic: The dough actually improves after 24 hours in the fridge, developing deeper flavors and an even better texture. This means you can prep ahead for parties or satisfy late-night cookie cravings in 12 minutes flat.
- Crowd Psychology: These cookies disappear at an alarming rate. I've watched grown adults hide them from their children. I've seen food bloggers claim they don't like pumpkin desserts demolish an entire batch. They're that good.
Alright, let's break down exactly what goes into this masterpiece...
Inside the Ingredient List
The Flavor Foundation
The butter is where it all begins, and please — I'm begging you — use the good stuff. European-style butter with its higher fat content creates cookies that spread just enough to get those gorgeous crispy edges while maintaining a tender center. When creamed with the brown sugar, something magical happens. The brown sugar's molasses notes pair with the butter to create this deep, almost butterscotch-like flavor that makes pumpkin sing.
Pumpkin puree is obviously the star here, but not all cans are created equal. Look for 100% pure pumpkin, not pumpkin pie filling (that's a completely different beast). The best brands have a deep orange color and thick consistency. If you can find it, organic pumpkin tends to have better flavor. And here's what most recipes miss: you need to blot your pumpkin. Seriously, press it between paper towels to remove excess moisture. Too much liquid equals sad, cakey cookies.
The Texture Crew
All-purpose flour provides the structure, but we're using slightly less than traditional recipes because pumpkin adds body. The protein content matters more than you'd think — too much and your cookies turn tough, too little and they fall apart. I tested this with everything from cake flour to bread flour, and regular AP flour hits that sweet spot of chewiness and stability.
Baking soda is our leavening agent, but it does more than just make cookies rise. It also helps with browning, creating those beautiful golden edges that taste like caramel. Don't substitute baking powder here — you need the alkaline properties of baking soda to balance the pumpkin's acidity and create the perfect texture.
The Unexpected Star
Pumpkin pie spice is where most recipes go off the rails. They dump in way too much, creating that aggressive "pumpkin spice everything" flavor that turns people off. We're using just enough to whisper autumn, not scream it. The blend of cinnamon, ginger, nutmeg, and cloves should enhance the pumpkin, not compete with it. If you're making your own blend, go easy on the nutmeg — it can quickly overpower everything.
The Final Flourish
Chocolate chips aren't just an afterthought here. Go for a mix of semisweet and milk chocolate for complexity. The different cocoa contents melt at different rates, creating these amazing chocolate pockets throughout the cookie. And don't you dare use those waxy, cheap chips that refuse to melt. Spring for the good stuff — your taste buds will thank you.
Mini marshmallows are the secret weapon. Regular-sized ones are too bulky and create weird air pockets. Mini marshmallows melt into these gorgeous little gooey spots that stretch like mozzarella when you break the cookie apart. They're what make these taste like actual s'mores, not just cookies with marshmallows.
Everything's prepped? Good. Let's get into the real action...
The Method — Step by Step
- Start by browning your butter in a light-colored pan over medium heat. This is where you need to watch closely — it's a fine line between perfectly nutty and tragically burnt. The butter will foam, then the milk solids will separate and sink to the bottom. Keep swirling the pan until those solids turn a deep golden brown and smell like toasted hazelnuts. That smell? Absolute perfection. This takes about 5-7 minutes, but trust your nose more than the clock. Pour it immediately into a heatproof bowl to stop the cooking.
- While the butter cools slightly, whisk together your flour, baking soda, pumpkin pie spice, and salt in a medium bowl. This ensures even distribution — nobody wants to bite into a pocket of baking soda. The mixture should smell like autumn and look like sandy beach. Set this aside and resist the urge to stick your finger in for a taste (learn from my mistakes).
- Now for the fun part: cream together your cooled brown butter with both sugars until the mixture looks like wet sand that just came back from vacation — relaxed, happy, and ready to party. This takes about 3 minutes with a mixer on medium speed. The mixture should lighten in color and look fluffy. Don't rush this step — proper creaming incorporates air that helps with the cookie's structure.
- Beat in your egg, pumpkin puree, and vanilla. Here's where most recipes fail — they don't account for how pumpkin changes the game. The mixture will look slightly curdled at first; that's normal. Keep beating until it comes together into a smooth, orange-hued cloud of deliciousness. If you want that extra orange color, add a drop or two of food coloring now.
- Time to bring it all together. Add your dry ingredients gradually, mixing just until no flour streaks remain. Overmixing develops gluten, which equals tough cookies. The dough should be soft but not sticky, like Play-Doh that's been left out for a few minutes. If it's too wet, add a tablespoon of flour. Too dry? A teaspoon of milk does the trick.
- Fold in your chocolate chips with a spatula, not the mixer. We want them evenly distributed, not pulverized. Then comes the marshmallow moment — reserve half of them for later. Fold in the first half gently, then add the rest on top right before baking. This creates those Instagram-worthy marshmallow pulls.
- Preheat your oven to 350°F (175°C) and line baking sheets with parchment. Use a cookie scoop or two spoons to portion dough into golf ball-sized mounds. Space them generously — these cookies spread more than you'd expect. Press a few extra chocolate chips and marshmallows on top for that bakery-style look.
- Bake for 12-14 minutes, but here's the secret: pull them out when the edges are set but the centers still look slightly underbaked. They'll continue cooking on the hot pan. The marshmallows should be puffed and just starting to turn golden. That sizzle when marshmallows hit the hot pan? That's the sound of magic happening.
- Let them cool on the pan for 5 minutes — this is crucial for developing that perfect chewy texture. Then transfer to a wire rack. Resist the urge to eat one immediately. Okay, who am I kidding? Burn your tongue on molten chocolate and live your best life. Just don't say I didn't warn you.
That's it — you did it. But hold on, I've got a few more tricks that'll take this to another level...
Insider Tricks for Flawless Results
The Temperature Rule Nobody Follows
Here's what separates good bakers from great ones: understanding temperature. Your ingredients should be at the right temp before you start, but more importantly, you need to know when to break the rules. Cold butter in this recipe would be a disaster — it won't cream properly. But room temperature butter that's too warm? Equally problematic. The sweet spot is cool room temperature, around 65°F. Press your finger into the butter; it should give slightly but still hold its shape. If your kitchen is warm, cut the butter into small pieces and let it sit for just 10 minutes.
Why Your Nose Knows Best
Stop relying on timers alone. Your nose is the most sophisticated piece of equipment in your kitchen. When these cookies are perfectly baked, your kitchen will smell like a autumn carnival. The moment you catch that rich, caramel-buttery scent, start checking for doneness. If you wait for the timer, you've probably overbaked them. I learned this from my grandmother, who never owned a kitchen timer but produced perfect cookies every single time. She'd walk past the oven, take one whiff, and announce "They're done!" She was always right.
The 5-Minute Rest That Changes Everything
After you mix your dough, let it rest for 5 minutes before adding mix-ins. This allows the flour to fully hydrate, creating a more stable dough that won't spread into puddles. It's like the difference between throwing everything into a smoothie versus letting oats soak first. Your cookies will hold their shape better, bake more evenly, and have a superior texture. A friend tried skipping this step once — let's just say her cookies looked like they'd melted in the oven and re-solidified into cookie puddles.
Creative Twists and Variations
This recipe is a playground. Here are some of my favorite ways to switch things up:
The Campfire Classic
Replace half the chocolate chips with chopped dark chocolate and add a teaspoon of liquid smoke to the dough. Toast your marshmallows under the broiler for 30 seconds before folding them in. The result tastes like you cooked these over an actual campfire, minus the mosquitos and questionable hygiene.
Salted Caramel Dream
Drizzle homemade caramel over the cookies right when they come out of the oven, then sprinkle with flaky sea salt. The sweet-salty combination with the warm spices creates this sophisticated flavor that makes people think you went to culinary school. Little do they know it took you 15 minutes.
White Chocolate Cranberry
Swap the chocolate chips for white chocolate and add dried cranberries instead of marshmallows. The tart cranberries cut through the richness, and white chocolate plays beautifully with pumpkin. It's like autumn in cookie form, but make it fancy.
Peanut Butter Paradise
Replace 1/4 cup of butter with creamy peanut butter. The nutty flavor pairs surprisingly well with pumpkin, creating this cozy, protein-packed cookie that somehow feels healthy (it's not, but let us dream). Add chopped peanuts for crunch.
Maple Bacon Madness
Fold in crumbled candied bacon along with the chocolate chips, and replace half the sugar with maple syrup. The smoky-sweet-salty combination is completely addictive. Fair warning: people will request these for every gathering forever.
Triple Chocolate Threat
Use a mix of dark, milk, and white chocolate chips, plus add cocoa powder to half the dough. Marble the two doughs together for dramatic black-and-orange cookies that taste like Halloween in the best possible way. Kids lose their minds over these.
Storing and Bringing It Back to Life
Fridge Storage
These cookies stay fresh in an airtight container at room temperature for up to 5 days, but here's the key: add a slice of bread to the container. The cookies will steal moisture from the bread instead of drying out. Replace the bread slice every other day. It's like cookie magic. Don't refrigerate them — the cold ruins the texture and makes them taste stale faster.
Freezer Friendly
Both the dough and baked cookies freeze beautifully. For dough, scoop into balls and freeze on a tray, then transfer to a bag. Bake from frozen, just add 2 extra minutes. For baked cookies, wrap individually in plastic wrap, then foil, then into a freezer bag. They'll keep for 3 months. Thaw at room temperature or give them 10 seconds in the microwave for that fresh-baked taste.
Best Reheating Method
Here's how to make day-old cookies taste fresh from the oven: place them on a microwave-safe plate with a slightly damp paper towel over them. Microwave for 8-10 seconds. The steam revives the chewy texture, and the chocolate gets melty again. If you're reheating multiple cookies, warm them in a 300°F oven for 5 minutes. Add a tiny splash of water to the pan before covering with foil — it steams back to perfection.