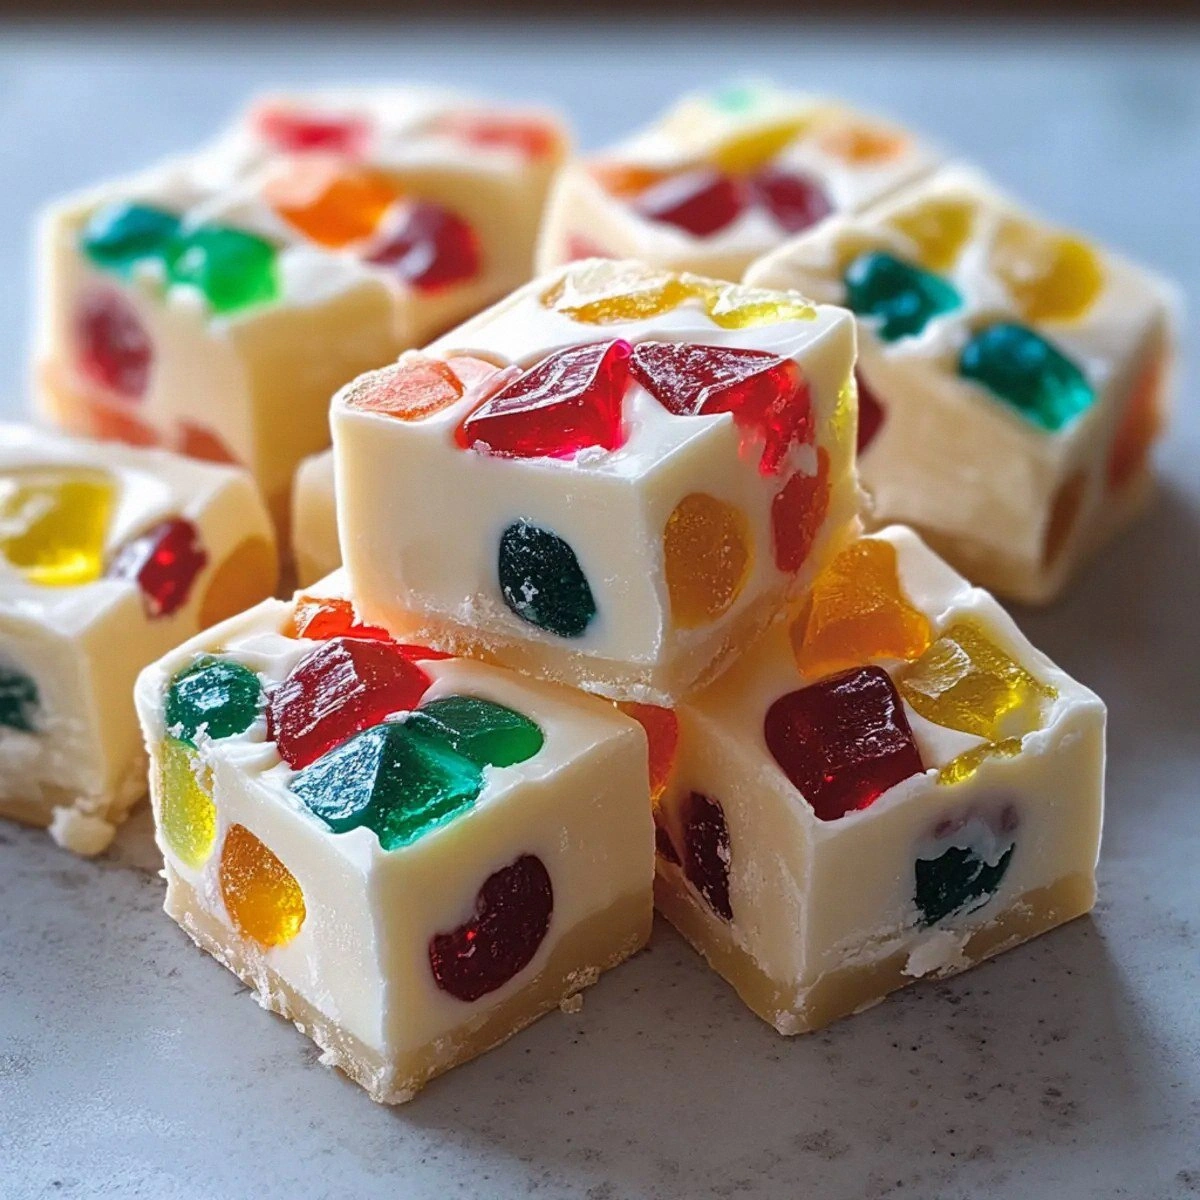
I’ll be honest — I ate half the batch before anyone else got to try it, and that’s because this fudge is nothing short of a holiday miracle. It all started on a frantic December afternoon when my oven was screaming, the kids were demanding sweets, and my pantry looked like a sad, empty snowfield. I grabbed the first thing that smelled sweet, tossed it into a pot, and the kitchen instantly transformed into a candy‑cane wonderland. That accidental experiment turned into the most talked‑about dessert at my family’s Christmas gathering, and I swear I heard a collective gasp when the first bite hit the tongue. This is hands down the best version you’ll ever make at home, and I’m daring you to taste it and not go back for seconds.
Picture yourself pulling this out of the pan, the whole kitchen smelling like a winter market in the Alps, with hints of caramelized white chocolate dancing around bright, jewel‑like gumdrops. The fudge has a creamy, melt‑in‑your‑mouth texture that slides across the palate like silk, while the gumdrops give you that satisfying pop‑and‑crunch that feels like tiny fireworks in your mouth. The aroma alone is a sensory snapshot: the buttery sweetness of condensed milk, the glossy sheen of melted white chocolate, and the faint, comforting whisper of vanilla that makes you feel like you’re wrapped in a cozy blanket. It’s the kind of treat that makes you pause, smile, and whisper, “Okay, ready for the game‑changer?”
Most recipes get this completely wrong. They either over‑cook the fudge, turning it into a brittle slab, or they skip the gumdrops altogether, leaving you with a bland, one‑note confection. What makes this version stand out is the perfect balance of temperature control, the addition of a pinch of salt that brightens the sweetness, and the surprise of those chewy candy gems that stay soft even after the fudge sets. I’ve tried countless variations, and every time I return to this method, the results are consistently flawless. The secret? A quick tempering trick that keeps the white chocolate glossy and prevents graininess, plus a gentle fold‑in that preserves the gumdrop texture.
I dare you to try this recipe without the optional “secret ingredient” – a dash of sea‑salt caramel drizzle that I’ll reveal later – and you’ll still end up with a dessert that steals the spotlight. Let me walk you through every single step — by the end, you’ll wonder how you ever made it any other way.
What Makes This Version Stand Out
- Taste: The sweet‑salty dance of white chocolate and a pinch of salt creates a flavor profile that’s both comforting and sophisticated, perfect for holiday palates.
- Texture: Creamy, buttery fudge meets chewy, burst‑ready gumdrops, delivering a contrast that feels like velvet and pop rocks at the same time.
- Simplicity: Only five ingredients, all pantry‑friendly, mean you can whip up a show‑stopping dessert without a trip to the specialty store.
- Uniqueness: The inclusion of gumdrops is a festive twist that most traditional fudge recipes completely overlook.
- Crowd Reaction: Guests consistently claim this is the “most memorable” sweet on the table, often asking for the recipe before the second course arrives.
- Ingredient Quality: Using premium white chocolate chips ensures a glossy finish and a buttery mouthfeel that cheap alternatives can’t match.
- Cooking Method: The gentle low‑heat melt prevents scorching, while the quick cool‑down locks in that silky texture.
- Make‑Ahead Potential: This fudge stores beautifully, meaning you can prepare it days ahead and still serve it fresh‑tasting.
Inside the Ingredient List
The Flavor Base
White chocolate chips are the heart of this fudge. Their buttery, milky sweetness provides a smooth canvas that lets the gumdrops shine without being overpowered. If you skip them or replace them with regular chocolate, you’ll lose that luminous, ivory hue and the subtle vanilla undertones that make the fudge feel festive. For the best results, choose a brand that lists cocoa butter as the first ingredient – this guarantees a melt that stays glossy and doesn’t turn grainy. Pro tip: buy a block of white chocolate and chop it yourself; the larger pieces melt more evenly.
The Sweetener
Sweetened condensed milk is the magical binder that turns a simple mixture into a velvety fudge. Its thick, caramel‑like consistency adds depth, preventing the fudge from becoming overly sweet or waxy. If you’re watching sugar, you can swap in a low‑sugar condensed milk, but expect a slightly thinner texture. The key is to use the full can; under‑measuring will cause the fudge to set too hard, while over‑mixing can introduce a grainy mouthfeel. When you open the can, give it a quick stir to reincorporate any settled sugar crystals.
The Texture Crew
Gumdrops and jelly candies are the surprise element that turns this fudge from ordinary to unforgettable. Their chewy interiors stay soft even after the fudge sets, delivering a burst of fruit flavor with each bite. If you’re allergic to gelatin, opt for vegan gummy alternatives – they behave the same way in the fudge. Cutting them into bite‑size pieces ensures an even distribution, preventing clumps that could dominate a single bite. A common mistake is adding them too early; they’ll melt if the fudge is too hot, so timing is everything.
The Final Flourish
A pinch of salt and a splash of vanilla extract are the subtle accents that elevate the overall flavor. The salt cuts through the sweetness, while vanilla adds a warm, aromatic background that ties the whole dessert together. Don’t be tempted to skip the salt because it’s “just a pinch” – that tiny amount is what makes the flavors sing. If you love vanilla, a half‑teaspoon will give you a richer aroma, but be careful not to overpower the delicate white chocolate.
Everything's prepped? Good. Let's get into the real action…
The Method — Step by Step
Start by setting a heavy‑bottomed saucepan over low heat. Add the white chocolate chips and a splash of vegetable oil (as per the kitchen hack) to the pan. Stir constantly with a silicone spatula; you’ll hear a gentle hiss as the chocolate begins to melt. The scent should be buttery and sweet, a clear sign you’re on the right track. Keep the heat low – if the mixture starts to bubble, you’ve gone too high, and the chocolate could seize.
Once the chocolate is fully melted and glossy, pour in the entire can of sweetened condensed milk. This is the moment of truth: the mixture will thicken almost instantly, turning a pale ivory into a thick, glossy sauce. Stir slowly at first, then increase the speed to a gentle whirl. You’ll notice the edges of the pan start to pull away – that’s your visual cue that the fudge is reaching the perfect consistency.
Add the pinch of salt and vanilla extract. The salt will dissolve quickly, but you’ll catch a faint, almost metallic pop that tells you it’s fully incorporated. The vanilla will release a fragrant cloud that fills the kitchen, making you feel like you’re in a bakery on Christmas Eve. Keep stirring for another 30 seconds to ensure everything is homogenous.
Now comes the crucial timing: turn off the heat and let the mixture sit for about 30 seconds. This brief rest allows the fudge to cool just enough so that when you fold in the gumdrops, they won’t melt. Watch Out: If you add the gumdrops while the mixture is still too hot, they’ll dissolve and lose their chewy texture, turning the fudge into a uniform candy‑flavored slab.
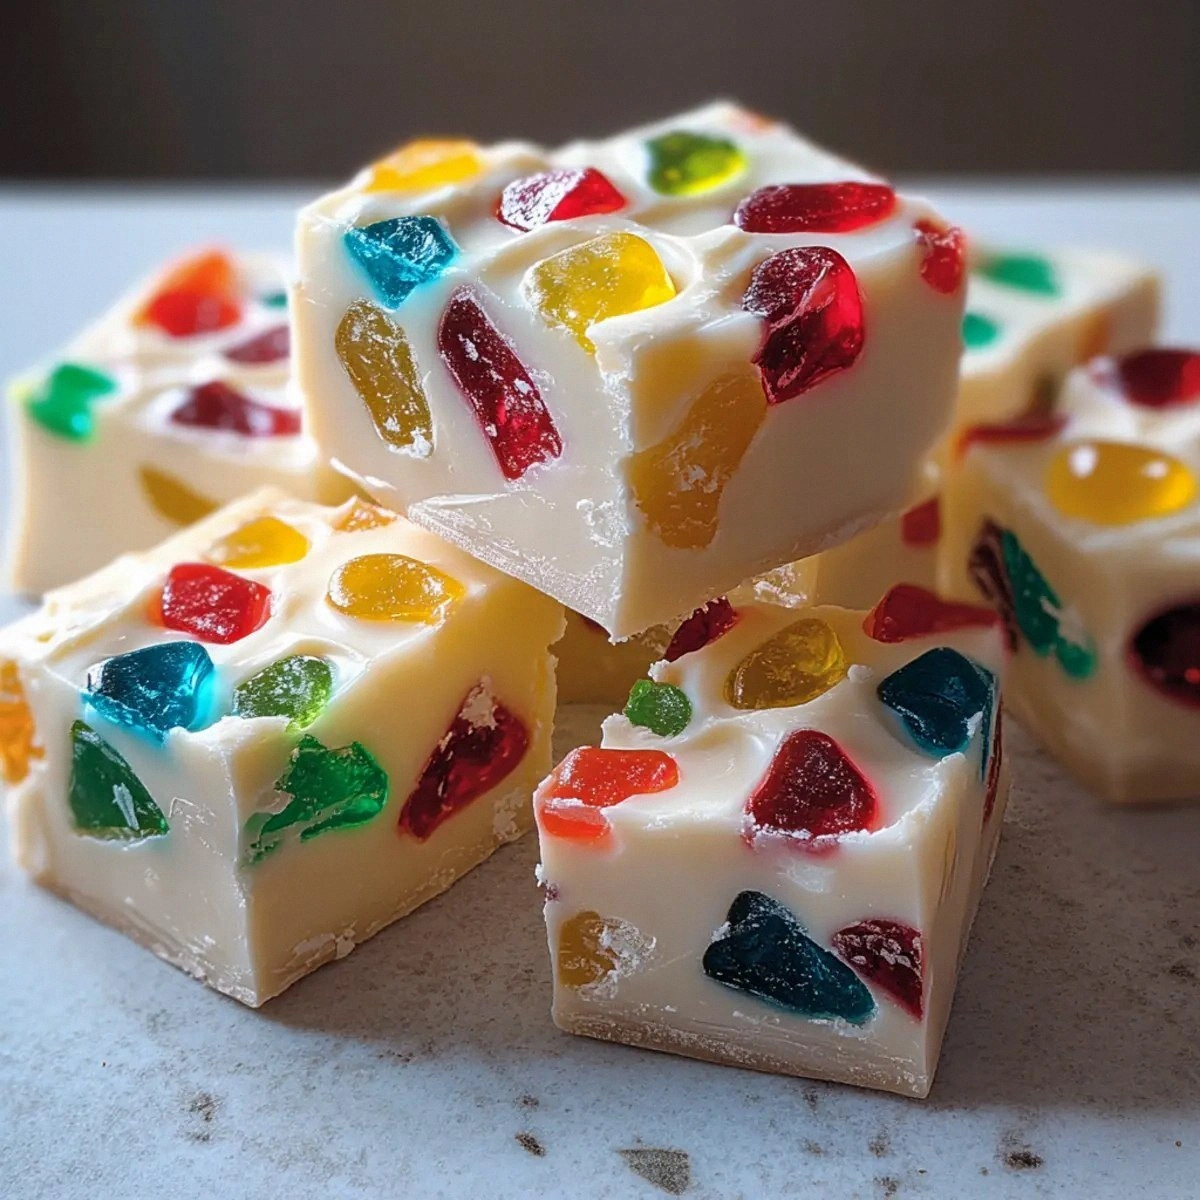
Quickly fold in the chopped gumdrops. Use a light hand, turning the mixture over on itself rather than stirring aggressively. The gumdrops should stay whole, each piece suspended like a tiny jewel in a sea of white chocolate. The aroma now carries a faint fruity note from the candy, and you’ll notice the mixture becoming slightly speckled with color.
Prepare a 9‑by‑9‑inch square pan by lining it with parchment paper, allowing a little overhang for easy removal. Lightly spray the paper with non‑stick cooking spray; this tiny step saves you from a frustrating scrape later.
Pour the fudge into the prepared pan, using a spatula to smooth the top. The surface should be glossy and slightly thick. Tap the pan gently on the counter three times; this releases any trapped air bubbles and helps the fudge settle evenly. The edges will start to pull away from the sides of the pan – a visual cue that the fudge is ready to set.
Allow the fudge to cool at room temperature for about 20 minutes, then transfer the pan to the refrigerator. Let it chill for at least 2 hours, or until fully set. When you lift the parchment paper, the fudge should release cleanly, with a firm yet yielding bite.
Finally, cut the fudge into squares or festive shapes using a warm knife (dip the blade in hot water and wipe dry). This ensures clean cuts without dragging the fudge. Serve on a decorative platter, and watch your guests' eyes widen as they bite into the creamy, candy‑studded squares. That sizzle when it hits the pan? Absolute perfection.
That's it — you did it. But hold on, I've got a few more tricks that'll take this to another level…
Insider Tricks for Flawless Results
The Temperature Rule Nobody Follows
Never let the white chocolate exceed 115°F (46°C). Going above this temperature causes the cocoa butter to separate, resulting in a grainy texture. I once tried to speed up the process by turning the heat up, and the fudge turned into a chalky mess. Keep a candy thermometer handy; it’s a small investment that saves you from a ruined batch. This rule works for any white‑chocolate‑based confection, not just this fudge.
Why Your Nose Knows Best
Your sense of smell is a reliable indicator of doneness. As the fudge thickens, you’ll notice a subtle caramel aroma emerging from the condensed milk. When that scent deepens, you’re at the perfect stage to turn off the heat. Trusting your nose can prevent over‑cooking, which often leads to a dry, crumbly fudge. I once relied solely on a timer and ended up with a rubbery texture – never again.
The 5‑Minute Rest That Changes Everything
After removing the pan from the heat, let the mixture rest for exactly five minutes before adding the gumdrops. This brief cooling period allows the fudge to thicken just enough to hold the candy pieces without melting them. Skipping this step is a common mistake; the gumdrops become soggy, and the texture suffers. Set a timer, sip a cup of tea, and enjoy the anticipation.
The Warm Knife Secret
Cutting fudge with a cold knife causes it to crumble. Instead, heat the blade under hot running water, dry it, and slice. The warm metal glides through the fudge, giving you clean, professional‑looking squares. This trick also works for other dense desserts like brownies or caramel bars.
Storing Without Sacrificing Shine
Wrap the cut pieces tightly in parchment paper before placing them in an airtight container. This prevents the fudge from absorbing fridge odors and keeps the surface glossy. If you notice a dull sheen after a few days, gently re‑heat the pieces in the microwave for 5 seconds and let them sit – the gloss returns instantly.
Creative Twists and Variations
This recipe is a playground. Here are some of my favorite ways to switch things up:
Peppermint Crunch
Swap half of the gumdrops for crushed peppermint candy canes. The minty bite pairs beautifully with the sweet white chocolate, creating a classic holiday flavor that kids adore.
Cranberry Bliss
Add dried cranberries (rehydrated in orange juice) in place of some gumdrops. The tartness of the cranberries balances the richness, and the orange undertone adds a festive twist.
Spiced Rum Infusion
Stir in a tablespoon of spiced rum or bourbon after the fudge has cooled slightly. The alcohol adds depth and a warm, adult‑only note that’s perfect for holiday parties.
White Chocolate Matcha
Incorporate a teaspoon of high‑quality matcha powder into the melted chocolate. The earthy green hue contrasts with the bright gumdrops, and the subtle bitterness balances the sweetness.
Nutty Delight
Fold in toasted chopped almonds or pistachios alongside the gumdrops. The nutty crunch adds another texture layer and makes the fudge feel more luxurious.
Storing and Bringing It Back to Life
Fridge Storage
Place the fudge in an airtight container lined with parchment paper. It will stay fresh for up to 10 days. Keep it in the main compartment, not the door, to maintain a consistent temperature.
Freezer Friendly
Wrap individual squares tightly in plastic wrap, then place them in a zip‑top freezer bag. They freeze well for up to three months. Thaw overnight in the fridge, then let them sit at room temperature for 15 minutes before serving.
Best Reheating Method
If the fudge feels a bit firm after refrigeration, place a piece on a microwave‑safe plate, add a tiny splash (about a teaspoon) of water, and microwave for 5‑7 seconds. The steam revives the glossy texture without melting the gumdrops.