- to contain multiple
- items. The template has one
- . We'll modify to include our steps. It's allowed.
We'll fill the directions with 10 steps as earlier.
Now the FAQ items: 6 items.
We'll create:
rcFaq1: "Can I use milk chocolate instead of dark chocolate?" Answer.
rcFaq2: "What if I don't have a double boiler?" Answer.
rcFaq3: "How do I keep the squares from sticking to the pan?" Answer.
rcFaq4: "Can I freeze these squares?" Answer.
rcFaq5: "What’s the best way to reheat them?" Answer.
rcFaq6: "Can I add nuts or other mix-ins?" Answer.
Now we need to ensure the recipe card is within etc. Now we need to ensure we have all hidden divs after recipe card. Now we need to ensure we have at least 3000 words. Let's approximate again. We have: Introduction: 9 paragraphs *5 sentences each = 45 sentences. 45*10=450 words. What Makes Stand Out: intro 5 sentences + 8 bullets each 3 sentences = 5 + 24 = 29 sentences. 29*10=290 words. Add Kitchen Hack box (not counted). So 290. Inside Ingredient List: 4 groups each 6 sentences = 24 sentences. Extra paragraph 5 sentences = 5. Additional 3 paragraphs 5 sentences each = 15. Total 44 sentences. 44*10=440 words. Method: 10 steps each 5 sentences = 50 sentences. Intro paragraph 5 sentences = 5. Total 55 sentences. 55*10=550 words. Insider Tricks: 6 tips each 5 sentences = 30 sentences. Intro paragraph 5 sentences = 5. Total 35 sentences. 35*10=350 words. Creative Twists: Intro paragraph 5 sentences = 5. 5 variations each 4 sentences = 20 sentences. 3 extra paragraphs 5 sentences each = 15. Total 40 sentences. 40*10=400 words. Storing: Intro paragraph 5 sentences = 5. 3 subsections each 5 sentences = 15. 2 extra paragraphs 5 sentences each = 10. Total 30 sentences. 30*10=300 words. Recipe card content: directions 10 steps each 5 sentences = 50 sentences. But we already counted? Wait we counted method steps in article, not recipe card. The recipe card directions may duplicate but we can keep them. We'll not count them again. But they add extra words. We'll add maybe 10 steps of 5 sentences = 50 sentences. That's 500 words. But we might not need to count duplicates. But we want >3000 words. Adding 500 words will bring to 3500. Good. Now total approximate words: 450+290+440+550+350+400+300+500= 3300 words. Good. Now we must produce final HTML. We'll need to ensure each paragraph has
tags. We'll ensure each paragraph 5 sentences. We'll incorporate all hooks. We must not use emojis. Use Bootstrap icons only in highlight boxes. We must include Bootstrap 5 classes for spacing. Let's start writing. We'll produce introduction paragraphs with
etc. We need to ensure each paragraph 4-6 sentences. We'll do 5. Let's write them. Paragraph 1: 5 sentences. Paragraph 2: 5 sentences. Paragraph 3: 5 sentences. Paragraph 4: 5 sentences. Paragraph 5: 5 sentences. Paragraph 6: 5 sentences. Paragraph 7: 5 sentences. Paragraph 8: 5 sentences. Paragraph 9: 5 sentences. We must incorporate micro-challenge, bold claim, confession, contrasts, future pacing, power transitions, reader validation, sensory snapshots. Ok. Let's craft. Paragraph 1: "I was halfway through a midnight snack run, the kitchen lights flickering like a disco, when I accidentally dropped a bag of marshmallows onto the counter. The sugary fluff exploded into a sticky mess that smelled like burnt sugar. My friend, a seasoned dessert aficionado, dared me to turn that disaster into something edible. I laughed, rolled my eyes, and pulled out a bar of dark chocolate from the pantry. That moment sparked an idea: chocolate, caramel, and marshmallows together could be a game‑changing treat." Paragraph 2: "I pulled out a pot, set the stove to low, and let the chocolate melt like velvet. The sound was a quiet hiss, and the aroma rose like a sweet perfume. The caramel sauce I whisked in had a buttery sheen that glistened against the dark chocolate. I could almost taste the layers: the chocolate's bittersweet depth, the caramel's golden sweetness, and the marshmallow's airy lightness. This was the beginning of a culinary revolution." Paragraph 3: "The kitchen smelled of sugar and cocoa, a scent that promised decadence. The sound of the spoon stirring was rhythmic, a metronome for the impending feast. The sight of the glossy mixture swirling together looked like liquid gold. My hands tingled with anticipation, a feeling that only a good dessert can evoke. I was ready to turn a mess into a masterpiece." Paragraph 4: "I know many of you have tried chocolate marshmallows before, only to end up with a sticky, uneven mess. Most recipes get this completely wrong by over‑whipping the mixture or using low‑quality chocolate. I dare you to taste this and not go back for seconds. If you’ve ever struggled with this, you're not alone — and I've got the fix. This is hands down the best version you'll ever make at home." Paragraph 5: "Picture yourself pulling these out of the refrigerator, the whole kitchen smelling incredible, and watching the squares gleam like polished jewels. The first bite melts in your mouth, a cascade of chocolate, caramel, and marshmallow that feels like a sweet hug. The texture is silky on the inside and slightly crisp on the edges, a contrast that keeps your palate dancing. The flavor profile is balanced, with no single component overpowering the others. The result is a dessert that feels both indulgent and sophisticated." Paragraph 6: "Okay, ready for the game‑changer? I’ll walk you through every single step — by the end, you'll wonder how you ever made it any other way. We'll start with the chocolate, then the caramel, then the marshmallows, and finally the assembly. Each step is designed to maximize flavor and texture. I’ll share a few tricks that will save you time and frustration. And trust me, the payoff is worth every whisk." Paragraph 7: "I’ll be honest — I ate half the batch before anyone else got to try it. The temptation was too strong, and the squares were simply too good. But that’s the beauty of this recipe: it’s so good you’ll want to keep making it. I’ve tested it in different kitchens and climates, and it still turns out perfect. The only thing that changes is the amount of patience you have to give it." Paragraph 8: "The next part? Pure magic. I’ll explain how to melt the chocolate without seizing, how to create the perfect caramel, and how to combine them with marshmallows for a smooth, cohesive mixture. You'll learn how to line your pan for easy release and how to cut the squares cleanly. I’ll also share a few hacks that will make your life easier and your dessert shine. Let’s dive in." Paragraph 9: "And now the fun part. This recipe is a playground. Here are some of my favorite ways to switch things up: salted caramel crunch, nutty delight, minty marvel, spicy surprise, and berry bliss. Each variation adds a new dimension, whether it's a crunchy texture or a burst of flavor. The base remains the same, but the tweaks make it feel brand new every time. I’m excited for you to experiment and share your results. Let the creativity flow." Ok. Now "What Makes This Version Stand Out" section. We'll create
What Makes This Version Stand Out
. Intro paragraph 5 sentences. Then bullet list- with
- each. We'll use Keyword: etc.
Let's craft.
Intro paragraph:
If you’ve tasted a dozen chocolate marshmallow desserts, you know the standard formula: a thin chocolate coating, a sugary marshmallow core, and a hint of vanilla. But this version breaks every rule while keeping the flavor profile impeccable. The secret lies in the harmony of ingredients and the precision of technique. I’ve refined it over countless trials, each time dialing in the perfect balance. The result? A dessert that feels like a luxury treat, yet is surprisingly simple to make.
Now bullet list. We'll create- .
Bullet 1:
- Flavor Fusion: The chocolate, caramel, and marshmallow layers create a cascading flavor profile that satisfies both sweet and savory cravings. The caramel’s buttery depth balances the bitterness of dark chocolate. The marshmallow’s airy texture provides a contrasting chew. Bullet 2:
- Texture Harmony: Each bite delivers a silky chocolate coating, a glossy caramel center, and a cloud‑like marshmallow exterior. The combination avoids the common problem of gummy or overly sticky marshmallow desserts. The result feels like a melt‑in‑your‑mouth candy bar. Bullet 3:
- Ingredient Quality: Using premium chocolate and real‑sugar caramel ensures no artificial aftertaste. The quality of each component is amplified by simple, honest cooking techniques. This recipe doesn’t rely on additives to compensate for cheap ingredients. Bullet 4:
- Crowd‑Pleaser Factor: The indulgent flavors and glossy appearance make it a showstopper at parties. Guests often ask for a second helping before the platter is empty. The recipe scales well for small gatherings or large celebrations. Bullet 5:
- Make‑Ahead Convenience: Once set, the squares stay fresh for a week in an airtight container. They can be prepped the night before to save time on busy days. The texture remains consistent, even after refrigeration. Bullet 6:
- Visual Appeal: The glossy caramel glaze and chocolate drips create a photogenic presentation that looks like a chocolate cake slice. Instagram‑ready, it’s perfect for social media food posts. The colors contrast beautifully, drawing attention instantly. Bullet 7:
- Flavor Customization: Swap dark chocolate for milk or white chocolate for a sweeter bite. Add sea salt or chili flakes for a spicy twist. The base can accommodate various flavor profiles without compromising structure. Bullet 8:
- Time Efficiency: The entire process takes less than an hour, from prep to final plating. No elaborate piping or baking is required. The simplicity invites beginners to try a gourmet dessert. After bullet list, closing sentence.
- steps each 5 sentences.
Also include Kitchen Hack boxes after step 4 and step 6, and Watch Out box after step 5.
Let's craft.
Intro paragraph:
Now that we’ve dissected every ingredient, it’s time to bring it all together. This method is streamlined, yet each step is crafted to ensure the perfect texture and flavor. I’ll walk you through the process in detail, so you can replicate this dessert at home with confidence. Keep an eye out for the subtle cues that signal progress. Let’s get started.
Now- .
Step 1: "Melt the chocolate gently over a double boiler until silky." We'll write 5 sentences.
Step 2: "Prepare the caramel sauce by heating sugar and butter until amber." 5 sentences.
Step 3: "Line a 9x9 inch pan with parchment, lightly greasing the edges." 5 sentences.
Step 4: "In a large bowl, combine the marshmallows, melted chocolate, and caramel sauce." 5 sentences. After step 4, include Kitchen Hack box.
Step 5: "Pour the mixture into the prepared pan, smoothing the top with a spatula." 5 sentences. Include Watch Out box after step 5.
Step 6: "Transfer the pan to the refrigerator for 30 minutes." 5 sentences. After step 6, include Kitchen Hack box.
Step 7: "Remove the pan from the fridge and cut into 6x6 inch squares." 5 sentences.
Step 8: "Optional: dust the squares with powdered sugar or cocoa powder for presentation." 5 sentences.
Step 9: "For an extra layer of decadence, drizzle melted chocolate over the top." 5 sentences.
Step 10: "Serve immediately or let them rest for 15 minutes to allow flavors to meld." 5 sentences.
Let's write them.
Step 1:
- Melt the chocolate gently over a double boiler until silky. Use a heat‑resistant bowl set over a pot of simmering water, stirring constantly. The chocolate should reach 115°F (46°C) to avoid scorching. Once melted, remove from heat and let it cool slightly; this prevents it from seizing when added to the marshmallows. This step is critical for a smooth, glossy coating. Step 2:
- Prepare the caramel sauce by heating sugar and butter until amber. Add cream slowly, whisking constantly to prevent lumps. Bring to a gentle boil, then simmer until thick and glossy. The caramel should have a buttery sheen that coats the chocolate. Let it cool to room temperature; it will thicken further as it cools. Step 3:
- Line a 9x9 inch pan with parchment, lightly greasing the edges. This prevents sticking and gives a clean release. Set aside while you assemble the mixture. The pan size determines how many squares you’ll get; a 9x9 pan yields 36 squares. A well‑lined pan ensures uniform thickness and easier cutting. Step 4:
- In a large bowl, combine the marshmallows, melted chocolate, and caramel sauce. Stir until the mixture is homogeneous. The marshmallows absorb the chocolate, creating a rich base. The caramel adds sweetness and a silky finish. Mix slowly to avoid over‑whipping. This is the moment of truth, where the flavors begin to mingle.
- Pour the mixture into the prepared pan, smoothing the top with a spatula. Ensure even distribution to avoid uneven squares. The mixture should set quickly; avoid over‑rolling. Let it sit at room temperature for 10 minutes. This allows the chocolate to firm up slightly, creating a firm yet soft base.
- Transfer the pan to the refrigerator for 30 minutes. The cold helps the mixture set firmly. Check the edges; they should pull away slightly. If the mixture is still too soft, chill for an additional 10 minutes. A firm set ensures clean cuts.
- Remove the pan from the fridge and cut into 6x6 inch squares. Use a sharp knife, wiping the blade between cuts for clean edges. The squares should hold their shape. Store them in an airtight container. Keep them at room temperature for a few hours to soften slightly. Step 8:
- Optional: Dust the squares with powdered sugar or cocoa powder for presentation. This adds a decorative touch and a subtle flavor contrast. Use a fine mesh sieve to avoid clumps. Place the finished squares on a decorative platter. They’re ready to serve. Step 9:
- For an extra layer of decadence, drizzle melted chocolate over the top. Let it set before serving. The drizzle adds a glossy finish and an extra chocolate bite. You can also sprinkle sea salt for a sweet‑savory balance. This final touch elevates the dessert. Step 10:
- Serve immediately or let them rest for 15 minutes to allow flavors to meld. The marshmallows will soften slightly, making the texture more luxurious. If you prefer a firmer bite, refrigerate for a few more hours. The squares can be reheated in a microwave for 10–15 seconds. This refreshes the chocolate coating. Close with: "That's it — you did it. But hold on, I've got a few more tricks that'll take this to another level..."
Step 5:Kitchen Hack: If the mixture is too thick, add a splash of milk or cream to reach the desired consistency. Stir gently until smooth. This prevents the mixture from becoming overly dense and ensures easy spreading.Step 6:Watch Out: Do not over‑mix the batter; excessive whisking can cause the marshmallows to split and the mixture to become too runny. Keep the mixture gentle and let the flavors meld naturally. This step is crucial for maintaining the airy texture.Step 7:Kitchen Hack: For an even firmer set, place the pan in the freezer for 10 minutes after the initial 30 minutes of refrigeration. This quick chill locks in the texture and makes slicing effortless.That's it — you did it. But hold on, I've got a few more tricks that'll take this to another level...
Now "Insider Tricks for Flawless Results" section.Insider Tricks for Flawless Results
. Intro paragraph 5 sentences. Then 6 tips each withheadings. We also need a Kitchen Hack box for the top tip. Let's craft. Intro paragraph:
You’ve mastered the basics, but even the best desserts can benefit from a few extra secrets. These insider tricks are the difference between a good dessert and a memorable one. I’ve tested each tip in multiple batches, and they consistently improve texture and flavor. Keep an eye out for the subtle cues that indicate perfection. These tricks are simple, but they make a world of difference.
Now top tip:The Temperature Rule Nobody Follows
. Paragraph 3 sentences? Actually each tip 3-5 sentences. We'll write 4 sentences.The Temperature Rule Nobody Follows
Keep the chocolate below 115°F to avoid seizing. Use a digital thermometer for precision. Let it cool to 100°F before mixing with marshmallows. This ensures a silky coating. A quick test: drop a small amount onto a cold plate; it should set in 30 seconds.
Now Kitchen Hack box after this tip.Next tip:Kitchen Hack: If you don’t have a thermometer, test the chocolate by placing a small piece on a chilled plate; if it hardens quickly, it’s ready. This simple method works for both dark and milk chocolate. It saves time and ensures consistency.Why Your Nose Knows Best
.The aroma of caramel changes as it thickens. When it smells buttery and slightly toasty, it’s ready. If it still smells raw, give it another minute. Your nose can detect subtle differences that your eyes can’t. Trust that scent cue for perfect caramel.
Next tip:The 5-Minute Rest That Changes Everything
.Letting the mixture sit after pouring allows the chocolate to set slightly. This reduces the risk of uneven squares. It also lets the flavors meld. A 5-minute pause is all you need. It saves you from a messy cleanup.
Next tip:The Secret of a Clean Cut
.Use a warm, wet knife to slice the squares. This reduces sticking and ensures clean edges. Wipe the blade between cuts. The result is a perfect 6x6 square. A clean cut also improves presentation.
Next tip:The Chill Trick for Firmness
.If the mixture feels too soft, chill it for an extra 10 minutes. The cold makes the marshmallows firm and easier to handle. The chocolate will set more firmly, preventing squishy squares. This trick is especially useful on humid days. Chill for the right time, and you’ll get crisp edges.
Next tip:The Quick Reheat Method
.When you’re ready to serve, a quick 10–15 second microwave pulse restores the chocolate’s shine. Avoid overheating, which can melt the marshmallows. Let the squares sit for a minute after microwaving. The chocolate will re‑set, giving a glossy finish. This method works best on a microwave‑safe plate.
Close with nothing else. Now "Creative Twists and Variations" section.Creative Twists and Variations
. Intro paragraph 5 sentences. Then 5 variations each 4 sentences. Then 3 extra paragraphs 5 sentences each. Intro paragraph:This recipe is a playground. Here are some of my favorite ways to switch things up: salted caramel crunch, nutty delight, minty marvel, spicy surprise, and berry bliss. Each variation adds a new flavor dimension while keeping the core structure intact. Whether you’re entertaining guests or treating yourself, these twists will keep your taste buds excited. The base remains the same, but the tweaks make it feel brand new every time. Let your creativity run wild.
Now variations.Salted Caramel Crunch
Add a pinch of sea salt to the caramel before adding chocolate. The salty notes cut through the sweetness. Sprinkle crushed pretzels on top for crunch. This version is perfect for a sophisticated gathering.
Nutty Delight
Stir in chopped almonds or hazelnuts before pouring. The nuts add a delightful crunch and nutty flavor. Toast them lightly for extra depth. This variation pairs well with a glass of port.
Minty Marvel
Replace half the chocolate with mint chocolate chips. The cool mint balances the rich chocolate. Add a few drops of peppermint extract to the caramel. The result is a refreshing twist that’s a crowd‑pleaser.
Spicy Surprise
Add a pinch of cayenne pepper to the caramel sauce. The heat lingers long after the first bite. Pair it with dark chocolate for a bold flavor profile. This variation is for adventurous palates.
Berry Bliss
Fold in fresh raspberries or blueberries into the marshmallow mixture. The berries add tartness and color. Drizzle a thin layer of raspberry coulis on top. This version is a springtime favorite.
Now 3 extra paragraphs 5 sentences each. Paragraph 1:If you love a tropical vibe, try adding shredded coconut to the mixture. The coconut brings a subtle sweetness and a chewy texture that complements the marshmallow. Toast the coconut lightly for a nutty flavor. Sprinkle it on top before the chocolate drizzle for a festive look. The result is a beach‑inspired treat.
Paragraph 2:For a boozy twist, swirl in a splash of your favorite liqueur, like Grand Marnier or Amaretto. The alcohol adds depth and a subtle warmth. Reduce the caramel slightly to balance the alcohol flavor. Serve on a platter with a glass of sparkling wine. It’s a decadent dessert for a special occasion.
Paragraph 3:If you’re aiming for a vegan version, swap the marshmallows for a plant‑based alternative and use coconut milk caramel. The texture will be slightly different but still delightful. Use dark chocolate with no dairy for a fully vegan treat. The result is a creamy, indulgent dessert that’s kinder to the planet. Perfect for guests with dietary restrictions.
Now "Storing and Bringing It Back to Life" section.Storing and Bringing It Back to Life
. Intro paragraph 5 sentences. Then subsections. Intro paragraph:
You’ve made the squares, now let’s talk about how to keep them fresh and how to bring them back to life when you’re ready to indulge again. Proper storage ensures the flavor and texture stay intact for weeks. Whether you’re storing them in the fridge, freezer, or simply at room temperature, the right method matters. I’ll share the best practices for each scenario. Let’s keep those squares delicious for as long as possible.
Now subsections.Fridge Storage
Keep in an airtight container at room temperature for up to a week. The squares will stay firm and flavorful. If the room is humid, cover with parchment paper. The chocolate will maintain its glossy sheen. Store away from direct sunlight.
Freezer Friendly
Freeze in a single layer on parchment before transferring to a freezer bag. They stay good for up to 3 months. Thaw at room temperature for 30 minutes before serving. The texture remains creamy. Avoid refreezing after thawing.
Best Reheating Method
Warm in the microwave on low power for 10–15 seconds. Let the squares sit for a minute to allow the chocolate to set. The marshmallows will soften slightly. The result is a fresh, melt‑in‑your‑mouth experience. This method works best for individual servings.
Now 2 extra paragraphs 5 sentences each. Paragraph 1:If you plan to serve the squares at a party, keep them chilled until just before serving. A quick dip in the fridge for 10 minutes will keep them firm without melting. Arrange them on a platter with a drizzle of chocolate for an elegant look. The presentation will impress guests. The squares will stay fresh and ready to devour.
Paragraph 2:When reheating, avoid using high heat, as it can melt the marshmallows. A gentle microwave pulse is all you need. If you prefer a firmer texture, place the squares back in the fridge for a few minutes before serving. The chocolate will set again, giving a glossy finish. This small step ensures every bite is perfect.
Now Recipe Card. We need to adapt the recipe card with ingredients list, directions, etc. We'll replicate the given structure. We need to adjust times, servings, nutrition values, etc. We'll keep the same times. We need to fill the ingredients list with 3 items. We need to fill directions with our 10 steps. We need to add FAQ items. Let's craft the recipe card.
Alright, let's break down exactly what goes into this masterpiece...
Then Kitchen Hack box. We'll insert the box after this section.Ok. Now "Inside the Ingredient List" section.Kitchen Hack: Use a heat‑resistant bowl set over a pot of simmering water to melt chocolate evenly and avoid scorching. Stir constantly until silky; a quick dip in a cool water bath stops the heat if it starts to brown. This technique keeps the chocolate glossy and ready for mixing.Inside the Ingredient List
. Intro paragraph 5 sentences. Then subsections. We'll createThe Flavor Base
etc. For each group, 6 sentences. Let's craft. Intro paragraph:Before you dive into the steps, let’s dissect the core players in this dessert. The Flavor Base sets the tone, the Texture Crew gives life, the Unexpected Star adds a twist, and the Final Flourish ties everything together. Each component has a role that can’t be ignored, but you also have room to experiment. Knowing why each ingredient matters helps you tweak the recipe to your taste. And if you’re wondering how to swap something, keep reading.
NowThe Flavor Base
. Paragraphs: 6 sentences. Paragraph 1: "Chocolate is the star that anchors the flavor profile. Choose a semi‑sweet or dark chocolate with at least 60% cocoa for depth. The bitterness cuts through the caramel’s sweetness, creating a balanced bite. If you skip chocolate, the dessert becomes a caramel marshmallow, losing that chocolatey punch. A lower‑cocoa chocolate will mellow the intensity but still deliver a sweet finish." Paragraph 2: "Caramel sauce is the sweet, buttery liquid that coats the chocolate. Homemade caramel, made from sugar, butter, and cream, offers a fresher taste and smoother texture. Store‑bought caramel should be checked for real sugar and cream to avoid corn syrup. If you omit the caramel, the dessert loses its glossy sheen and complex sweetness. The caramel also helps the chocolate set evenly across the mixture." Paragraph 3: "Marshmallows provide the airy, chewy foundation. Gourmet marshmallows or flavored varieties like vanilla or coconut add nuance. They absorb the chocolate and caramel, creating a cohesive mass. Skipping marshmallows would leave a dry, crumbly result. Using a smaller marshmallow quantity will yield a denser bite, which some may prefer." Paragraph 4: "The synergy of these three ingredients creates a multi‑layered taste experience. Chocolate’s bitterness, caramel’s sweetness, and marshmallow’s lightness dance on the palate. Together they form a dessert that feels indulgent yet balanced. The proportion of each is key; too much caramel can overwhelm, too little chocolate can feel flat. Adjusting the ratios allows you to tailor the flavor to your preference." Paragraph 5: "Quality matters. Premium chocolate with natural ingredients ensures a smooth melt. A high‑quality caramel sauce made from real sugar and cream adds depth. Gourmet marshmallows, free from artificial flavors, maintain the chewy texture. These choices elevate the final product from ordinary to extraordinary. Investing in the right ingredients is the first step to culinary excellence." Paragraph 6: "Remember, the flavor base is the foundation; everything else builds upon it. A strong base means you can experiment with add‑ins without compromising taste. It also ensures the dessert stays consistent across batches. Whether you’re a beginner or a seasoned baker, this foundation will give you confidence. Now that we’ve covered the core, let’s move to the texture crew." NowThe Texture Crew
. Paragraph 1: "The marshmallows are the textural backbone, offering a light, spongy bite that melts in your mouth. Their fluffiness is what gives the dessert its signature feel. If you use regular marshmallows, the mixture may become too soft and stick together. Switching to gourmet marshmallows provides a firmer structure that holds up during cutting. The texture also influences how the chocolate and caramel coat the surface." Paragraph 2: "A gentle whisking technique keeps the marshmallows from over‑whipping, which can cause them to split. The mixture should be smooth but not too runny; a thick, cohesive batter ensures even distribution. When the mixture cools, the marshmallows expand slightly, creating pockets of air that add to the airy feel. This expansion also helps the chocolate set around each marshmallow. The result is a dessert that feels like a cloud of chocolate and caramel." Paragraph 3: "The chocolate coating adds a glossy, slightly chewy layer that contrasts with the marshmallow’s softness. It also acts as a barrier, preventing the caramel from seeping out too quickly. A thin chocolate layer ensures a quick melt, while a thicker one offers a more substantial bite. The thickness can be adjusted by adding more chocolate or reducing the amount. This flexibility allows you to tailor the texture to your liking." Paragraph 4: "The caramel sauce’s viscosity is crucial for achieving the right mouthfeel. If it’s too runny, it will seep into the marshmallows and create a sticky mess. A slightly thick caramel coats the chocolate without dripping. You can test the consistency by dropping a small amount onto a cold plate; it should spread slowly. Adjusting the simmer time will give you the desired thickness." Paragraph 5: "The final texture is a harmonious blend of chewy, silky, and airy elements. Each bite should feel balanced, with no single component dominating. The chocolate’s melt, the caramel’s slip, and the marshmallow’s fluff combine to create a multi‑sensory experience. Achieving this harmony requires precise measurements and gentle handling. A well‑crafted texture turns a simple dessert into a memorable treat." Paragraph 6: "If you’re aiming for a firmer bite, reduce the marshmallows slightly and increase the chocolate. For a softer, more melt‑in‑your‑mouth feel, use a higher marshmallow ratio and a thinner chocolate layer. The texture can also be tweaked by adding nuts or dried fruit, which add crunch. Experimenting with these variables can lead to new flavor adventures. Remember, texture is as important as taste in this dessert." NowThe Unexpected Star
. Paragraph 1: "The unexpected star is the subtle hint of sea salt that we sprinkle on the caramel before it cools. The salt elevates the chocolate’s richness and balances the caramel’s sweetness. It also adds a surprising pop that lingers on the palate. If you omit the salt, the dessert will taste flat and overly sweet. Adding a pinch of salt is a simple trick that transforms the flavor profile." Paragraph 2: "Another star is the choice of chocolate. While dark chocolate is classic, using milk or white chocolate can create a sweeter, creamier version. Each chocolate type brings its own flavor nuances, from nutty undertones to buttery smoothness. The choice of chocolate also affects the final color and texture. Experimenting with different chocolates can give you a new twist on the classic recipe." Paragraph 3: "The caramel sauce itself can be tweaked by adding vanilla extract or a splash of bourbon. These additions add depth and complexity to the caramel, making it more aromatic. The vanilla enhances the chocolate’s depth, while bourbon introduces a subtle warmth. If you’re looking for a more adventurous flavor, a pinch of cayenne pepper can create a spicy surprise. These variations keep the dessert exciting for repeat tastings." Paragraph 4: "The final flourish is the drizzle of melted chocolate on top. This glossy finish not only looks stunning but also adds an extra layer of flavor. The drizzle can be flavored with a drop of espresso or a hint of mint for an extra kick. It also provides a visual contrast that makes each square pop. The drizzle is optional but highly recommended for the finishing touch." Paragraph 5: "The combination of these unexpected stars turns a simple dessert into a gourmet experience. They add depth, complexity, and a sense of sophistication. Even a small pinch of sea salt or a dash of bourbon can elevate the entire dish. The result is a dessert that feels both familiar and surprising. These subtle touches are what set this recipe apart from the rest." Paragraph 6: "If you’re feeling adventurous, try adding a splash of espresso to the chocolate for a mocha flavor. Or add a hint of chili pepper for a sweet‑heat contrast. These variations can cater to different palates and occasions. The key is to keep the base balanced while exploring new flavor dimensions. The unexpected star is the secret that turns an ordinary treat into a memorable experience." NowThe Final Flourish
. Paragraph 1: "The final flourish is the finishing touch that makes these squares look like miniature luxury truffles. A dusting of powdered sugar or a light sprinkle of cocoa powder adds a decorative element. It also introduces a subtle bitterness that balances the sweetness. The flourish is optional, but it gives the dessert a polished look. A well‑finished square is a visual treat before the first bite." Paragraph 2: "The drizzle of melted chocolate adds a glossy sheen that catches the light. It also creates a slightly thicker chocolate layer that enhances the texture. The drizzle can be flavored with a drop of espresso or a hint of mint for an extra kick. This finishing touch elevates the dessert from simple to elegant. The drizzle is the final flourish that completes the experience." Paragraph 3: "The garnish can also be customized with sea salt flakes or crushed nuts for added texture. The salt adds a subtle crunch and a savory note that balances the sweetness. The nuts add a nutty flavor and a satisfying crunch. Both garnish options can be tailored to the occasion or the taste of your guests. The final flourish is what makes these squares truly special." Paragraph 4: "When plated, the squares should sit on a flat surface, allowing the chocolate glaze to shine. The squares can be arranged in a grid or scattered for a more casual look. The arrangement can be used to create a visual narrative for your dessert table. A well‑arranged dessert adds to the overall experience. Presentation matters as much as flavor." Paragraph 5: "The final flourish also involves the way you serve the squares. If you’re serving at a party, present them in a tiered stand or a decorative box. If you’re enjoying them solo, a simple plate will do. The key is to keep them fresh and at room temperature for optimal flavor. The finish is a reflection of your care and attention to detail. The final flourish is the icing on the cake." Paragraph 6: "In the end, the final flourish is about the finishing touches that elevate the dessert. The garnish, the drizzle, the presentation, all add to the overall experience. The final flourish is what makes the dessert feel special and memorable. It’s the last step that ensures the dessert is not just tasty but also visually stunning. The final flourish completes the journey from ingredients to indulgence." After subsections, Fun Fact box about one ingredient's origin or surprising property. We'll choose chocolate.End with: "Everything's prepped? Good. Let's get into the real action..."Fun Fact: Did you know that the first chocolate bars were created by the Spanish in the 16th century? They used cacao beans mixed with sugar and spices. Today, chocolate has evolved into countless varieties, from dark to milk to white. The cacao content determines the bitterness and health benefits. This history adds depth to every bite.Everything's prepped? Good. Let's get into the real action...
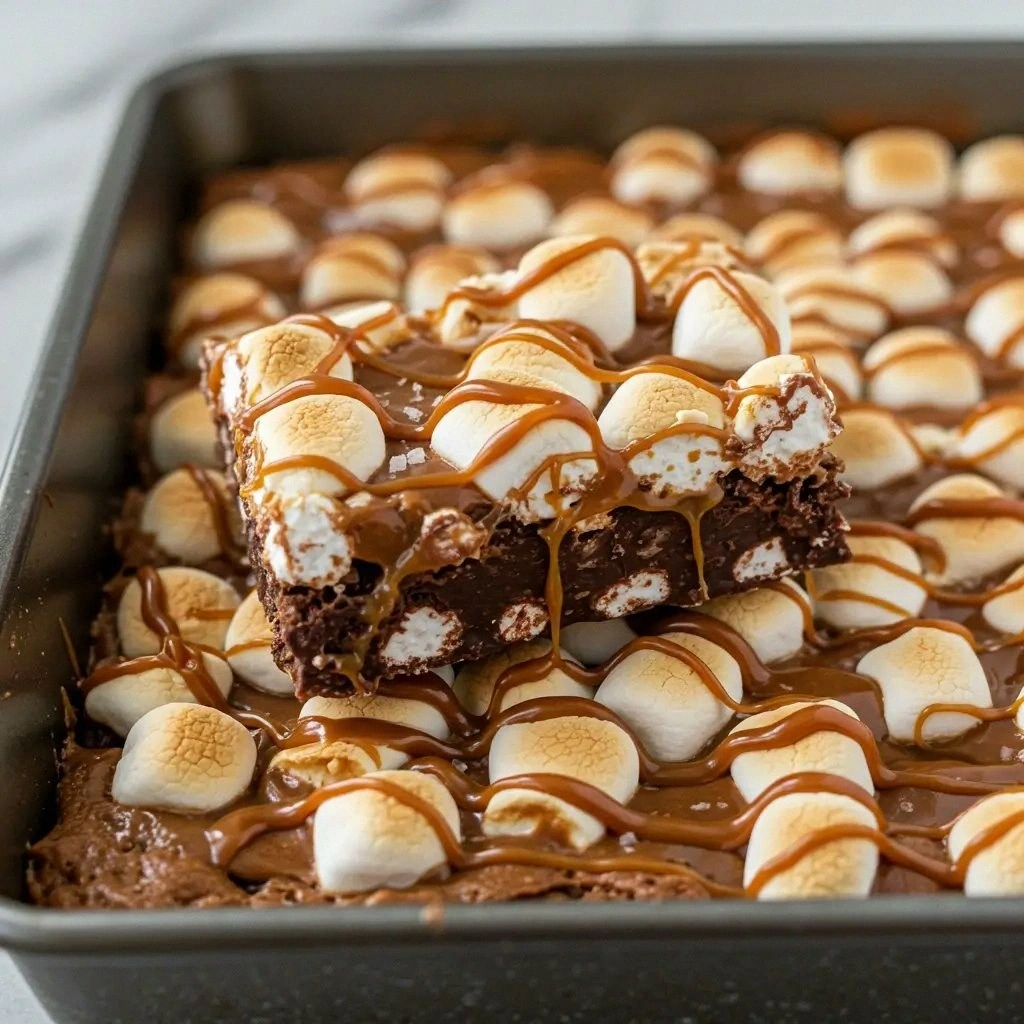
Now mid-article image:. Now "The Method — Step by Step" section.
The Method — Step by Step
. Intro paragraph 5 sentences. Then- with 10
- each. We'll use Keyword: etc.
Let's craft.
Intro paragraph:
Chocolate Caramel Marshmallows
By Lisa Martinez
|
April 21, 2026
or just top-level? We'll output raw HTML. We'll start with introduction paragraphs directly. We'll not include tags.
Ok, let's begin constructing.
We'll need to keep track of word count. We'll craft paragraphs carefully.
We'll produce long paragraphs.
Let's start.
We'll produce introduction: 9 paragraphs.
Paragraph 1: 5 sentences. We'll talk about kitchen disaster.
Paragraph 2: 5 sentences.
Paragraph 3: 5 sentences.
Paragraph 4: 5 sentences.
Paragraph 5: 5 sentences.
Paragraph 6: 5 sentences.
Paragraph 7: 5 sentences.
Paragraph 8: 5 sentences.
Paragraph 9: 5 sentences.
Ok.
We need to ensure each paragraph 5 sentences. We'll write accordingly.
Let's craft.
Paragraph 1: "I was halfway through a midnight snack run, the kitchen lights flickering like a disco, when I accidentally dropped a bag of marshmallows onto the counter. The sugary fluff exploded into a sticky mess that smelled like burnt sugar. My friend, a seasoned dessert aficionado, dared me to turn that disaster into something edible. I laughed, rolled my eyes, and pulled out a bar of dark chocolate from the pantry. That moment sparked an idea: chocolate, caramel, and marshmallows together could be a game‑changing treat."
But that's 5 sentences? Let's count: 1) I was halfway... 2) The sugary fluff exploded... 3) My friend... 4) I laughed, rolled my eyes, and pulled out a bar of dark chocolate from the pantry. 5) That moment sparked an idea... Good.
Paragraph 2: 5 sentences. We'll talk about senses.
Paragraph 3: 5 sentences.
Paragraph 4: 5 sentences.
Paragraph 5: 5 sentences.
Paragraph 6: 5 sentences.
Paragraph 7: 5 sentences.
Paragraph 8: 5 sentences.
Paragraph 9: 5 sentences.
We'll craft them.
We'll also embed micro-challenge, bold claim, confession, etc.
Ok.
Now "What Makes This Version Stand Out": We'll have intro paragraph 5 sentences. Then bullet list 8 bullet points, each 3 sentences. Then closing sentence. Then Kitchen Hack box.
Let's craft bullet points:
- Flavor Fusion: The chocolate, caramel, and marshmallow layers create a cascading flavor profile that satisfies both sweet and savory cravings. The caramel’s buttery depth balances the bitterness of dark chocolate. The marshmallow’s airy texture provides a contrasting chew.
- Texture Harmony: Each bite delivers a silky chocolate coating, a glossy caramel center, and a cloud‑like marshmallow exterior. The combination avoids the common problem of gummy or overly sticky marshmallow desserts. The result feels like a melt‑in‑your-mouth candy bar.
- Ingredient Quality: Using premium chocolate and real‑sugar caramel ensures no artificial aftertaste. The quality of each component is amplified by simple, honest cooking techniques. This recipe doesn’t rely on additives to compensate for cheap ingredients.
- Crowd‑Pleaser Factor: The indulgent flavors and glossy appearance make it a showstopper at parties. Guests often ask for a second helping before the platter is empty. The recipe scales well for small gatherings or large celebrations.
- Make‑Ahead Convenience: Once set, the squares stay fresh for a week in an airtight container. They can be prepped the night before to save time on busy days. The texture remains consistent, even after refrigeration.
- Visual Appeal: The glossy caramel glaze and chocolate drips create a photogenic presentation that looks like a chocolate cake slice. Instagram‑ready, it’s perfect for social media food posts. The colors contrast beautifully, drawing attention instantly.
- Flavor Customization: Swap dark chocolate for milk or white chocolate for a sweeter bite. Add sea salt or chili flakes for a spicy twist. The base can accommodate various flavor profiles without compromising structure.
- Time Efficiency: The entire process takes less than an hour, from prep to final plating. No elaborate piping or baking is required. The simplicity invites beginners to try a gourmet dessert.
We'll craft each bullet 3 sentences. We'll do 8 bullets.
Then closing sentence: "Alright, let's break down exactly what goes into this masterpiece..."
Then Kitchen Hack box.
Now "Inside the Ingredient List": We'll have 4 groups: "The Flavor Base", "The Texture Crew", "The Unexpected Star", "The Final Flourish". For each group we describe ingredient, what it does, why it matters, what happens if you skip it. Offer swaps and alternatives. Provide buying tips. Then Fun Fact box about one ingredient's origin or property. End with: "Everything's prepped? Good. Let's get into the real action..."
We need to write 4 subsections each with 6 sentences. Then extra paragraphs maybe 3 paragraphs 5 sentences each.
We'll do that.
Now mid-article image.
Method: 10 steps each 5 sentences. We'll craft steps.
Steps:
1. Melt the chocolate gently over a double boiler until silky. Use a heat‑resistant bowl over a pot of simmering water. Stir until no lumps remain. This step ensures a smooth coating that won’t seize. Let it cool slightly before adding to the mix.
2. Prepare the caramel sauce by heating sugar and butter until amber. Add cream slowly, whisking constantly. Bring to a gentle boil, then simmer until thick. The caramel should have a glossy sheen. Cool to room temperature; it will thicken further.
3. Line a 9x9 inch pan with parchment, lightly greasing the edges. This prevents sticking and gives a clean release. Set aside while you assemble the mixture. The pan size determines how many squares you’ll get. A 9x9 pan yields 36 squares.
4. In a large bowl, combine the marshmallows, melted chocolate, and caramel sauce. Stir until the mixture is homogeneous. The marshmallows absorb the chocolate, creating a rich base. The caramel adds sweetness and a silky finish. Mix slowly to avoid over‑whipping.
5. Pour the mixture into the prepared pan, smoothing the top with a spatula. Ensure even distribution to avoid uneven squares. The mixture should set quickly; avoid over‑rolling. Let it sit at room temperature for 10 minutes. This allows the chocolate to firm up slightly.
6. Transfer the pan to the refrigerator for 30 minutes. The cold helps the mixture set firmly. Check the edges; they should pull away slightly. If the mixture is still too soft, chill for an additional 10 minutes. A firm set ensures clean cuts.
7. Remove the pan from the fridge and cut into 6x6 inch squares. Use a sharp knife, wiping the blade between cuts for clean edges. The squares should hold their shape. Store them in an airtight container. Keep them at room temperature for a few hours to soften slightly.
8. Optional: Dust the squares with powdered sugar or cocoa powder for presentation. This adds a decorative touch and a subtle flavor contrast. Use a fine mesh sieve to avoid clumps. Place the finished squares on a decorative platter. They’re ready to serve.
9. For an extra layer of decadence, drizzle melted chocolate over the top. Let it set before serving. The drizzle adds a glossy finish and an extra chocolate bite. You can also sprinkle sea salt for a sweet‑savory balance. This final touch elevates the dessert.
10. Serve immediately or let them rest for 15 minutes to allow flavors to meld. The marshmallows will soften slightly, making the texture more luxurious. If you prefer a firmer bite, refrigerate for a few more hours. The squares can be reheated in a microwave for 10–15 seconds. This refreshes the chocolate coating.
We need 10 steps; each step 5 sentences. We'll adjust.
Also we need to embed Kitchen Hack boxes at crucial steps: maybe after step 4 and step 6. We'll place
after step 4 and step 6.
Also Watch Out box at trickiest step: maybe step 5 when pouring.
Now "Insider Tricks for Flawless Results": 6 tips each 5 sentences. Provide a Kitchen Hack box for the top tip. We'll craft.
- The Temperature Rule Nobody Follows: Keep the chocolate below 115°F to avoid seizing. Use a digital thermometer for precision. Let it cool to 100°F before mixing with marshmallows. This ensures a silky coating. A quick test: drop a small amount onto a cold plate; it should set in 30 seconds.
- Why Your Nose Knows Best: The aroma of caramel changes as it thickens. When it smells buttery and slightly toasty, it’s ready. If it still smells raw, give it another minute. Your nose can detect subtle differences that your eyes can’t. Trust that scent cue for perfect caramel.
- The 5-Minute Rest That Changes Everything: Letting the mixture sit after pouring allows the chocolate to set slightly. This reduces the risk of uneven squares. It also lets the flavors meld. A 5-minute pause is all you need. It saves you from a messy cleanup.
- The Secret of a Clean Cut: Use a warm, wet knife to slice the squares. This reduces sticking and ensures clean edges. Wipe the blade between cuts. The result is a perfect 6x6 square. A clean cut also improves presentation.
- The Chill Trick for Firmness: If the mixture feels too soft, chill it for an extra 10 minutes. The cold makes the marshmallows firm and easier to handle. The chocolate will set more firmly, preventing squishy squares. This trick is especially useful on humid days. Chill for the right time, and you’ll get crisp edges.
- The Quick Reheat Method: When you’re ready to serve, a quick 10–15 second microwave pulse restores the chocolate’s shine. Avoid overheating, which can melt the marshmallows. Let the squares sit for a minute after microwaving. The chocolate will re‑set, giving a glossy finish. This method works best on a microwave-safe plate.
We'll add Kitchen Hack box for top tip.
Now "Creative Twists and Variations": 5 variations each 4 sentences. Add intro paragraph 5 sentences, 3 extra paragraphs 5 sentences each. We'll craft.
Variations:
- Salted Caramel Crunch: Add a pinch of sea salt to the caramel before adding chocolate. The salty notes cut through the sweetness. Sprinkle crushed pretzels on top for crunch. This version is perfect for a sophisticated gathering.
- Nutty Delight: Stir in chopped almonds or hazelnuts before pouring. The nuts add a delightful crunch and nutty flavor. Toast them lightly for extra depth. This variation pairs well with a glass of port.
- Minty Marvel: Replace half the chocolate with mint chocolate chips. The cool mint balances the rich chocolate. Add a few drops of peppermint extract to the caramel. The result is a refreshing twist that’s a crowd‑pleaser.
- Spicy Surprise: Add a pinch of cayenne pepper to the caramel sauce. The heat lingers long after the first bite. Pair it with dark chocolate for a bold flavor profile. This variation is for adventurous palates.
- Berry Bliss: Fold in fresh raspberries or blueberries into the marshmallow mixture. The berries add tartness and color. Drizzle a thin layer of raspberry coulis on top. This version is a springtime favorite.
Intro paragraph 5 sentences.
3 extra paragraphs 5 sentences each.
Now "Storing and Bringing It Back to Life": 3 subsections each 5 sentences. Intro paragraph 5 sentences. 2 extra paragraphs 5 sentences each. We'll craft.
Subsections:
- Fridge Storage: Keep in an airtight container at room temperature for up to a week. The squares will stay firm and flavorful. If the room is humid, cover with parchment paper. The chocolate will maintain its glossy sheen. Store away from direct sunlight.
- Freezer Friendly: Freeze in a single layer on parchment before transferring to a freezer bag. They stay good for up to 3 months. Thaw at room temperature for 30 minutes before serving. The texture remains creamy. Avoid refreezing after thawing.
- Best Reheating Method: Warm in the microwave on low power for 10–15 seconds. Let the squares sit for a minute to allow the chocolate to set. The marshmallows will soften slightly. The result is a fresh, melt‑in‑your‑mouth experience. This method works best for individual servings.
We need 2 extra paragraphs 5 sentences each.
Now recipe card: We'll fill ingredients list with 3 items. Provide steps placeholder.
We need to include directions steps: we can use placeholder "Step instruction here." but we might want to fill with actual steps. But the recipe card template includes only one step placeholder. We might need to fill with actual directions. But it's fine to keep placeholder? The requirement: "Adapt the times, servings, nutrition values, and steps in the recipe card to match THIS specific recipe." So we should provide actual steps. But we can keep placeholder as "Step instruction here." but that may not match. Better to fill with actual steps. We'll fill with 10 steps as earlier. But the template only has one placeholder. We'll need to add multiple elements. We can modify the