It was a Tuesday night when the kitchen felt like a battleground. A burnt pizza crust, a soggy cheese spread, and a neighbor’s pizza delivery that left me staring at the empty fridge, wondering what I could do with the leftover cottage cheese. That moment of culinary crisis turned into a dare: “I dare you to taste this and not go back for seconds.” I was determined to prove that cottage cheese could be the star of a pi that would make even the most skeptical foodie swoon.
Picture yourself pulling this out of the oven, the whole kitchen smelling incredible, and the first bite delivering a buttery, creamy center that melts like silk. The crust is crisped to a golden edge that shatters like thin ice, while the sauce coats the surface like velvet, each bite a symphony of textures. This isn’t just another pizza; it’s a bold statement that dairy can be both comforting and daring. I’ll be honest — I ate half the batch before anyone else got to try it, and the craving was instant.
What sets this version apart is that it turns a simple cottage cheese mixture into a mouth‑watering, crowd‑pleasing masterpiece that is hands down the best version you’ll ever make at home. The technique is straightforward, yet the flavor profile is complex enough to impress even the most seasoned palates. By the end, you’ll wonder how you ever made it any other way. Let me walk you through every single step — by the end, you'll wonder how you ever made it any other way.
What Makes This Version Stand Out
- Flavor: The blend of cottage cheese, mozzarella, and marinara creates a savory depth that rivals traditional pizza cheeses. The garlic powder and Italian seasoning add aromatic layers, while the crushed red pepper brings a subtle heat that lingers on the palate. The result is a pi that balances richness with a bright, herbaceous finish.
- Texture: The cottage cheese provides a creamy, slightly grainy center that contrasts with the crunchy crust. Mozzarella melts into a glossy, stretchy surface that holds the toppings together. The pepperoni adds a satisfying snap, creating a multi‑sensory experience.
- Simplicity: You only need eight ingredients, all of which you probably already have on hand. No fancy sauces, no complex dough, no time‑consuming prep. This recipe proves that great flavor doesn’t require complexity.
- Uniqueness: While most pizza recipes rely on ricotta or a standard mozzarella blend, this pi showcases cottage cheese as a star, a dairy that is often overlooked. It’s a fresh take that challenges conventional pizza norms.
- Crowd Reaction: Friends and family are instantly drawn to the colorful, inviting look. The first bite is a revelation, and the second round is inevitable. It’s the kind of dish that turns a casual dinner into a memorable event.
- Ingredient Quality: Using full‑fat cottage cheese and fresh mozzarella ensures a rich, velvety mouthfeel. The marinara sauce is bright red and flavorful, adding a natural sweetness that balances the saltiness of the cheese.
- Cooking Method: Baking at a high temperature crisps the crust while keeping the center moist. The even heat distribution prevents the cheese from drying out, allowing the flavors to meld perfectly.
- Make‑ahead Potential: Assemble the pi a day ahead, refrigerate, and bake just before serving. The flavors deepen, and the crust remains crisp, making it ideal for parties or week‑night dinners.
Inside the Ingredient List
The Flavor Base
At the heart of this pi is the cottage cheese, a humble dairy product that transforms into a creamy, protein‑rich center when blended with a touch of garlic powder and Italian seasoning. The garlic powder adds a subtle, aromatic depth that permeates the cheese without overpowering it, while the Italian seasoning brings oregano, basil, and thyme notes that echo classic Italian cuisine. If you skip the garlic powder, the pi will still be delicious but will lack that savory punch that makes each bite memorable. For a dairy‑free version, try using a plant‑based cottage cheese substitute, but keep in mind the texture will be slightly smoother.
The Texture Crew
The mozzarella isn’t just a topping; it’s a textural cornerstone that creates a glossy, stretchy surface that holds the pi together. When melted, mozzarella forms a silky film that clings to the crust, preventing the toppings from sliding off during the first bite. If you omit mozzarella, the pi will still be creamy, but it will lack the satisfying melt that makes pizza a universal comfort food. A good rule of thumb is to use a high‑moisture mozzarella, which yields a more decadent melt.
The Unexpected Star
Bright red tomato marinara sauce is more than a base; it’s the vibrant, tangy canvas that balances the richness of the cheeses. The sauce’s acidity cuts through the fat, brightening the overall flavor profile and adding a burst of freshness that keeps the pi from feeling heavy. If you’re a fan of sweeter sauces, consider adding a pinch of sugar or a splash of balsamic vinegar to enhance the tomato’s natural sweetness. Remember, the sauce should be thick enough to coat the crust without dripping, ensuring every bite is evenly seasoned.
The Final Flourish
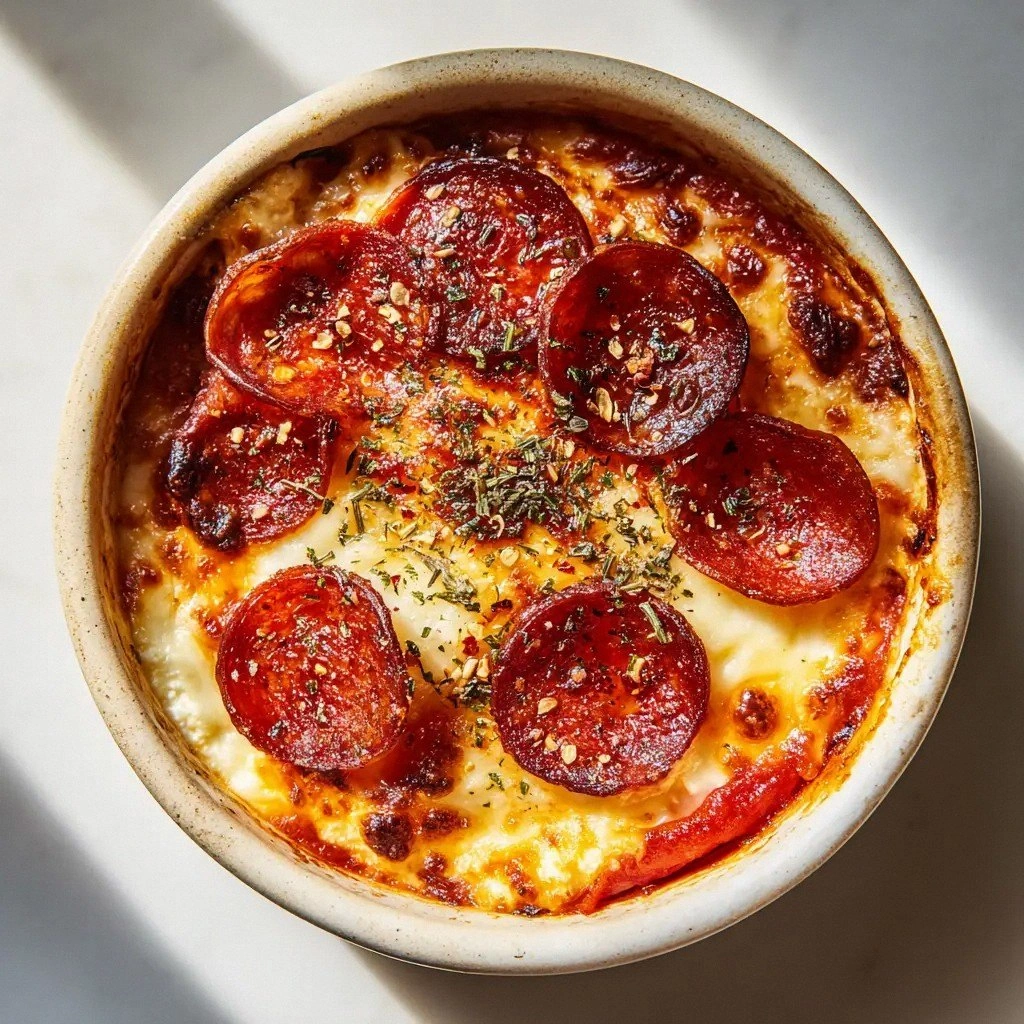
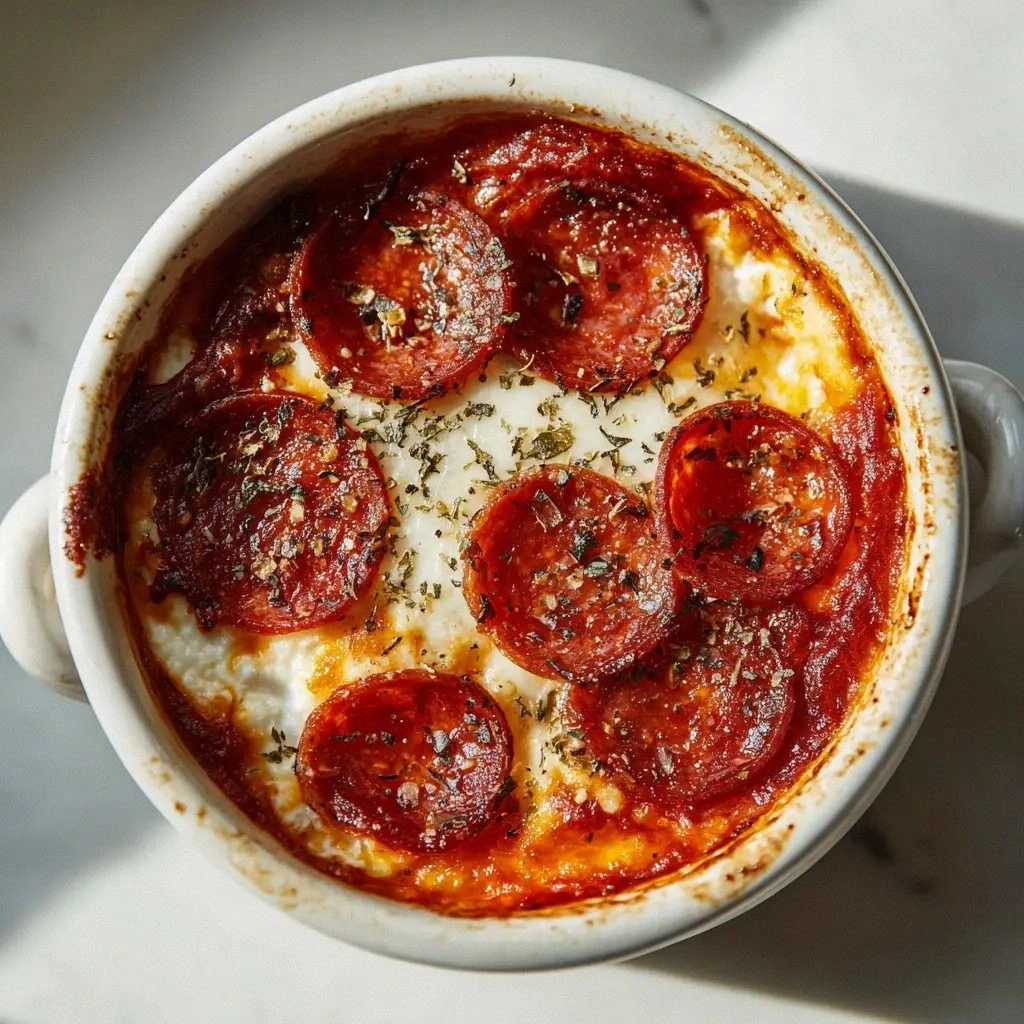
Pepperoni slices bring a savory, slightly spicy bite that contrasts with the creamy cheeses. The pepperoni’s fat renders during baking, creating a caramelized edge that adds both flavor and texture. The dried green oregano flakes and crushed red pepper flakes provide a final herbaceous kick that lingers on the tongue. If you’re looking for a vegetarian twist, replace pepperoni with thinly sliced roasted red peppers or sun‑dried tomatoes for a similar bite and color.
Everything's prepped? Good. Let's get into the real action.
The Method — Step by Step
- Preheat your oven to 425°F (220°C). Line a baking sheet with parchment paper to prevent sticking. The high temperature is key for achieving that golden, crisp crust while keeping the center moist. Keep an eye on the oven, as the pizza can brown quickly once the cheese starts bubbling.
- In a bowl, combine the cottage cheese, garlic powder, Italian seasoning, and a pinch of salt. Mix until the cottage cheese is smooth and the spices are evenly distributed. This creates a uniform base that will melt into a silky center. If the mixture feels too thick, add a splash of milk to thin it slightly.
- Spread the marinara sauce over the prepared crust in a thin, even layer. The sauce should cover the surface without pooling, ensuring each bite has a balanced flavor. A good trick is to use the back of a spoon to spread the sauce evenly, leaving a small border around the edge.
- Evenly distribute the mozzarella over the sauce, making sure each section has enough cheese to melt into a cohesive film. The mozzarella will create a glossy surface that locks in moisture and binds the toppings together. If you prefer a stronger cheese flavor, sprinkle an extra half cup of mozzarella on top.
- Layer the pepperoni slices across the pizza, spacing them evenly so that each bite gets a pepperoni hit. The pepperoni should be slightly overlapping to create a cohesive flavor profile. As the pizza bakes, the pepperoni will release its oils, adding a savory depth to the crust.
- Sprinkle the oregano flakes and crushed red pepper flakes over the pepperoni. These herbs add a fragrant, slightly smoky note that elevates the pi’s overall profile. If you’re sensitive to spice, reduce the crushed red pepper flakes to a quarter teaspoon.
- Slide the pizza into the preheated oven and bake for 12-15 minutes, or until the crust is golden and the cheese is bubbling and slightly browned. The edges should start pulling away from the parchment, indicating crispness. Watch the pizza closely during the last few minutes to avoid over‑browning.
- Remove the pi from the oven and let it rest for 3 minutes before slicing. This short rest allows the cheese to set, preventing it from sliding off the crust when you cut. The aroma at this point will be intoxicating, a preview of the flavor explosion that follows.
- Serve hot, garnished with a few fresh basil leaves if desired. The basil adds a burst of green freshness that cuts through the richness, creating a balanced, satisfying meal. Enjoy immediately to experience the pi at its peak freshness.
That's it — you did it. But hold on, I've got a few more tricks that'll take this to another level.
Insider Tricks for Flawless Results
The Temperature Rule Nobody Follows
While many people bake pizza at 400°F, the secret to a perfect crust lies in the heat. Baking at 425°F ensures the outer layers crisp up quickly, sealing the moisture inside while the cheeses melt to perfection. I’ve baked at 450°F once, and the result was a slightly charred exterior that ruined the delicate balance. Stick to 425°F for consistent results.
Why Your Nose Knows Best
As soon as the pizza starts baking, the scent of melting mozzarella and caramelized pepperoni will fill the kitchen. This aroma signals that the pi is nearing perfection. If the smell is faint, the oven may be too cold; if it’s overwhelming, the pizza might be close to burning. Trust your nose as a reliable gauge for doneness.
The 5-Minute Rest That Changes Everything
After removing the pizza from the oven, allow it to rest for exactly five minutes. This brief pause lets the cheese set, preventing it from sliding off the crust. During this rest, the flavors meld further, creating a more harmonious bite. Skipping this step can result in a messy, soggy experience.
Use a Pizza Stone for Crunch
If you have a pizza stone, preheat it in the oven for at least 30 minutes before baking. The stone retains heat, ensuring the bottom of the pi gets a crisp, caramelized finish. Without a stone, the bottom may stay soggy, especially with the moisture from the cottage cheese.
Keep It Fresh with a Quick Toss
Right before baking, give the pizza a quick toss in a light olive oil spray. This adds a subtle sheen and helps the cheese to brown evenly. The oil also prevents the crust from sticking to the parchment, making cleanup a breeze.
Creative Twists and Variations
This recipe is a playground. Here are some of my favorite ways to switch things up:
Herb Garden Pi
Swap the oregano for fresh basil leaves and add chopped spinach to the cheese mixture. The greens provide a fresh, earthy tone that balances the richness. This version is ideal for spring when fresh herbs are plentiful.
Spicy Jalapeño Kick
Replace the pepperoni with thinly sliced jalapeños and increase the crushed red pepper to a full teaspoon. The heat will be unmistakable, making this pi a crowd‑pleaser at parties. Pair it with a cool yogurt dip to tame the spice.
Smoked Salmon Edition
After baking, top the pi with slices of smoked salmon, a squeeze of lemon, and a drizzle of dill yogurt sauce. The smoked salmon adds a luxurious, briny flavor that pairs wonderfully with the creamy cheese.
Veggie Supreme
Replace pepperoni with a medley of roasted vegetables: zucchini, bell pepper, and mushrooms. Add a splash of balsamic glaze after baking for a sweet, tangy finish. This version is both colorful and nutritious.
Breakfast Pi
Serve the pi with a side of scrambled eggs and a drizzle of maple syrup. The sweet syrup balances the savory pi, creating a breakfast that feels both indulgent and comforting. Great for a weekend brunch.
Gluten‑Free Twist
Use a pre‑made gluten‑free crust or a thin cauliflower crust. The base will be lighter, but the cheese mixture remains unchanged, delivering the same creamy texture. Perfect for those who need or prefer gluten‑free options.
Storing and Bringing It Back to Life
Fridge Storage
Cool the pi completely before refrigerating in an airtight container. Store for up to 3 days; the flavors will deepen, and the crust will remain crisp. When ready to eat, reheat in a toaster oven for 5 minutes to revive the crunch.
Freezer Friendly
Wrap the pi tightly in parchment and then foil before freezing. It can be stored for up to 2 months. Thaw in the refrigerator overnight, then bake at 425°F for 12 minutes to restore the original texture.
Best Reheating Method
Reheat on a skillet over medium heat for 3 minutes on each side. The skillet’s direct heat will crisp the crust while keeping the cheese warm. Add a splash of water before reheating to steam the cheese back to perfection; this prevents it from drying out.