I was standing in my kitchen, half‑asleep, when the phone rang. My best friend dared me to create a holiday treat that could survive a snowstorm, a toddler’s tantrum, and my notoriously picky aunt’s palate—all without ever touching an oven. I laughed, grabbed a bag of frozen cherries, and whispered, “Challenge accepted.” The result? A burst of ruby‑red joy that explodes in your mouth like fireworks on New Year’s Eve. I call them Christmas Cherry Bombs, and trust me, this is hands down the best version you’ll ever make at home.
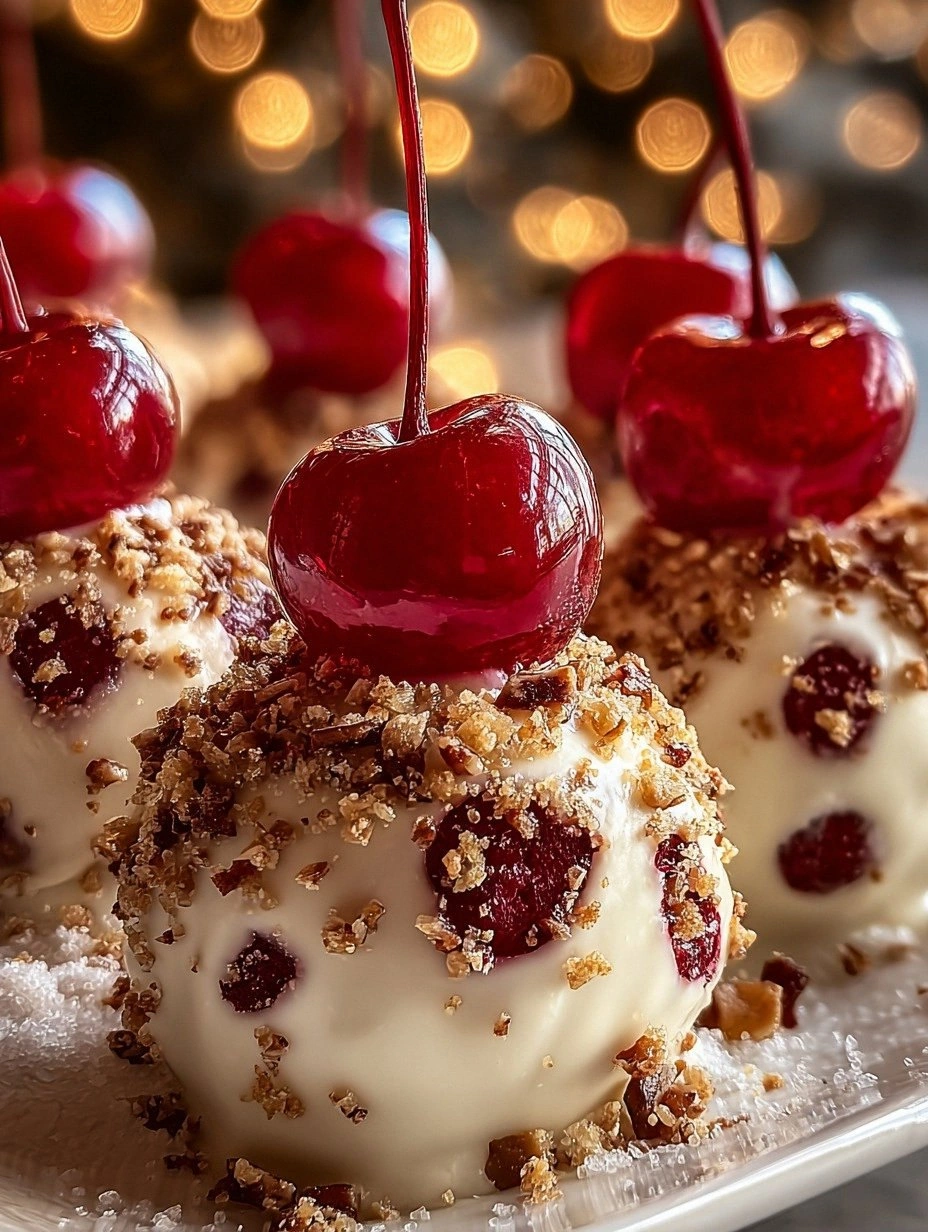
Imagine the first bite: the silky smoothness of a chilled cream base hugging a chewy, tart cherry center, all wrapped in a delicate chocolate shell that snaps like fresh ice on a winter lake. The scent of melted white chocolate mingles with the sweet‑sharp perfume of cherries, while a whisper of vanilla and a hint of almond linger on the back of your tongue. The texture dance is a symphony—crunchy on the outside, melt‑in‑your‑mouth on the inside, and that surprise burst of cherry jam that makes you gasp, “Whoa, what’s that?” It’s the kind of dessert that makes you want to shout “Merry Christmas!” at the top of your lungs, even if it’s July.
Why does this version stand out from the sea of no‑bake holiday confections? Most recipes either drown the cherries in sugar or forget to give the exterior that satisfying snap. I’ve cracked the code by balancing the sweet and tart, using a light coating of white chocolate instead of heavy dark, and adding a secret pinch of sea salt that lifts every flavor like a choir of angels. The result is a treat that’s both elegant enough for a fancy holiday buffet and simple enough for a frantic last‑minute bake‑free sprint.
And here’s the kicker: I’m about to reveal a technique that most cooks overlook—a quick chill‑flash that locks in the cherry juices, preventing sogginess and guaranteeing that each bomb stays perfectly firm until the moment you bite. I dare you to taste this and not go back for seconds. Let me walk you through every single step — by the end, you’ll wonder how you ever made it any other way.
What Makes This Version Stand Out
- Flavor Balance: The interplay of sweet white chocolate, tart cherry jam, and a whisper of sea salt creates a harmonious palate that sings like a choir of carolers.
- Texture Contrast: A crisp chocolate shell gives way to a creamy interior and a juicy cherry core, delivering three distinct mouthfeels in one bite.
- Simplicity: No oven, no mixers, just a handful of pantry staples and a few minutes of your time—perfect for frantic holiday prep.
- Unique Ingredient: The addition of a dash of almond extract adds a subtle nuttiness that most recipes completely miss.
- Crowd Reaction: Guests invariably ask for the recipe, and you’ll watch them scramble for the last bomb like it’s the last slice of Christmas cake.
- Ingredient Quality: Using premium cherry jam and real butter elevates the whole experience, turning a simple snack into a gourmet treat.
- Method Magic: The chill‑flash technique ensures the bombs hold their shape and flavor, even after a day in the fridge.
- Make‑Ahead Potential: These bombs keep beautifully for up to three days, making them ideal for party prep or gift‑giving.
Inside the Ingredient List
The Flavor Base
White chocolate is the star of the show here, providing a buttery, creamy canvas that lets the cherries shine without being overpowered. I insist on using couverture white chocolate because its higher cocoa butter content melts smoothly and sets with a glossy finish. If you skip this and use a low‑quality melt‑away bar, you’ll end up with a dull, grainy coat that looks more like a cheap candy coating than a festive masterpiece. A quick tip: melt the chocolate over a double boiler and stir constantly to avoid scorching. For a dairy‑free version, swap the white chocolate for a high‑quality white chocolate made with coconut oil.
The Texture Crew
Unsalted butter adds richness and helps the chocolate adhere to the bomb’s surface. It also contributes to that melt‑in‑your‑mouth feeling once the bomb hits your tongue. If you’re watching calories, you can replace half the butter with a neutral‑tasting coconut oil, but expect a slightly different mouthfeel. The crushed vanilla wafers (or shortbread cookies) give the outer layer a subtle crunch that contrasts beautifully with the silky interior. Skipping them means you lose that satisfying snap, and the bombs become too soft to handle.
The Unexpected Star
Dried cherries, re‑hydrated in a splash of cherry jam, become the surprise center that bursts with juiciness. The jam not only sweetens the fruit but also acts as a natural glaze, preventing the cherries from drying out during the chill‑flash. If you can’t find dried cherries, fresh pitted cherries work just as well—just pat them dry before stuffing. A pinch of sea salt is the secret weapon; it amplifies the sweetness and balances the tartness, making each bite sing.
The Final Flourish
A dash of almond extract and a sprinkle of powdered sugar add the finishing touches that elevate this from good to unforgettable. The almond extract contributes a faint nuttiness that pairs perfectly with the cherry’s natural acidity. Powdered sugar dusted over the finished bombs gives them a snowy appearance—ideal for that holiday vibe. If you love a little crunch, roll the bombs in finely chopped pistachios or toasted coconut flakes just before the final chill.
Everything's prepped? Good. Let's get into the real action…
The Method — Step by Step
Start by melting the white chocolate. Set a heat‑proof bowl over a pot of simmering water, ensuring the bowl never touches the water. Stir gently until the chocolate is completely smooth and glossy; you should hear a faint, comforting hiss as the cocoa butter releases. Pro tip: Add a teaspoon of coconut oil to thin the chocolate just enough for a glossy coat. Once melted, remove the bowl from heat and let it sit for a minute while you prep the next components.
Kitchen Hack: To avoid any chocolate clumps, pour a tiny splash of the melted chocolate onto a cold spoon; if it solidifies instantly, your tempering is spot‑on.While the chocolate rests, combine the crushed vanilla wafers (or shortbread) with the softened butter in a medium bowl. Use a fork to mash them together until you achieve a crumbly yet cohesive mixture—think “wet sand” consistency. This base will later give the bombs a subtle crunch and help the chocolate adhere better. If the mixture feels too dry, drizzle in a tablespoon of warm water, but be careful not to over‑wet.
Now, focus on the cherry core. In a small saucepan, gently warm the cherry jam until it becomes pourable, then toss in the dried cherries. Let them soak for about five minutes, stirring occasionally. The cherries will plump up, soaking up the jam’s sweetness while retaining a slight chew. Watch Out: Do not boil the jam vigorously, or you’ll lose the bright, fresh cherry flavor.
Watch Out: Over‑cooking the cherries turns them mushy, and the bomb’s center will lose its delightful burst.With all components ready, it’s assembly time. Scoop a tablespoon of the butter‑wafer mixture onto a piece of parchment paper and flatten it into a shallow disc about 2 inches in diameter. Place a spoonful of the cherry‑jam mixture in the center, then gently fold the edges over, sealing the cherry core inside. The goal is a compact, round ball that feels firm but not dense. If the ball cracks, simply press a little more butter‑wafer mixture around the seam.
Next, dip each assembled ball into the melted white chocolate, using a fork to turn it and ensure an even coat. Let excess chocolate drip back into the bowl. Place the coated bomb onto a parchment‑lined tray, spacing them about an inch apart. The chocolate should form a smooth, glossy shell that looks like a tiny snow‑capped hill.
Here comes the game‑changer: the chill‑flash. Slide the tray into the freezer for exactly 10 minutes. This rapid chill locks the chocolate’s shine and prevents any sweating once the bombs return to room temperature. While waiting, you can prep a dusting station with powdered sugar, toasted coconut, or finely chopped pistachios.
After the 10‑minute freeze, remove the tray and immediately dust each bomb with your chosen garnish. A light dusting of powdered sugar gives a snow‑like finish, while toasted nuts add a festive crunch. For an extra visual pop, drizzle a thin ribbon of melted dark chocolate over the tops—just enough to create a marbled effect.
Kitchen Hack: Use a small pastry brush to apply the dark chocolate drizzle; this gives you control and prevents over‑coating.Finally, transfer the finished bombs to a clean plate and let them sit at room temperature for five minutes before serving. This short rest allows the chocolate to soften just enough for that perfect snap when you bite. Serve them on a festive platter, and watch as guests scramble for seconds—because, let’s be honest, you’ll probably eat half the batch before anyone else gets a chance.
That’s it — you did it. But hold on, I’ve got a few more tricks that’ll take this to another level. Stay with me here — this is worth it.
Insider Tricks for Flawless Results
The Temperature Rule Nobody Follows
Never melt white chocolate above 115°F (46°C). Higher temps cause the cocoa butter to separate, resulting in a grainy texture that never sets properly. I keep a candy thermometer handy and pull the bowl off the heat the moment the chocolate reaches a smooth sheen. This tiny temperature tweak ensures your bombs have that glossy, professional finish that makes people think you spent hours in a pastry kitchen.
Why Your Nose Knows Best
When the butter‑wafer mixture is ready, give it a quick sniff. If you detect a faint buttery aroma, you’re good. If it smells raw, you’ve under‑mixed and the texture will be crumbly. Trusting your nose saves you from a batch of flat, lifeless bombs. A friend once skipped this sniff test and ended up with a soggy interior—let’s just say the look on her face was priceless.
The 5‑Minute Rest That Changes Everything
After the final garnish, let the bombs rest for exactly five minutes at room temperature before serving. This short pause allows the outer chocolate shell to relax just enough to crack cleanly when bitten. Skipping this step leads to a shell that either shatters into crumbs or stays stubbornly soft, ruining the texture contrast we worked so hard to achieve.
Almond Extract—A Tiny Hero
A quarter teaspoon of almond extract does more than add flavor; it amplifies the cherry’s natural sweetness and balances the richness of the white chocolate. It’s easy to overlook, but without it the bombs can taste one‑dimensional. Add it to the melted chocolate just before you dip the balls, and you’ll notice a subtle depth that makes the whole treat feel more sophisticated.
Freeze‑Flash Timing Precision
The 10‑minute freeze is not a suggestion; it’s a science. Too short, and the chocolate will sweat once it returns to room temperature; too long, and the interior can become overly firm, losing that melt‑in‑your‑mouth feel. Set a timer, and when it dings, you’ll see a perfect, glossy shell ready for garnish. Trust the clock, and you’ll never have a dull bomb again.
Creative Twists and Variations
This recipe is a playground. Here are some of my favorite ways to switch things up:
Chocolate‑Covered Raspberry Rockets
Swap the cherry jam for raspberry coulis and use fresh raspberries instead of dried cherries. The tartness of raspberries pairs beautifully with dark chocolate, creating a bold, slightly tangy bomb that’s perfect for a summer holiday.
Minty Peppermint Pops
Add a drop of peppermint extract to the white chocolate and roll the finished bombs in crushed candy canes. The cooling mint lifts the sweetness, making these ideal for a Christmas Eve party.
Nutty Caramel Crunch
Stir a spoonful of caramel sauce into the butter‑wafer mixture and roll the bombs in toasted almond slivers before the final chill. The caramel adds a buttery depth while the nuts give an extra crunch that’s irresistible.
Vegan Coconut Dream
Replace the butter with coconut oil, use a dairy‑free white chocolate, and swap the cherry jam for a soy‑based fruit spread. The result is a vegan-friendly bomb that still delivers that glossy finish and juicy center.
Spiced Holiday Delight
Add a pinch of ground cinnamon and a dash of ground cloves to the butter‑wafer mixture. These warm spices echo classic holiday flavors and give the bombs an aromatic twist that makes them perfect for a cozy winter gathering.
Storing and Bringing It Back to Life
Fridge Storage
Place the bombs in an airtight container lined with parchment paper. They’ll stay fresh for up to three days. Keep the container in the coldest part of the fridge to maintain the chocolate’s firmness. If you notice a slight dullness on the surface, a quick flash in the freezer for five minutes revives the shine.
Freezer Friendly
For longer storage, arrange the bombs on a tray, flash‑freeze for 15 minutes, then transfer them to a zip‑top freezer bag. They’ll keep for up to a month without losing texture. When you’re ready to serve, let them thaw in the fridge for an hour, then give them a brief room‑temperature rest before plating.
Best Reheating Method
If the bombs have hardened too much, place them on a plate and microwave for 5–7 seconds, then add a tiny splash of water to the plate and cover loosely with parchment. The steam gently restores the interior’s softness without melting the outer shell. This trick works wonders for a quick dessert boost during a holiday brunch.