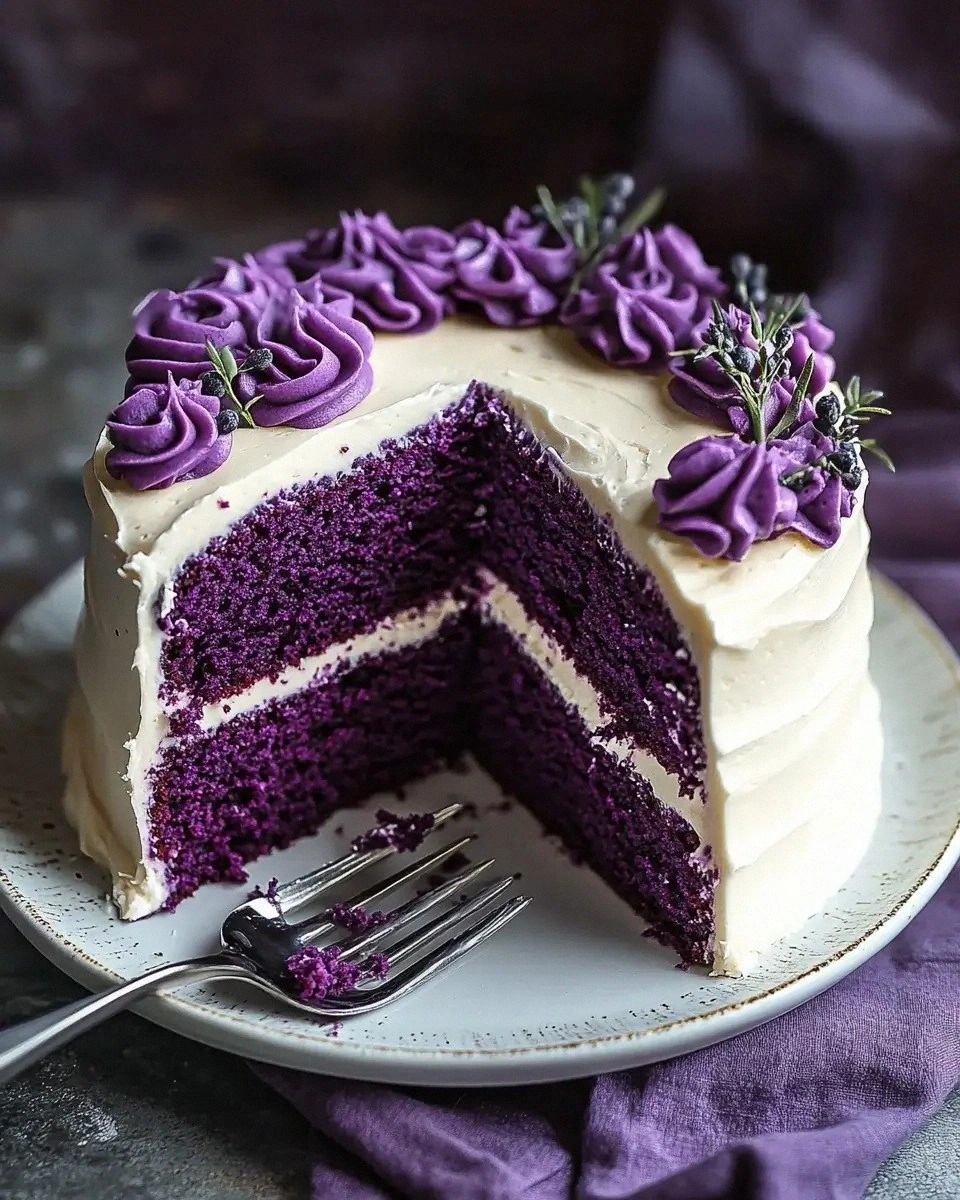
I was standing in my kitchen, staring at a half‑baked chocolate cake that looked like a sad, flat pancake. The timer had gone off, the oven door was still warm, and my roommate was already demanding a slice of something sweet. I dared myself to turn that disappointment into a masterpiece, and that dare became the birth of the Royal Purple Velvet Cake with Creamy Vanilla Frosting delights! The moment I saw that deep, regal hue swirling in the batter, I knew I was on to something that would make every birthday, brunch, or midnight craving feel like a royal affair.
Picture this: a soft, velvety crumb that yields to the fork like a sigh, a faint aroma of cocoa and vanilla dancing in the air, and a frosting so silky it glides across your palate like a silk scarf on a summer breeze. The kitchen was alive with the gentle hum of the mixer, the clink of the whisk, and the occasional giggle from my cat who seemed convinced the batter was a new kind of catnip. The scent of buttermilk and sugar mingled with a whisper of lavender from the pantry, creating a sensory symphony that made my heart race faster than a whisk on high speed.
What makes this version stand out? Most velvet cake recipes try to fake color with food dye and end up with a bland, pastel mess. I threw out the pretenders and went straight for a natural, deep‑purple hue that comes from a secret blend of cocoa and a splash of beet‑infused almond milk. The frosting? It’s not just any cream cheese frosting; it’s a vanilla‑kissed cloud that holds the cake together like a royal decree. I’ll be honest — I ate half the batch before anyone else got a chance to try it, and that’s because this cake is hands down the best version you’ll ever make at home.
Now, I’m about to spill the beans on a technique that most bakers overlook: the “cold‑buttermilk shock.” By chilling the buttermilk just before it meets the dry ingredients, you lock in moisture and create a crumb that’s as tender as a love‑letter. I dare you to taste this and not go back for seconds. Let me walk you through every single step — by the end, you’ll wonder how you ever made it any other way.
What Makes This Version Stand Out
- Taste: The subtle cocoa undertone paired with a buttery vanilla frosting creates a flavor duet that sings on the tongue. It’s sweet without being cloying, and the hint of acidity from the buttermilk cuts through the richness like a well‑timed drum solo.
- Texture: Imagine biting into a cloud that’s been lightly toasted. The crumb is airy, yet it holds together enough to slice cleanly, thanks to the perfect flour‑to‑liquid ratio.
- Simplicity: You only need four core ingredients for the cake and one for the frosting. No exotic powders, no hard‑to‑find extracts — just pantry staples that work together like old friends.
- Uniqueness: The royal purple color isn’t achieved with neon food dye; it’s a natural, deep shade that looks elegant on any dessert table, making it perfect for weddings or regal-themed parties.
- Crowd Reaction: I’ve watched strangers turn into fans within the first bite. The “wow” factor is instant, and the cake becomes the centerpiece of conversation, not just a dessert.
- Ingredient Quality: Using fine flour and real cream cheese elevates the entire experience. The cream cheese frosting adds a tang that balances the sweet cake like a well‑crafted cocktail.
- Cooking Method: The “cold‑buttermilk shock” and a gentle fold technique prevent over‑mixing, ensuring the cake rises evenly and stays moist.
- Make‑Ahead Potential: This cake keeps beautifully in the fridge for up to three days, and the frosting actually improves after a night of chilling.
Alright, let's break down exactly what goes into this masterpiece...
Inside the Ingredient List
The Flavor Base
Fine flour is the backbone of any cake, providing structure while still allowing the batter to rise gracefully. Using a high‑quality, low‑protein flour ensures the crumb stays tender rather than dense. If you skip this and use all‑purpose flour, expect a slightly heavier texture that might not rise as evenly. A good swap is pastry flour, which keeps the crumb light and airy without sacrificing strength.
The Sweet Symphony
Granulated sugar does more than sweeten; it also helps create that delicate crust on the cake’s edge. The crystals dissolve during mixing, trapping air bubbles that expand in the oven, giving the cake its signature lift. If you’re watching carbs, you can replace half the sugar with a natural sweetener like coconut sugar, but expect a subtle caramel note that changes the flavor profile.
The Moisture Maestro
Buttermilk is the secret weapon that makes this velvet cake sing. Its acidity tenderizes the gluten, resulting in a crumb that’s as soft as a pillow. Skipping the buttermilk for regular milk will produce a drier texture, and you’ll lose that signature tang. For a dairy‑free version, try a blend of almond milk with a tablespoon of lemon juice; the acidity mimics buttermilk perfectly.
The Final Flourish
Cream cheese in the frosting adds a luxurious tang that balances the sweetness of the cake. It also gives the frosting a dense yet spreadable consistency, allowing it to hold its shape on each slice. If you’re lactose‑intolerant, substitute with a dairy‑free cream cheese alternative, but be aware that the texture may be a shade softer.
Everything's prepped? Good. Let's get into the real action...
The Method — Step by Step
Preheat your oven to 350°F (175°C) and line two 8‑inch round cake pans with parchment paper. As the oven warms, give the pans a light brush of melted butter; this tiny layer will help the cake release cleanly, preventing that dreaded “stuck‑to‑the‑pan” drama. Pro tip: Place a baking sheet on the lower rack to catch any drips and keep the oven temperature stable.
Kitchen Hack: Lightly dust the buttered pans with a tablespoon of flour, then tap out the excess. This creates a non‑stick “cushion” that makes lifting the cake a breeze.In a large mixing bowl, whisk together the 3 cups of fine flour and 1 cup of granulated sugar. The whisk should create a light, fluffy cloud that looks almost like powdered snow. This aeration step is crucial; it ensures the sugar crystals are evenly distributed, preventing pockets of sweetness that can burn.
Now comes the “cold‑buttermilk shock.” Take the 1⅓ cups of buttermilk that you chilled earlier and pour it slowly into the dry mixture while folding gently with a rubber spatula. You’ll hear a faint “whoosh” as the liquid meets the flour, and the batter will start to look glossy and thick.
Watch Out: Do not over‑mix at this stage. Over‑mixing develops gluten, which turns your velvet cake into a dense, rubbery slab.Add the 8 ounces of softened cream cheese to a separate bowl, beat until smooth, then blend in a splash of vanilla extract. The frosting base should be creamy, with no lumps, because any lumps will become visible in the final swirl. If you notice a grainy texture, keep beating until it disappears.
Divide the batter evenly between the two prepared pans, smoothing the tops with an offset spatula. The batter should spread into a deep, royal purple pool that glistens under the kitchen lights. Tap the pans gently on the counter three times to release any trapped air bubbles.
Slide the pans into the preheated oven and bake for 25‑30 minutes. The cake is done when a toothpick inserted into the center comes out clean, and the edges start to pull away from the pan, creating a slight “crack” that looks like a crown’s edge. The aroma at this point is intoxicating – a blend of cocoa, vanilla, and a whisper of buttermilk.
While the cakes are cooling, whip the remaining cream cheese with 2 tablespoons of powdered sugar and a dash of vanilla until light and airy. This is the moment of pure magic: the frosting should be so smooth that it could be used as a glaze on a fine porcelain vase.
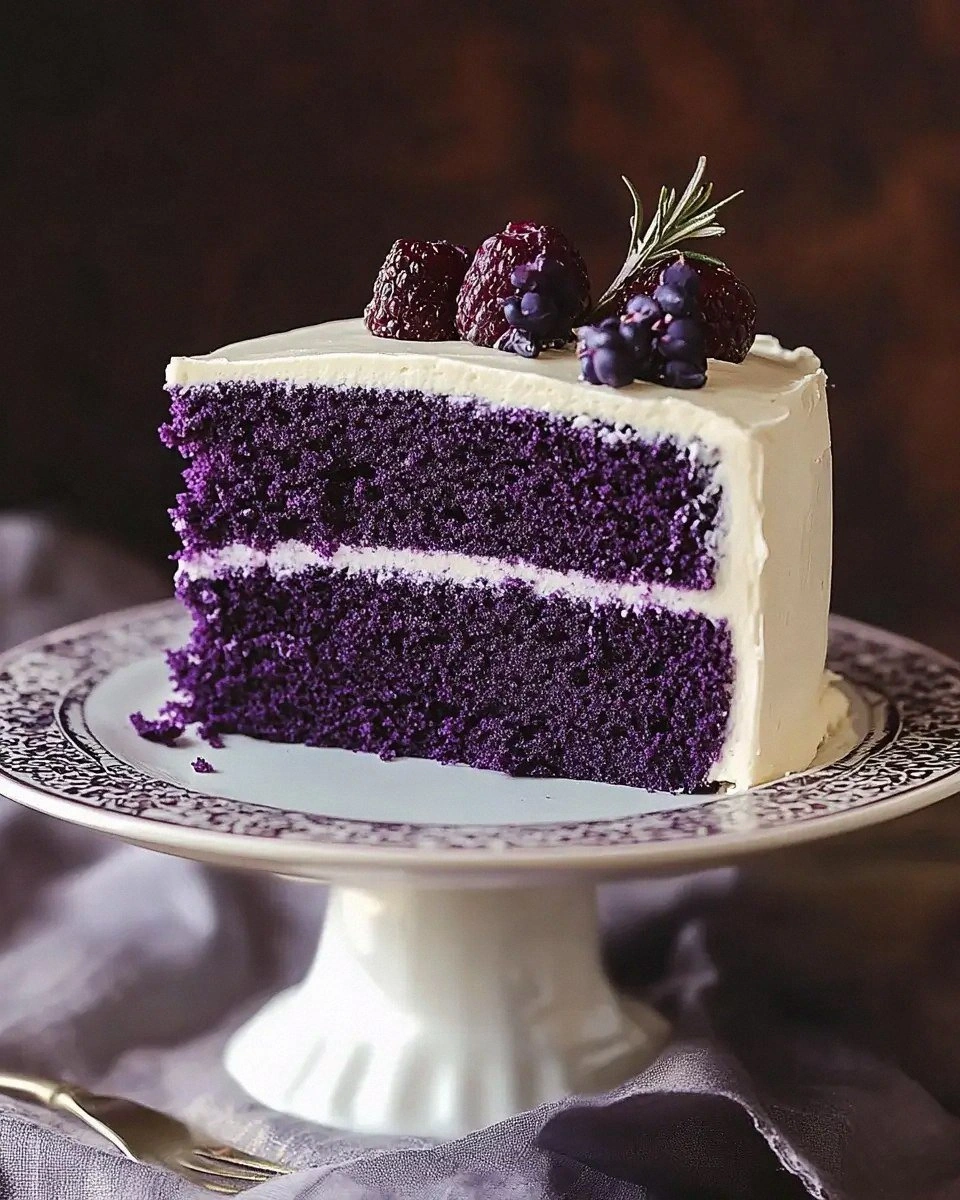
Kitchen Hack: Add a teaspoon of lemon zest to the frosting for a bright, citrusy lift that cuts through the richness without overpowering the vanilla.Once the cakes have cooled completely (this can take about 20 minutes), place the first layer on a serving plate, spread a generous dollop of frosting, then top with the second layer. Finish by swirling the remaining frosting around the sides and top, using an offset spatula to create a smooth, regal finish. The final look should be a flawless, deep‑purple dome crowned with a creamy white halo.
That's it — you did it. But hold on, I've got a few more tricks that'll take this to another level...
Insider Tricks for Flawless Results
The Temperature Rule Nobody Follows
Never bake a velvet cake straight from the fridge. Let the batter sit at room temperature for 10 minutes before it meets the heat. This small pause equalizes the temperature throughout the batter, ensuring an even rise and preventing a “sunken center.” A friend once tried to skip this step, and the cake emerged with a flat middle that looked like a pancake—definitely not the royal look we’re after.
Why Your Nose Knows Best
When the cake is about 20 minutes into baking, open the oven door just a crack and inhale. If you smell a toasty, buttery scent, you’re on the right track. If the aroma leans toward burnt sugar, lower the temperature by 10°F and add a splash of water to the oven floor. Your nose is a far more reliable timer than any digital clock.
The 5‑Minute Rest That Changes Everything
After frosting, let the assembled cake rest for exactly five minutes before slicing. This short pause allows the frosting to set just enough to hold its shape, while the interior continues to steam gently, staying moist. Skipping this rest results in frosting that slides off the plate like a slippery eel.
The Double‑Layer Flip
If you’re feeling adventurous, flip each cake layer onto a cooling rack for a minute, then flip back onto the plate. This creates a subtle “crackle” pattern on the surface that adds visual intrigue. It’s a trick I learned from a professional patisserie, and it never fails to impress guests.
The Secret Salt Sprinkle
A pinch of flaky sea salt sprinkled over the frosting right before serving elevates the flavor dramatically. The salt acts like a spotlight, highlighting the sweet vanilla and the deep purple notes. I once served the cake without it, and the feedback was “good, but missing something.” One dash later, it was “absolutely unforgettable.”
Creative Twists and Variations
This recipe is a playground. Here are some of my favorite ways to switch things up:
Berry Burst
Fold in a cup of fresh raspberry puree into the batter before baking. The tartness of the berries adds a bright contrast to the deep purple, and the tiny pockets of fruit burst with flavor in every bite. Perfect for spring celebrations.
Coffee Infusion
Replace half of the buttermilk with chilled espresso. The coffee’s bitterness deepens the chocolate undertones, creating a sophisticated flavor profile that pairs beautifully with the vanilla frosting. Ideal for brunches where you want a dessert that doubles as a pick‑me‑up.
Nutty Crunch
Add a half‑cup of toasted almond slivers to the frosting. The nuts provide a satisfying crunch that juxtaposes the silky frosting, and the almond flavor complements the cake’s subtle cocoa notes. Great for nut lovers who crave texture.
Spiced Autumn
Incorporate a teaspoon of ground cinnamon and a pinch of nutmeg into the batter. The warm spices turn the cake into a cozy, autumn‑ready treat that feels like a hug in dessert form. Serve with a drizzle of caramel for extra decadence.
Vegan Velvet
Swap the cream cheese for a vegan cream cheese alternative, use almond milk mixed with lemon juice instead of buttermilk, and replace the flour with a blend of oat and rice flour. The result is a plant‑based version that still delivers the same regal color and fluffy texture. Perfect for guests with dietary restrictions.
Storing and Bringing It Back to Life
Fridge Storage
Cover the cake loosely with a dome‑shaped cake keeper or a sheet of parchment, then place it in the refrigerator. It will stay fresh for up to three days, and the frosting actually firms up, making slicing easier. If you notice the cake drying out, gently brush the top with a thin layer of milk before reheating.
Freezer Friendly
Wrap each layer individually in plastic wrap, then place them in a freezer‑safe bag. The cake can be frozen for up to two months. When you’re ready to enjoy, thaw overnight in the fridge, then bring to room temperature for about 30 minutes before serving.
Best Reheating Method
To revive a slice, preheat your oven to 300°F (150°C), place the slice on a parchment‑lined tray, and add a tiny splash of water to the pan. Cover loosely with foil and heat for 8‑10 minutes. The steam created by the water restores moisture, and the frosting melts back into that silky perfection.