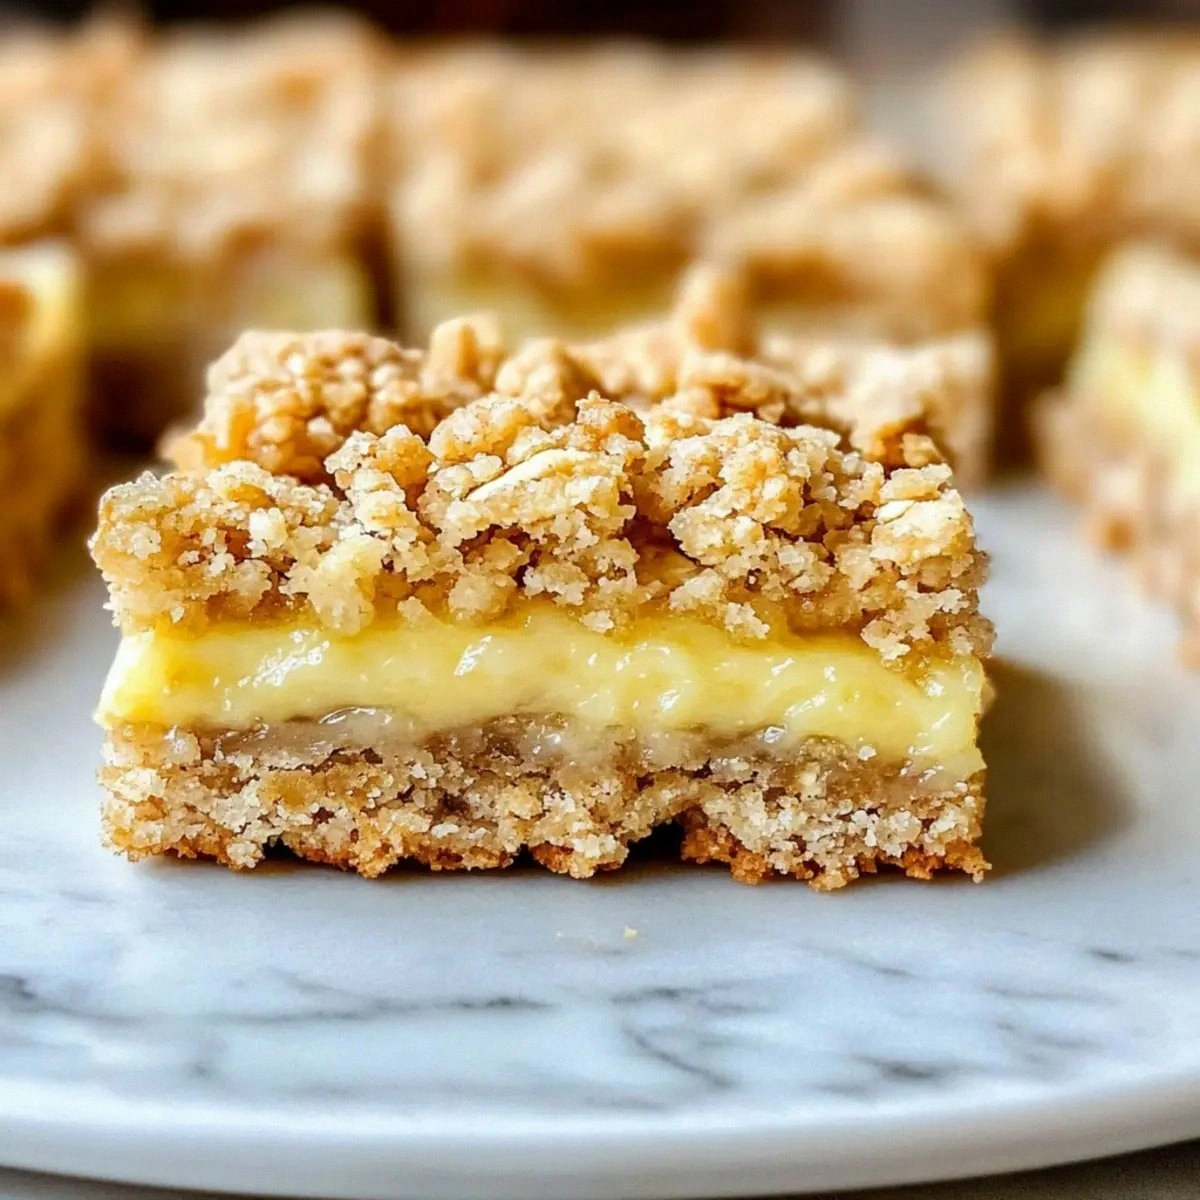
Picture this: I’m in my kitchen, a half‑hour late for a Zoom brunch, and the only thing that could save the day is a sweet‑tart bar that screams sunshine. I grabbed the first lemon I could find, tossed some oats in the pantry, and—boom—my oven started humming like a contented cat. The result? A golden‑brown crumble that crackles under the fork, a buttery base that melts in your mouth, and a lemon‑kissed center that’s as bright as a summer sunrise. I’ll be honest — I ate half the batch before anyone else got to try it, and that’s a confession I’m not shy about.
The scent that filled my apartment was nothing short of a citrus‑infused dream: the buttery aroma mingling with the sharp tang of lemon, the warm, comforting notes of toasted oats, and a whisper of caramel from the condensed milk. My nose was doing a happy dance, my ears caught the faint sizzle of butter hitting the pan, and the whole kitchen felt like a cozy bakery on a breezy patio. When the timer finally pinged, the bars were a masterpiece of texture—crunchy on the edges, soft and gooey in the middle, and a zing that made my taste buds do cartwheels.
Most lemon bars you see online either drown in a sugary frosting or skimp on the buttery crunch that makes a crumb bar truly addictive. This version flips the script by using old‑fashioned oats for a hearty chew, sweetened condensed milk for a silky, caramel‑like richness, and a splash of lemon juice that cuts through the sweetness like a cool breeze on a hot day. I’ve tried countless variations, and most recipes get this completely wrong—either the crust is soggy, the lemon flavor is muted, or the bar falls apart before it even reaches the plate. Here’s what actually works: a perfect balance of fat, sugar, and acid, plus a secret technique that guarantees a flawless crumble every single time.
Okay, ready for the game‑changer? I’m about to reveal a trick involving the butter and sugar that creates a “golden‑capped” crust, a method that’s as simple as it is transformative. I dare you to taste this and not go back for seconds—because once you’ve experienced that buttery, lemony bliss, ordinary desserts will feel like bland reheated leftovers. Let me walk you through every single step — by the end, you’ll wonder how you ever made it any other way.
What Makes This Version Stand Out
- Bright Zest: Six tablespoons of fresh lemon juice paired with a tablespoon of zest deliver a punchy citrus flavor that doesn’t get lost in the sweet base.
- Hearty Texture: Old‑fashioned oats give the bars a satisfying chew, creating a contrast to the silky condensed‑milk filling.
- Buttery Crumble: The combination of butter and brown sugar, creamed together, forms a caramelized crust that shatters like thin ice when you bite into it.
- One‑Pan Simplicity: No separate crust and topping—everything bakes together, cutting down on dishes and making cleanup a breeze.
- Make‑Ahead Magic: These bars keep their texture and flavor for up to three days in the fridge, perfect for busy mornings or impromptu snack attacks.
- Ingredient Integrity: We use real butter, not margarine, and real lemon zest, not artificial flavor, ensuring every bite is pure and honest.
- Crowd‑Pleaser Factor: The balance of sweet and tart wins over kids and adults alike; I’ve seen grown‑ups fight over the last piece.
- Budget Friendly: All ingredients are pantry staples, making this an affordable indulgence that doesn’t break the bank.
Inside the Ingredient List
The Flavor Base
Unsalted Butter (7 tablespoons): Butter is the foundation of any good crumble. Its fat content creates that melt‑in‑your‑mouth richness and helps the brown sugar caramelize. If you skip it or replace it with oil, you’ll lose the buttery crunch and the bars will feel greasy. For the best flavor, use European‑style butter with a higher butterfat percentage.
Brown Sugar (¾ cup): This isn’t just sweetener; it adds a deep, molasses‑like note that balances the lemon’s acidity. Light brown sugar works fine, but dark brown sugar will give you an even richer, almost toffee‑like flavor. If you’re out of brown sugar, you can blend white sugar with a teaspoon of molasses as a quick swap.
Vanilla Extract (1 tsp): A splash of vanilla adds a warm background that rounds out the sharp citrus. It’s subtle, but without it the lemon can feel a bit harsh. Use pure vanilla extract, not imitation, for that authentic depth.
The Texture Crew
All‑Purpose Flour (1 cup): Flour provides structure. It binds the butter, sugar, and oats together, ensuring the bars hold their shape after cooling. If you use cake flour, the bars will be too tender and may crumble apart; if you use whole‑wheat flour, they’ll be denser and have a nutty undertone.
Baking Powder (1 tsp): A modest lift is all we need—just enough to give the crumb a light, airy crumb without turning it into a cake. Too much, and you’ll end up with a puffed‑up, cake‑like texture that defeats the purpose of a bar.
Salt (¼ tsp): Salt is the flavor enhancer that brings out the sweetness of the sugar and the brightness of the lemon. It’s a tiny amount, but without it the bars would taste flat and one‑dim.
The Unexpected Star
Old‑Fashioned Oats (1 cup): These oats give the bars a hearty chew and a rustic feel. They also absorb some of the condensed milk, creating pockets of gooey goodness. If you only have quick oats, pulse them briefly in a food processor to achieve a similar texture.
Sweetened Condensed Milk (1 can, 14 oz): This is the secret weapon that makes the interior luxuriously creamy and caramel‑sweet. It also adds moisture, preventing the bars from drying out. For a dairy‑free version, try a coconut‑based sweetened condensed milk, but expect a subtle coconut flavor.
The Final Flourish
Lemon Juice (6 tablespoons): Freshly squeezed juice provides the sharp, clean acidity that cuts through the sweetness. Bottled juice can work in a pinch, but it lacks the bright, aromatic oils found in fresh juice.
Lemon Zest (1 tablespoon): The zest is the aromatic crown on this bar. It adds a fragrant, almost floral note that makes the lemon flavor sing. Be careful to zest only the yellow part; the white pith is bitter and will ruin the balance.
Everything's prepped? Good. Let's get into the real action...
The Method — Step by Step
Preheat your oven to 350°F (175°C) and line a 9‑inch square baking pan with parchment paper, leaving an overhang on the sides for easy removal. As the oven warms, the kitchen will start to fill with that faint, buttery aroma that hints at what’s to come. This first step sets the stage, so don’t rush it—allow the oven to fully reach temperature before the batter goes in.
In a medium saucepan, melt the 7 tablespoons of unsalted butter over medium heat. Once it’s fully melted, add the ¾ cup of brown sugar and stir continuously. You’ll hear a gentle sizzle; that’s the sugar beginning to dissolve and caramelize, creating a glossy, amber‑colored mixture. Keep stirring for about 2‑3 minutes until the mixture looks smooth and slightly thickened.
Kitchen Hack: Add a pinch of sea salt to the butter‑sugar blend at this stage; it will deepen the caramel flavor without making the bars salty.Remove the pan from heat and whisk in the vanilla extract, then the lemon zest. The zest should instantly release tiny oil droplets that swirl through the caramel, giving you a visual cue that the citrus is integrating. Let this mixture sit for a minute so the flavors meld.
In a large mixing bowl, combine the flour, baking powder, and ¼ tsp of salt. Whisk them together to ensure even distribution—this prevents any pockets of baking powder that could cause uneven rising.
Add the oats to the dry ingredients and give everything a quick toss. The oats will coat with the flour mixture, which helps them stay suspended in the batter rather than sinking to the bottom during baking.
Pour the warm butter‑sugar mixture over the dry ingredients, then add the sweetened condensed milk. Using a sturdy rubber spatula, fold everything together until you have a thick, slightly sticky dough. The dough should cling to the spatula but still be manageable—if it feels too dry, drizzle in a tablespoon of the lemon juice.
Now, the crucial part: create a well in the center of the dough and pour in the 6 tablespoons of fresh lemon juice. Fold the dough gently, allowing the juice to create pockets of tangy moisture throughout. You’ll notice the batter turning a pale, almost marbled yellow—this is the moment of truth where the lemon and caramel start to dance.
Watch Out: Over‑mixing at this stage can break down the oat texture, turning the bars gummy. Fold just until the juice is incorporated.Transfer the batter into the prepared pan, spreading it evenly with the spatula. The surface should be smooth but not overly compacted; a gentle press is enough. As you level the top, you’ll see the edges start to pull away slightly—this is a good sign that the crust will be crisp.
Kitchen Hack: Sprinkle a thin layer of coarse sea salt (just a pinch) on the very top before baking. It adds a subtle crunch and amplifies the lemon flavor.Slide the pan into the preheated oven and bake for 30‑35 minutes, or until the edges are golden brown and a toothpick inserted into the center comes out with just a few moist crumbs. You’ll hear a faint crackle as the top sets—that’s the caramelized crust announcing its readiness. Keep a close eye after the 30‑minute mark; over‑baking will dry out the lemon center.
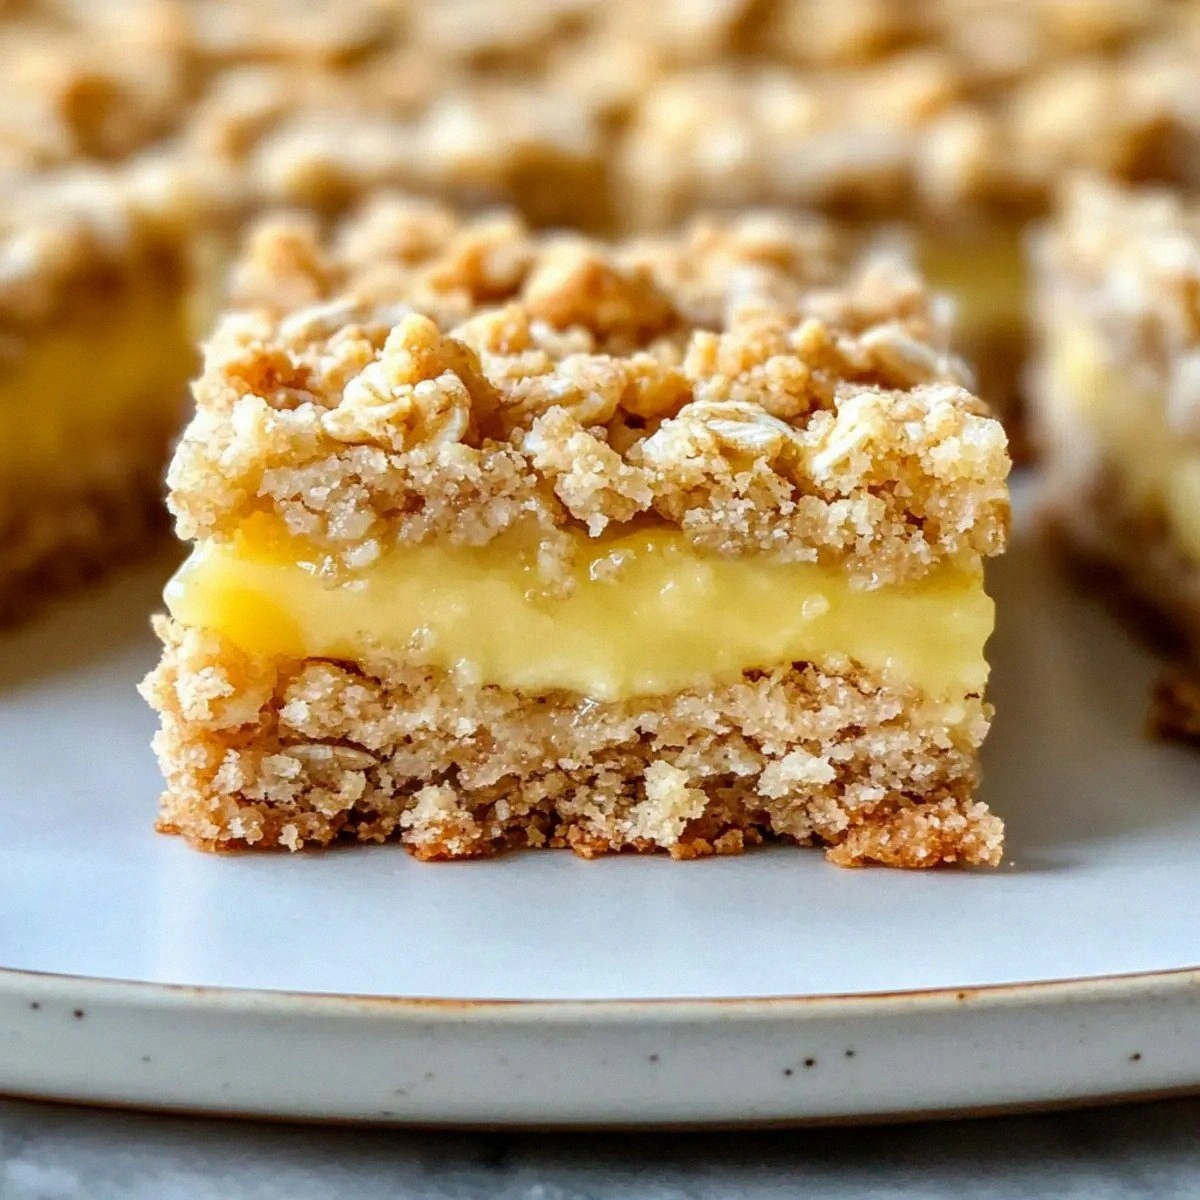
Allow the bars to cool completely in the pan on a wire rack. As they cool, the crumble will firm up, and the lemon‑infused pockets will set into a silky layer. Once cool, use the parchment overhang to lift the entire slab onto a cutting board, then cut into squares or rectangles. That first bite? Pure, bright bliss that makes you wonder why you ever settled for ordinary desserts.
That's it — you did it. But hold on, I've got a few more tricks that'll take this to another level...
Insider Tricks for Flawless Results
The Temperature Rule Nobody Follows
Never bake these bars straight from the fridge. Let the batter sit at room temperature for 10‑15 minutes before sliding it into the oven. This small pause ensures the butter is evenly distributed, which in turn gives you that uniform golden crust. I once tried to rush the process, and the edges turned pale while the center stayed soggy—lesson learned.
Why Your Nose Knows Best
Trust the aroma. When the butter‑sugar mixture starts to smell like toasted marshmallows, you’re in the sweet spot. If you smell a burnt undertone, lower the heat by a few degrees and pull the pan out early. Your nose is a more reliable timer than any kitchen gadget.
The 5‑Minute Rest That Changes Everything
After removing the bars from the oven, let them rest uncovered for five minutes before cutting. This short rest allows the caramel to set just enough so the bars don’t crumble apart when you slice. It also gives the lemon juice a chance to fully meld with the condensed milk, intensifying the flavor.
Slice Like a Pro
Use a hot, wet knife for clean cuts. Dip the blade in hot water, wipe it dry, and then slice. The heat prevents the crust from sticking, while the moisture ensures a smooth glide. If you skip this, you’ll end up with ragged edges that look less than appetizing.
Storage Savior
Place a piece of parchment between each bar when storing them in an airtight container. This prevents them from sticking together and preserves the crispness of the top crust. I’ve stored these for three days, and they still taste like they just came out of the oven.
Creative Twists and Variations
This recipe is a playground. Here are some of my favorite ways to switch things up:
Berry Burst
Fold in a half‑cup of fresh blueberries or raspberries right after adding the lemon juice. The berries add a pop of color and a subtle sweetness that complements the tart lemon. Perfect for a summer brunch.
Almond Crunch
Swap half of the oats for finely chopped toasted almonds. The nuts introduce a buttery crunch and a nutty aroma that pairs beautifully with the lemon. This variation is a hit with anyone who loves a bit of texture.
Coconut Cream
Replace the sweetened condensed milk with an equal amount of coconut‑infused sweetened condensed milk. The result is a tropical twist with a faint coconut perfume that makes the bars feel like a beach vacation.
Spiced Zest
Add a pinch of ground ginger or cardamom to the dry ingredients for a warm, spicy undertone. The spice doesn’t overpower the lemon; instead, it adds depth and makes the bars feel cozy during cooler months.
Chocolate Drizzle
Once the bars are cooled, drizzle melted dark chocolate over the top and let it set. The bitter chocolate balances the sweet caramel and bright lemon, creating a sophisticated flavor trio.
Storing and Bringing It Back to Life
Fridge Storage
Place the bars in an airtight container lined with parchment paper and store them in the refrigerator for up to three days. The cool environment keeps the crumb firm while preserving the lemon’s brightness. Before serving, let them sit at room temperature for 10 minutes to regain that soft interior.
Freezer Friendly
Wrap each bar individually in foil, then place them in a zip‑top freezer bag. They’ll keep for up to two months. When you’re ready to enjoy, thaw them in the fridge overnight, then warm them in a 300°F oven for 8‑10 minutes. The gentle heat revives the caramelized crust and re‑activates the lemon zing.
Best Reheating Method
For a quick revival, pop a single bar on a microwave‑safe plate, add a tiny splash (about a teaspoon) of water, and microwave on high for 15‑20 seconds. The added moisture creates a gentle steam that brings the interior back to its gooey perfection without making the crust soggy.