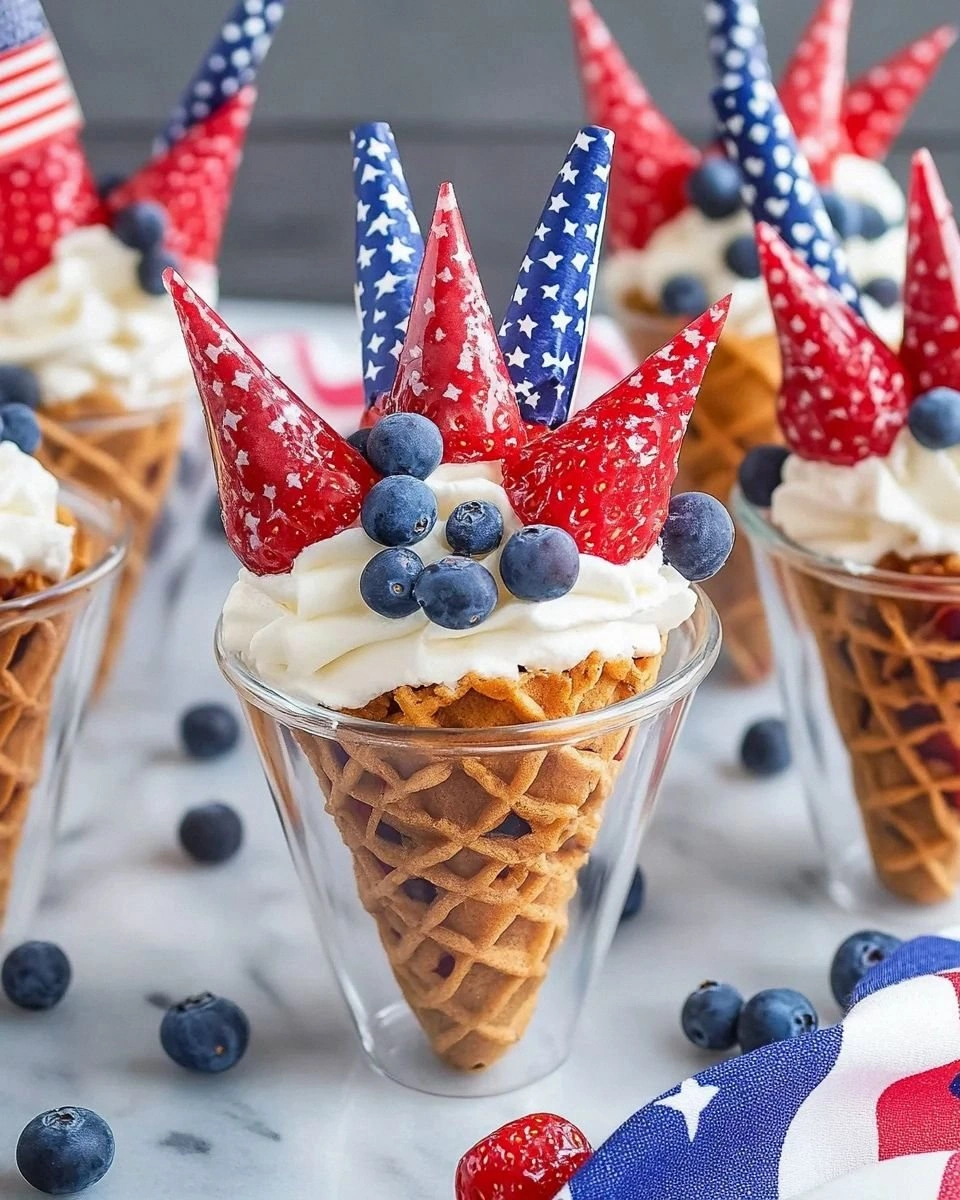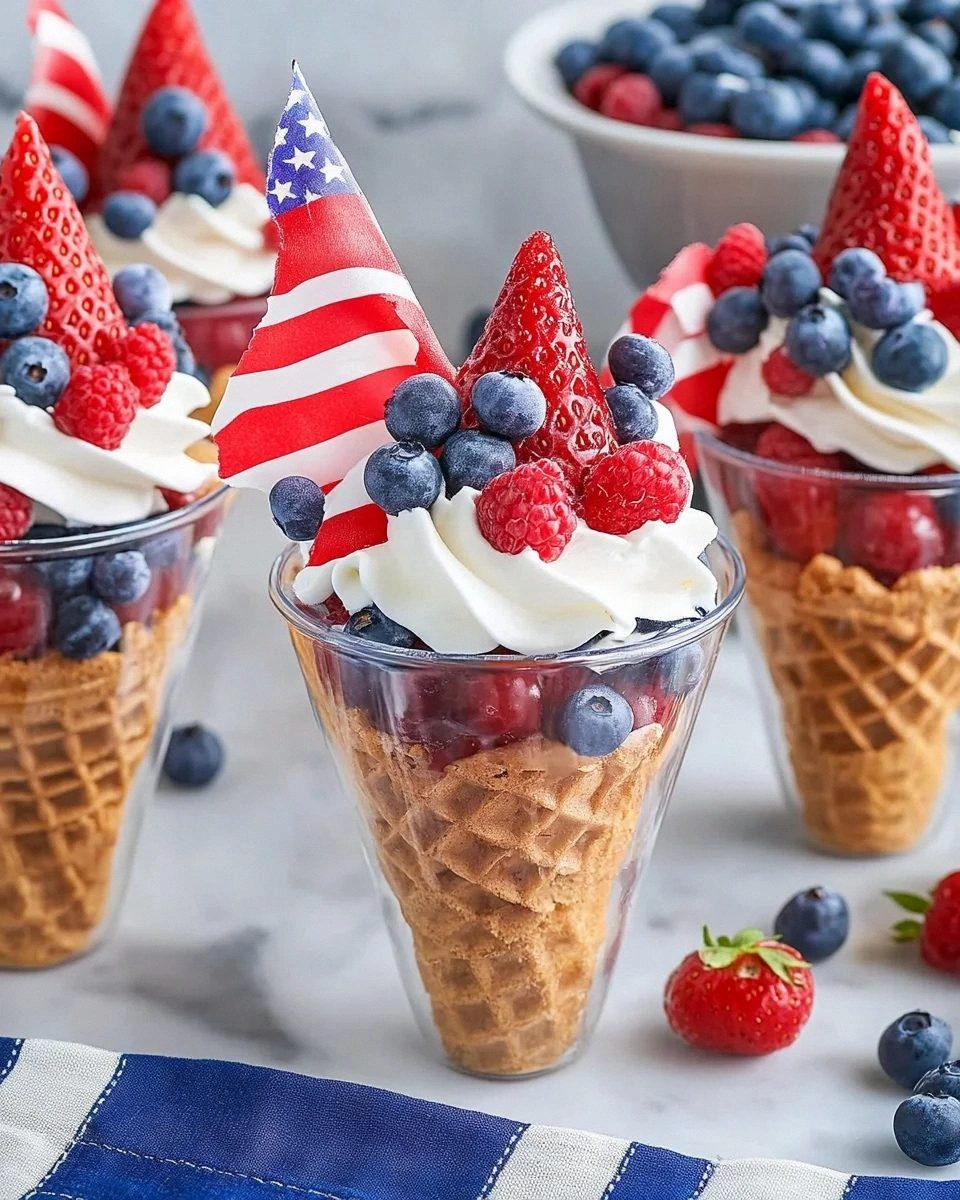
I still remember the Fourth of July three summers ago when my sister dared me to make something patriotic that didn't involve dyeing everything red, white, and blue with food coloring. "I dare you to taste this and not go back for seconds," she said, waving a sugar cone at me like it was a magic wand. Challenge accepted. What followed was a kitchen explosion of berries, whipped cream, and enough powdered sugar to make it look like a snowstorm hit my countertops. The result? These Patriotic Fruit Cones that had my entire family fighting over the last one like it was the last lifeboat on the Titanic.
Picture this: it's ninety-five degrees outside, the grill is working overtime, and everyone's hovering around the dessert table before the burgers are even ready. That's when you pull out these beauties — sugar cones piled high with clouds of vanilla-scented cream, ruby-red strawberries, sapphire-blueberries, and coconut flakes that look like tiny snowdrifts. The smell alone makes people forget about the potato salad. The way the cold cream meets the crisp cone while fireworks pop overhead? Pure summer magic. I've made these every single year since that fateful dare, and every year someone asks for the recipe before the sparklers even cool down.
Most recipes get this completely wrong. They turn these into sad, soggy messes that collapse before you can Instagram them. Here's what actually works: you need the cream to be stabilized enough to hold up in the heat, the fruit needs to be macerated just enough to release its juices without turning into soup, and the cones need a secret moisture barrier that nobody talks about. Stay with me here — this is worth it. I'll show you how to make these so they stay crisp for hours, even when your cousin's kids are grabbing them with sticky fingers.
Okay, ready for the game-changer? We're going to brush the inside of each cone with melted white chocolate. Not only does this create a waterproof barrier that keeps the cone from getting soggy, but it adds this incredible flavor layer that makes people close their eyes when they take the first bite. Trust me on this one. Let me walk you through every single step — by the end, you'll wonder how you ever made it any other way.
What Makes This Version Stand Out
Crunch Factor: These cones stay crisp for up to six hours thanks to our white chocolate barrier, which means you can prep them ahead of time without serving dessert mush to your guests. The chocolate hardens into a thin shell that locks out moisture while adding a subtle sweetness that complements the fruit perfectly.
Flavor Balance: We're not just throwing fruit in a cone here. Each berry gets macerated in honey and a touch of balsamic vinegar, which might sound weird until you taste how it intensifies the natural sweetness and adds depth that makes people ask, "What did you put in these?"
Heat-Proof Cream: Traditional whipped cream melts faster than ice cream in Phoenix. Our version uses a stabilized base with cream cheese that holds its shape even when your backyard feels like the surface of the sun. It pipes like a dream and tastes like vanilla clouds.
Visual Impact: These look like edible fireworks. The way the red strawberries, blue blueberries, and white coconut arrange themselves in spiraling patterns makes even the most Instagram-obsessed teenager pause to appreciate real beauty before posting.
Make-Ahead Magic: You can prep every component separately up to two days ahead, then assemble in under ten minutes when your guests arrive. This means you're not stuck in the kitchen while everyone else is enjoying the party.
Crowd Psychology: There's something about handheld desserts that makes people feel like kids again. Watch grown adults giggle while eating these, and notice how conversations flow more freely when everyone's holding ice cream cones, even if there's no ice cream inside.
No Food Coloring Needed: We achieve the patriotic colors using actual food — revolutionary concept, I know. The natural hues are more vibrant than anything synthetic, and you won't have hyperactive children running around like they've been mainlining Red Dye 40.
Inside the Ingredient List
The Foundation Squad
Sugar cones are your canvas here, and quality matters more than you'd think. Skip the generic store brand — they taste like cardboard and shatter at the first sign of moisture. Look for cones with visible specks of vanilla bean and a golden-brown color that promises caramelized flavor. The texture should feel sturdy but not rock-hard; you're looking for that sweet spot that'll hold up to filling without being impossible to bite through. Pro tip: buy one extra package because someone always drops a cone, and watching a patriotic fruit cone explode on the patio is sadder than a dropped ice cream cone.
Heavy cream is the backbone of our filling, and you want the highest fat content you can find. Generic brands often top out at 35%, but premium brands hit 40% or higher. That extra fat means more stability and a richer flavor that makes people pause mid-conversation to ask what you did differently. Cold cream whips faster and holds more air, so stash your bowl and beaters in the freezer for fifteen minutes before starting. This isn't just kitchen snobbery — it's science that translates to better texture.
The Flavor Enhancers
Strawberries should smell like summer and taste like sunshine. Look for berries that are uniformly red without white shoulders, with bright green tops that look fresh-picked. Size doesn't matter — flavor does. Those tiny wild strawberries pack more punch than their giant cousins, but they're harder to find. If you can only find the big ones, slice them thinner so every bite gets an even distribution of berry flavor. And please, for the love of all that's holy, don't refrigerate them until they're fully ripe. Cold kills flavor compounds faster than a blender kills soup.
Blueberries need to feel firm and plump, with a silvery bloom that looks like morning dew. That bloom is natural protection that keeps them fresh longer — wash it off right before using, not before. If you can find wild blueberries, grab them. They're smaller but pack an intense flavor that makes regular blueberries taste like water balloons. The color should be deep blue-black, not reddish — red berries are underripe and will taste like disappointment.
The Secret Weapons
Cream cheese is the unsung hero that keeps our whipped topping stable in summer heat. Don't you dare reach for the low-fat version — we need the full-fat brick that spreads like velvet and tastes like heaven. Room temperature is crucial here; cold cream cheese creates lumps that no amount of beating will smooth out. Let it sit on the counter for at least an hour before starting, or better yet, cube it and let it warm up faster. The slight tang balances the sweetness of the fruit and adds complexity that makes people wonder what your secret ingredient is.
White chocolate gets a bad rap from chocolate snobs, but here it serves a crucial purpose beyond flavor. When melted and brushed inside the cone, it creates an impermeable barrier that keeps everything crisp. Look for white chocolate that lists cocoa butter as the first ingredient, not palm oil or — heaven forbid — "white confection." The real stuff melts smoothly and sets with a satisfying snap. Cheap white chocolate seizes up and tastes like sugary wax, which is not the vibe we're going for.
The Final Flourish
Honey does double duty here, sweetening the fruit while helping it release its natural juices. Skip the clover honey from the plastic bear — look for wildflower or orange blossom honey that brings its own flavor party. The floral notes complement berries beautifully and add depth that plain sugar can't touch. Warm it slightly before mixing with the fruit; cold honey is thick and doesn't distribute evenly. A little goes a long way — we're enhancing the fruit, not drowning it.
Coconut flakes need to be unsweetened and toasted to golden perfection. Sweetened coconut turns into candy that overpowers everything else, while untoasted coconut tastes like cardboard. Spread it on a baking sheet and watch it like a hawk — it goes from perfect to burnt faster than you can say "fireworks." The toasting brings out natural oils that smell like tropical vacations and add a nutty complexity that makes the whole thing taste more sophisticated than it has any right to be.
The Method — Step by Step
- Start by prepping your fruit because this needs time to work its magic. Hull and slice your strawberries into thin pieces — not paper-thin, but thin enough that they'll fold into the cone without breaking it. Toss them in a bowl with blueberries, two tablespoons of honey, one teaspoon of balsamic vinegar, and a pinch of salt. The salt sounds weird, but it makes the fruit taste more like itself by suppressing bitter compounds. Let this sit for at least thirty minutes while you prep everything else. The fruit will start releasing its juices, creating a syrup that's basically liquid summer.
- While the fruit macerates, toast your coconut. Preheat your oven to 325°F and spread the coconut in a thin, even layer on a baking sheet. Slide it into the oven and set a timer for five minutes — do not walk away. Stir it around with a spatula, then set another three-minute timer. Keep doing this dance until it's golden and smells like a tropical paradise. It should take about eight to ten minutes total, but older ovens run hot and coconut is fickle. Once it's perfect, let it cool completely; it will crisp up as it cools.
- Now for the game-changing step: melt your white chocolate. Chop it into small, even pieces so it melts uniformly. Microwave it in thirty-second bursts, stirring between each burst. White chocolate burns easier than a vampire in sunlight, so err on the side of caution. When it's mostly melted with a few lumps, keep stirring — the residual heat will finish the job. If it seizes up, add a teaspoon of coconut oil and stir like your life depends on it.
- Brush the inside of each cone with the melted white chocolate, making sure to coat the bottom and about two inches up the sides. Use a pastry brush if you're fancy, or the back of a spoon if you're not. The chocolate should be thin enough to spread but thick enough to create a solid barrier. Don't go crazy here — you want a protective layer, not a chocolate fortress. Let them set while you make the cream.
- In a chilled bowl, beat the heavy cream until it starts to thicken but isn't holding peaks yet. In a separate bowl, beat the room-temperature cream cheese with powdered sugar and vanilla until it's smooth and fluffy. This is crucial — lumpy cream cheese means lumpy cream. Fold about a third of the cream into the cream cheese mixture to lighten it, then gently fold that mixture back into the remaining cream. The result is a stabilized whipped cream that can handle summer heat without turning into soup.
- Transfer the cream to a piping bag fitted with a large star tip. If you don't have piping bags, use a zip-top bag with the corner snipped off. The star tip creates those beautiful ridges that make people think you went to pastry school. Pipe a spiral of cream into each cone, starting at the bottom and working your way up. Don't overfill — you want room for the fruit to sit on top like a crown.
- Drain the fruit, reserving the syrup for later. The syrup is liquid gold — save it for cocktails or drizzle it over vanilla ice cream when no one's looking. Gently fold the toasted coconut into the fruit, being careful not to crush the berries. You want distinct pieces, not fruit salad mush. The coconut adds texture and that crucial white color for our patriotic theme.
- Spoon the fruit mixture on top of the cream in each cone, piling it up like a mountain. The contrast between the white cream and colorful fruit should be dramatic — we're going for visual impact here. If you're feeling extra, add a few fresh mint leaves for color contrast. Serve immediately or refrigerate for up to six hours. The cones will stay crisp, the cream will stay fluffy, and you'll look like a dessert wizard.
Insider Tricks for Flawless Results
The Temperature Rule Nobody Follows
Everything needs to be cold except the cream cheese. I mean everything — the bowl, the beaters, the cream, even the coconut if you have time. Cold cream incorporates more air, which means fluffier, more stable peaks that won't deflate faster than your motivation on a Monday morning. Stick your mixing bowl in the freezer for fifteen minutes before starting. This isn't just kitchen folklore; it's food science that separates amateur hour from professional results. Warm cream is a one-way ticket to soup city, and nobody wants to eat patriotic fruit soup cones.
Why Your Nose Knows Best
Your sense of smell is your most underutilized kitchen tool. When the coconut is perfectly toasted, your kitchen will smell like a tropical paradise. When the white chocolate is properly melted, it smells like vanilla and caramel had a beautiful baby. If the fruit smells like nothing, it will taste like nothing — no amount of honey can save bland berries. Trust your nose over the clock every single time. I've saved more disasters by sniffing than by timing.
The 5-Minute Rest That Changes Everything
After you pipe the cream into the cones, let them rest for five minutes before adding the fruit. This gives the cream time to set up slightly, creating a more stable base for your fruit mountain. It also lets any air bubbles work their way out, preventing embarrassing collapses when your guests bite into them. Use this time to drain your fruit properly — nobody wants a soggy cone bottom. Those five minutes feel like forever when you're excited, but they're the difference between Instagram-worthy and Instagram-pitiful.
The Assembly Line Secret
Don't try to make these one at a time like some kind of dessert serial killer. Set up an assembly line and work in batches. Pipe all your cones first, then top them all with fruit. This keeps everything consistent and prevents the cream from warming up while you're fumbling with individual cones. Plus, there's something deeply satisfying about seeing a whole tray of identical cones lined up like soldiers ready for dessert duty. My record is forty cones in fifteen minutes using this method.
Creative Twists and Variations
This recipe is a playground. Here are some of my favorite ways to switch things up:
The Tropical Patriot
Swap the strawberries for diced mango and the blueberries for blackberries. Add a teaspoon of lime zest to the cream and replace the coconut with toasted macadamia nuts. The colors still work — yellow mango, purple-black berries, white cream — but the flavor profile takes you straight to a beach somewhere. The lime zest adds brightness that makes the fruit taste like it's been kissed by sunshine. If you close your eyes while eating these, you can almost hear steel drums.
The Chocolate Deviation
Replace the white chocolate barrier with dark chocolate for a sophisticated twist that makes the whole thing taste like a berry truffle. Use chocolate wafer cookies instead of sugar cones for extra chocolate intensity. The bitterness of the dark chocolate makes the berries taste sweeter by comparison, creating this incredible flavor dance that chocolate lovers will lose their minds over. Add a pinch of sea salt to the chocolate before brushing for that sweet-salty thing that makes people make inappropriate noises while eating.
The Adult Version
Replace one tablespoon of honey with bourbon when macerating the fruit. The alcohol cooks off, leaving behind this incredible depth that makes people ask if you went to culinary school. Add a pinch of fresh thyme to the cream — it sounds weird until you taste how it makes the berries taste more like berries. These are perfect for backyard parties where the kids are occupied with sparklers and the adults need something special.
The Health Nut
Replace the heavy cream with coconut cream for a dairy-free version that tastes like a tropical vacation. Use maple syrup instead of honey, and replace the sugar cones with gluten-free waffle cones. The coconut cream whips up beautifully and adds this subtle tropical note that plays beautifully with the berries. Even dairy-lovers won't miss the traditional version — it's that good.
The Mini Version
Use mini cones and pipe the cream using a small round tip for adorable one-bite wonders perfect for parties where people want to try everything. They're like the dessert equivalent of those tiny liquor bottles — somehow more fun because they're small. You can fit about twenty on a standard baking sheet, and they're always the first thing to disappear. Something about miniature food makes people lose all sense of portion control.
The Winter Patriot
Use frozen berries instead of fresh — they're picked at peak ripeness and often taste better than fresh berries in winter. Let them thaw halfway so they're still icy but not rock-hard. The contrast between the frozen berries and the cream is incredible, like a sophisticated version of those frozen fruit bars. Add a sprinkle of crushed peppermint candy for color and that winter-fresh flavor that makes these perfect for holiday parties.
Storing and Bringing It Back to Life
Fridge Storage
Here's the beautiful thing — these actually get better after an hour in the fridge. The flavors meld together, the cream firms up, and everything becomes more cohesive. Store them upright in a covered container, and they'll stay perfect for up to six hours. After that, the cones start to soften, but they're still delicious. If you're making them more than two hours ahead, wait to add the coconut until just before serving so it stays crisp. The white chocolate barrier is your friend here — it keeps everything where it belongs.
Freezer Friendly
You can freeze these for up to a month, but you need to do it right. Freeze them uncovered for two hours first, then wrap each cone in plastic wrap and stash them in a freezer bag. Let them thaw for fifteen minutes before serving — they'll be like frozen custard cones, which is honestly incredible on hot days. The fruit gets this jewel-like quality when frozen, and the cream becomes this perfect frozen mousse texture. It's like having patriotic ice cream cones that you made yourself.
Best Reheating Method
There's really no reheating these — they're meant to be served cold or at room temperature. But if your cream has deflated or your fruit has gotten mushy, you can revive them. Re-whip any leftover cream and pipe it on top, then add fresh fruit. The cone might be softer, but the flavors will still be incredible. If you're serving these at an outdoor event, keep them in a cooler with ice packs until just before serving. Nothing ruins a party faster than melted dessert.