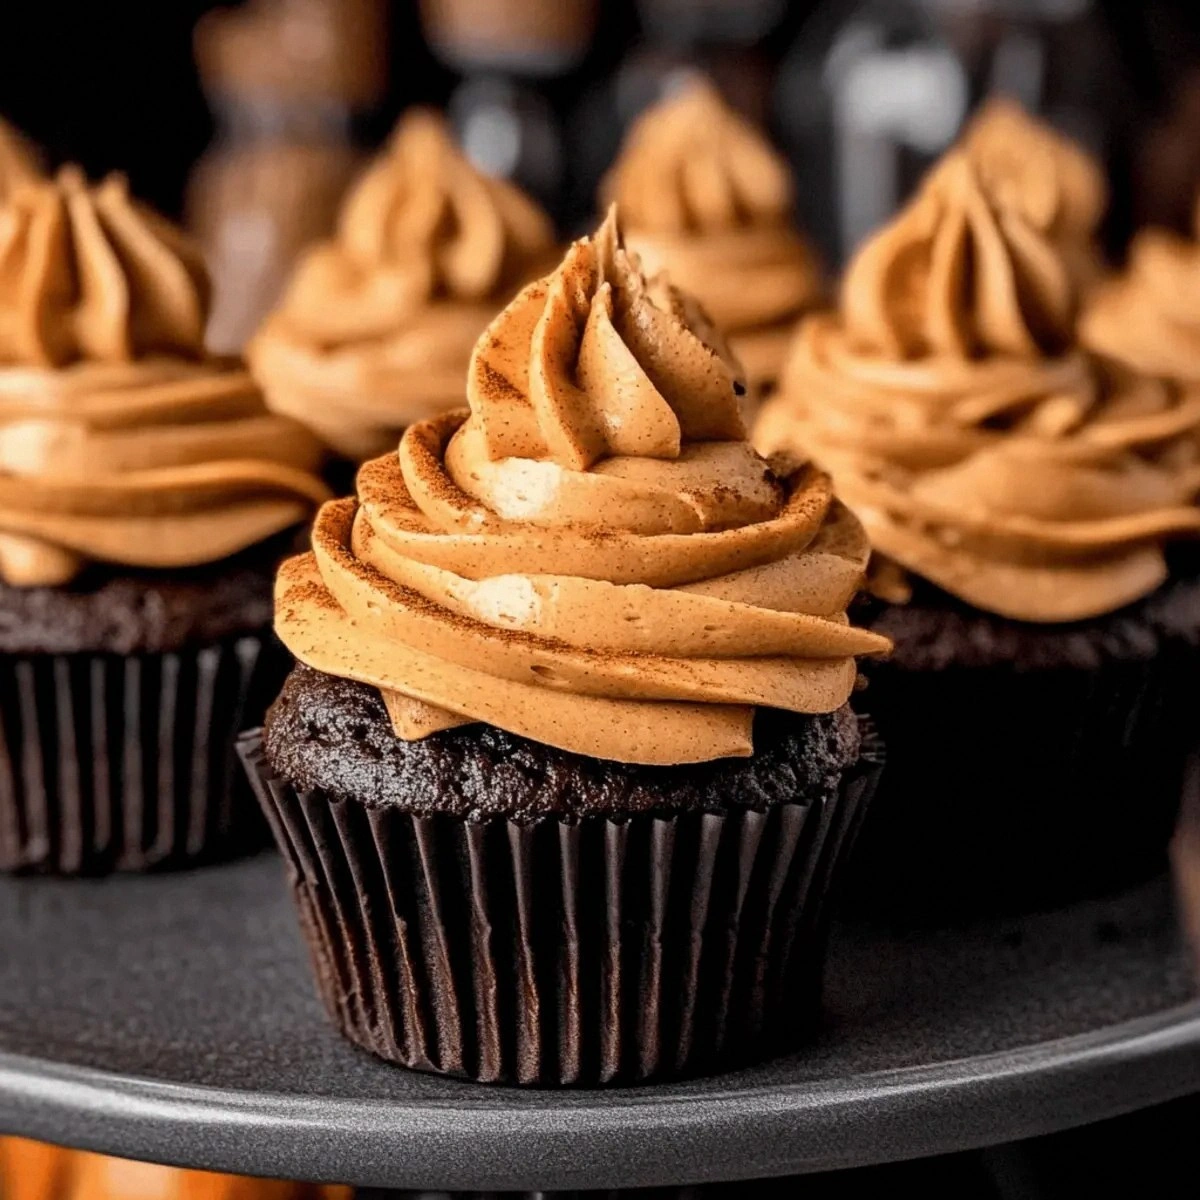
Picture this: it's a gray Sunday morning, the kind where the sky hangs low and moody, and you're still in your pajamas at 11 AM because the world outside feels like it can wait. You're craving something that tastes like fall but hits like dessert—something that makes your kitchen smell like a candle shop and your heart feel like a hug. I was in that exact spot last October, staring at a half-used can of pumpkin puree and a bar of dark chocolate I'd been "saving for something special," when it hit me: what if I married those two flavors into a cupcake so good it could make a grown adult cry into their coffee? I scribbled notes on the back of a grocery receipt, preheated the oven with the kind of reckless optimism usually reserved for first dates, and proceeded to bake the batch that would ruin all other fall desserts for me forever.
Here's the twist: most chocolate-pumpkin hybrids taste like someone couldn't decide between a muffin and a brownie, so they just... didn't. They end up dense, or worse, vaguely damp, like a basement carpet. Mine? We're talking a crumb so tender it practically sighs when you bite it, a chocolate hit that punches through the earthy pumpkin like a plot twist, and a cream cheese swirl that melts into a lava pool of tangy-sweet heaven. The first tester—my neighbor who claims she "doesn't like pumpkin spice anything"—ate three in a row, then quietly asked if I sold them by the dozen. I knew I had something dangerous on my hands.
I'll be honest—I ate half the batch before anyone else got to try it. Not out of greed (okay, maybe a little), but because I kept "testing" to see if they were as good as I remembered from five minutes ago. They were. They are. And if you've ever struggled with dry cupcakes, or ones that dome like Mount Everest then cave in like a bad soufflé, you're not alone—and I've got the fix. We're using a reverse-creaming method borrowed from bakery pros, plus a sour-cream-pumpkin one-two punch that keeps things moist for days. Picture yourself pulling these out of the oven, the whole kitchen smelling like a Williams-Sonoma store exploded in the best possible way, and tell me you aren't already reaching for your whisk.
Let me walk you through every single step—by the end, you'll wonder how you ever made it any other way.
What Makes This Version Stand Out
- Flavor Depth: Black cocoa powder gives a Oreo-like bitterness that makes the pumpkin taste more vibrant, not muddled. It's like turning the color saturation up on fall itself.
- Texture Paradise: The batter uses oil for moisture and butter for flavor, plus sour cream for a bounce that springs back when you poke it. No brick-like muffins here—just plush, delicate crumbs.
- One-Bowl Swirl: The cream-cheese filling gets blitzed in the same processor—no extra bowls to wash, and it marbles like a tattoo artist's dream. li class="mb-2">Make-Ahead Hero: These taste even better the second day, when the spices throw a party with the chocolate. Bake on Sunday, dazzle co-workers on Monday, look like a wizard.
- Crowd Gasps: I dare you to taste this and not go back for seconds. I've seen grown men whisper "what did you put in these?" like I slipped in some banned substance.
- Ingredient Integrity: No fake pumpkin spice syrups, no weird emulsifiers—just real pumpkin, real spices, real chocolate. You can pronounce everything, and your body will thank you.
Alright, let's break down exactly what goes into this masterpiece...
Inside the Ingredient List
The Flavor Base
Unsalted butter gets melted and browned for nutty depth, then cooled so it won't scramble the egg. Granulated sugar sweetens, but also helps create that delicate crust on top—like the thin sugar shell on a crème brûlée, only softer. The egg binds everything; use one that's room temp so it emulsifies smoothly instead of turning into scrambled flecks. Vanilla extract is the background singer you only notice when it's gone—go for the real stuff, not the imitation bottle that's been lurking since 2012.
The Texture Crew
Whole milk keeps the crumb plush, but the real star is sour cream—its lactic acid tenderizes the gluten so your cupcake feels like a pillow rather than a seat cushion. Canned pumpkin puree (not pie filling!) brings moisture and that autumnal orange hue; squeeze out excess water with a paper towel so you don't end up with pumpkin soup batter. Black cocoa powder is the moody teenager of the cocoa world—less sweet, more dramatic, and it makes the chocolate taste like midnight.
The Unexpected Star
Pumpkin pie spice gets a bad rap, but here it's balanced by the bitterness of cocoa so it reads sophisticated, not potpourri. A teaspoon is enough—any more and you're drinking a candle. Baking powder and baking soda work the graveyard shift, creating lift and browning; skip one and your cupcakes will either taste metallic or refuse to rise like Monday morning motivation.
The Final Flourish
Salt is the volume knob; just a quarter teaspoon wakes up every other flavor. Cream cheese for the swirl should be brick-style, not whipped, so it bakes into a distinct layer rather than melting into oblivion. Powdered sugar sweetens the swirl without grit—sift it if yours has been sitting open in a humid pantry and now resembles cement.
Everything's prepped? Good. Let's get into the real action...
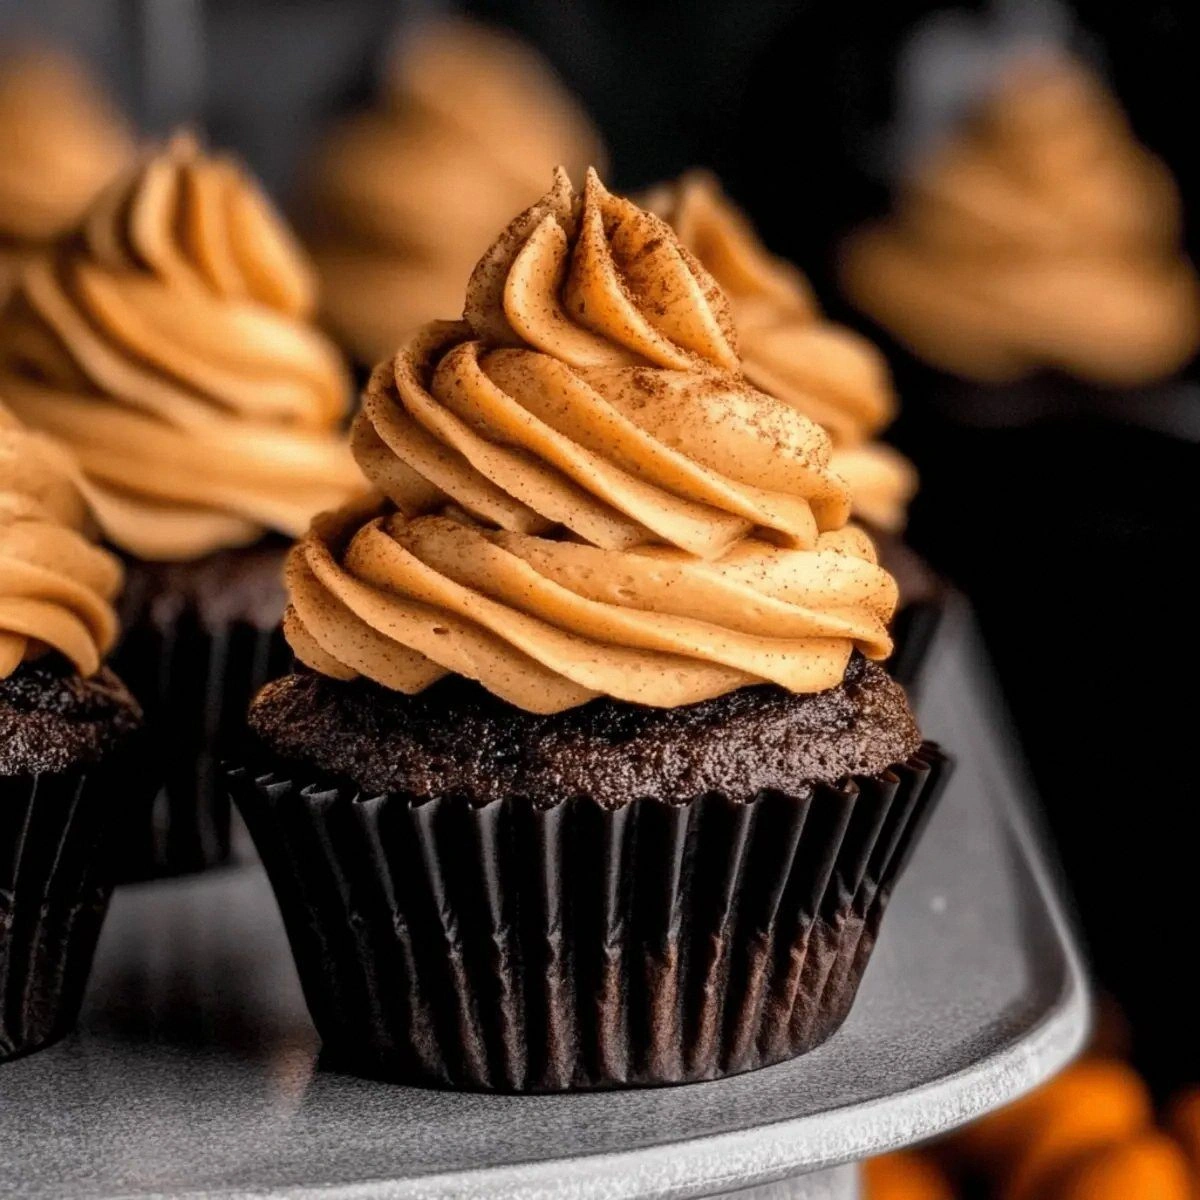
The Method — Step by Step
- Preheat your oven to 350°F (175°C) and line a 12-cup muffin tin with paper liners—foil ones keep the edges from over-browning if you're feeling fancy. In a medium saucepan, melt the butter over medium heat until it foams, smells nutty, and the milk solids turn chestnut brown. This takes about 5 minutes; don't walk away because those solids go from toasted to charcoal faster than you can say "smoke alarm." Pour the browned butter into a heat-proof bowl and let it cool for 10 minutes so it won't scramble the egg later.
- In a large bowl, whisk together the sugar, egg, and vanilla until the mixture looks like pale yellow ribbons—about 1 minute of vigorous whisking or 30 seconds with a hand mixer. Stream in the cooled browned butter while whisking; it should combine into a glossy emulsion that coats the back of a spoon like liquid gold. Add the milk and sour cream and whisk until smooth; tiny flecks of sour cream are fine, but break up any large globs so your batter stays even.
- Fold in the pumpkin puree with a silicone spatula, scraping the sides and bottom of the bowl to make sure every streak disappears. The batter will look like autumnal sunrise—deep orange with flecks of vanilla bean if you're using the good stuff. Take a moment to inhale; it already smells like Thanksgiving morning.
- In a separate bowl, sift together the flour, black cocoa, pumpkin pie spice, baking powder, baking soda, and salt. Sifting isn't just for show here—black cocoa loves to clump like damp sand, and nobody wants a bitter pocket ruining their cupcake buzz. Whisk the dry ingredients for 15 seconds so the leavening agents distribute evenly; think of it as a quick dry mix party.
- Add the dry ingredients to the wet in two additions, folding gently after each. The first addition will look like chocolate mottling through pumpkin, but resist the urge to over-mix; stop as soon as you see no dry streaks. Over-mixing activates gluten and you'll end up with hockey pucks that could double as paperweights. The batter should drop off your spatula in thick ribbons that slowly melt back into the bowl.
- For the swirl, beat the cream cheese and powdered sugar together until smooth and fluffy—about 1 minute on medium speed. You want it pipe-able but not runny; if it's too stiff, add a teaspoon of milk, but err on the side of thick so it holds shape during baking. Transfer the mixture to a zip-top bag and snip a ½-inch corner off; this makes piping precise and cleanup a dream.
- Divide the batter among the muffin cups, filling each about ⅔ full—an ice-cream scoop makes this fast and tidy. Pipe a small spiral of cream-cheese mixture on top of each, then drag a toothpick through once in a figure-eight motion to marble. Don't over-swirl or you'll just mix everything into beige oblivion.
- Bake for 20-24 minutes, rotating the pan halfway through for even browning. They're done when the edges pull away slightly from the papers, the tops spring back when lightly pressed, and a toothpick inserted into the chocolate part comes out with a few moist crumbs—not wet batter. That sizzle when they hit the cooling rack? Absolute perfection.
- Cool in the pan for 5 minutes—any longer and steam will sog the bottoms—then transfer to a wire rack. The cream-cheese swirl will set as it cools, turning from glossy to matte. If you can resist, wait 30 minutes before peeling off the paper; the flavors meld and the crumb relaxes into bakery-level tenderness.
That's it—you did it. But hold on, I've got a few more tricks that'll take this to another level...
Insider Tricks for Flawless Results
The Temperature Rule Nobody Follows
Room-temperature ingredients aren't a suggestion; they're the difference between a silky emulsion and a curdled mess. Set your egg, milk, and sour cream on the counter 30 minutes before baking. Cold egg + warm butter = scrambled flecks that never quite mix in. If you're impatient, submerge the egg in warm (not hot) water for 5 minutes and microwave the milk for 10 seconds—just enough to take the chill off.
Why Your Nose Knows Best
Most recipes get this completely wrong: they rely on timers alone. Your nose is the original kitchen timer. When the cocoa's volatile oils hit their stride, you'll smell a deep, almost boozy chocolate drifting from the oven. That's the cue to start checking for doneness. If your house smells like a chocolate factory, you're 90% there.
The 5-Minute Rest That Changes Everything
After cooling on the rack, tuck the cupcakes into an airtight container while still slightly warm. The residual steam creates a micro-climate that makes the tops glossy and the crumb ultra-moist. A friend tried skipping this step once—let's just say it didn't end well. Her cupcakes dried out by morning and she had to rebrand them as "day-old artisanal biscuits."
Creative Twists and Variations
This recipe is a playground. Here are some of my favorite ways to switch things up:
Espresso Swirl
Dissolve 1 teaspoon instant espresso in a tablespoon of hot water, then beat it into the cream-cheese mixture. The coffee amplifies the chocolate's bitterness and makes the whole thing taste like a mocha in cupcake form. Top with a shard of chocolate-covered espresso bean for drama.
Maple Glaze Drizzle
Skip the cream-cheese swirl and instead whisk ½ cup powdered sugar with 2 tablespoons maple syrup and a splash of milk. Drizzle over cooled cupcakes so it sets into a paper-thin shell that cracks when you bite. It's like autumn leaf confetti on top.
Spiced Pecan Crunch
Toss ½ cup chopped pecans with a tablespoon of brown sugar and a pinch of cayenne. Sprinkle on top before baking for a sweet-heat crunch that contrasts the soft crumb. People will ask if you went to pastry school.
Vegan Flip
Swap the butter for coconut oil, the egg for ¼ cup silken tofu blended smooth, and the dairy for oat milk and coconut yogurt. The cream-cheese swirl becomes a tangy cashew cream blended with lemon juice and maple. Even non-vegans inhale these.
Mini Bundt Brilliance
Pipe the batter into greased mini-bundt pans and bake 18 minutes. Invert while warm so the cream-cheese swirl becomes a hidden tunnel. Dust with snowy powdered sugar so the ridges look like tiny mountain ranges.
Storing and Bringing It Back to Life
Fridge Storage
Because of the cream-cheese swirl, these need to live in the fridge after day one. Place them in an airtight container with a sheet of parchment between layers so the tops don't stick. They'll keep for up to 5 days, though honestly they've never lasted past Tuesday in my house.
Freezer Friendly
Freeze unfrosted cupcakes on a tray until solid, then transfer to a zip-top bag with as much air removed as possible. They'll stay perfect for 2 months. Thaw overnight in the fridge, then add the cream-cheese swirl fresh—frozen swirl can get grainy.
Best Reheating Method
Room temp is best for flavor, but if you like the just-baked vibe, warm refrigerated cupcakes in a 300°F oven for 5 minutes. Add a tiny splash of water to the container before reheating—it steams back to perfection without drying the edges.